What frequency and Channel is the Lora Chip using for the 915MHz Range (USA)? I would like to see if I can add my existing Lora Nodes attached to a PC or should I just use an IDE?
Hey @R_M,
thank you for your message.
With stock firmware, Chatters are working on a frequency of 868MHz and with a bandwidth of 500khz.
Let me know if you have any further questions!
-Monika from CM
Is there any way to change the firmware to change the frequency. 868 is a commercially licensed band in Australia. We should not be transmitting on it.
Hey @Matt_Perkins,
thank you for reaching out.
You can change the frequency on your own.
You do that by downloading the firmware and manually adjusting the code and the frequency.
Here is Chatter’s firmware, and here is the code line on which you’ll change the frequency.
Let me know if you have any further questions,
Monika
can it be programmed to use lora India frequency i.e. 865 ?
It should be possible, because the Lora chip DL-LLCC68-S has frequency range from 800 MHz to 960 MHz.
Hey @pushpesh,
Yes, you can change the frequency on your own.
You do that by downloading the firmware and manually adjusting the code and the frequency.
Here is Chatter’s firmware, and here is the code line on which you’ll change the frequency.
Let me know if you have any further questions,
Monika
Can we get a little more instruction? I can connect and python is installed but all I see is how to add more code or modules and don’t know how to pull the firmware to edit the code.
Hey @Goocherrific,
this is not something you can do in CirucuitBlocks. If you want to change the frequency of your Chatters, you must compile stock firmware with Arduino.
I recently purchased the Chatter 2.0 (green version) but I live in Japan. I want to change the frequency to Japan Lora standards (920-923 MHz). How can I do this? The code line you reference seems to be for Chatter 1.0 maybe? Which files and line do I need to change for the Chatter 2.0. To confirm my Lora chip is the EU version I think which is the VollGo VGdd79S868N0S1. Also since the unit didn’t include a coiled antenna like the pictures depict I plan to make an antenna on my own (specific to the frequency, the length I believe should be 8.1 cm). Any help with this would be useful.
Hello @Brossy ,
Thanks for reaching out!
The Chatter 2.0 uses the same codebase as the original version, so you can change the LoRa frequency directly in the firmware.
You’ll find the frequency setting in this file: src/Services/LoRaService.cpp, line 64
int state = radio.begin(868, 500, 9, 5, RADIOLIB_SX126X_SYNC_WORD_PRIVATE, 22, 8, 0, false);
The first parameter (868) defines the frequency. You can change this number to your desired frequency within the 920–923 MHz range.
Hope this helps, and feel free to reach out if you have any other questions!
Best regards,
Filip
I tried fixing it as you mentioned, but will this new uploaded firmware work for my specific chip? It seems this version of the Lora chip isn’t the ESP version (maybe for North America) but rather the vollgo chip VGdd79S868N0S1. After changing the liens as mentioned, I was getting compile errors requiring to change things such as " Remove std:: from both instances of std::round ". After making the changes the firmware would upload correctly, but the unit wouldn’t turn on. Serial Monitor in Arduino would give the error message: E(895) SPIFFS: mount failed, -10025 SPIFFS failed Non-volatile storage retrieval error: %d
Any advice to resolve would be helpful.
Hello @Brossy ,
The Vollgo module used in your Chatter 2.0 is based on the LLCC68 chip, a successor of the SX126X family. These chips work essentially the same way, using identical LoRa-related registers managed over the SPI interface. All new Chatter 2.0 units come with this module — there aren’t different regional versions.
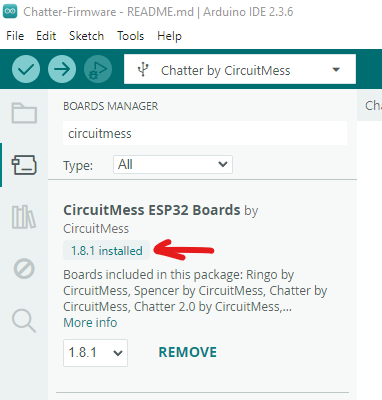
Please make sure you have the latest CircuitMess ESP32 board package (version 1.8.1) installed in Arduino.

If not, update it and try recompiling the firmware.
If you continue to get NVS or SPIFFS errors when the device boots, we recommend using esptool, a utility for flashing ESP32 devices. It can help if part of the flash memory got corrupted. Run this command before re-uploading your code:
esptool erase_flash
A quick note about board naming in Arduino:
- Chatter → used for all green boards (the newest Chatter 2.0 and the original Chatter).
- Chatter 2.0 → was used for the older, limited North American red edition (also called Chatter Red 2022).
So your green Chatter 2.0 would actually be called Chatter as the board in Arduino.
We’ll try to make this naming clearer in future updates.
If you still run into any issues, please let us know, we’ll be glad to help.