When I came across the MAKERbuino project I had the idea that it could make a fun platform for exploring the Arduino. As a basic but self-contained unit with a display, power supply, SD card storage and a number of input buttons, I saw it as a portable experimenting unit for the Uno. It was also an interesting soldering project.
The DIY aspect of the MAKERbuino is also an invitation to be creative with the hardware side. I wanted to create a “micro” workbench/lab for Arduino coding/hardware projects, and have made a few simple non-destructive modifications to the basic unit.

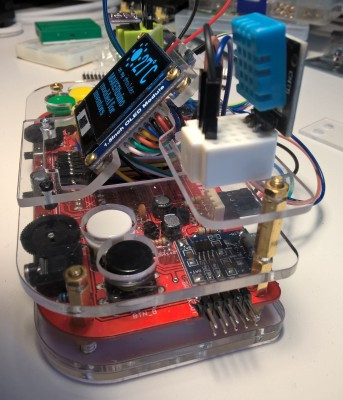
My MAKERbuino micro inventor’s lab
What I did:
-
I desoldered the display and in its place soldered angled header pins to the top of the circuit board. This allows me to swap out displays for different experiments - wired using jumper cables with Dupont connectors. Pictured here is 1.5 inch OLED display with 128x128 pixels.
-
I made small fixing brackets to mount the display screens on the top plate. I heat-bent the acrylic to angle the display to a convenient viewing position for desk-top experiments.
-
I replaced the spacers connecting the top plate and circuit board with slightly longer ones. This gave me some room to park cables under the display. The buttons are now slightly recessed, and do not stick anymore when pushed down.
-
Using longer spacers, I mounted a small acrylic shelf at the back of the unit, with two micro 5-row breadboards attached. Cables to the I2C ports at the back of the unit are threaded through holes into the lower part of the MAKERbuino.
I’m happy to now have a tiny experimental “lab” where everything is self-contained and portable! No more spaghetti sprawl on the workbench! The USB serial adapter is still hanging out of the back, but when it’s not in use I tuck it in under the display cables.
Maybe these few ideas can inspire other Makers to explore the potential of the MAKERbuino. Go ahead - and have some fun in the process!
