Hi there!
Every modern videogame supports feedback via rumble effect - and so can your MAKERbuino!
My friend @Rebeqt came up with the idea, so props to him!
I searched for the part and did the coding-stuff.
We ordered the necessary part and it’s as easy as it sounds 
We ordered this little thing to be exact: Mini Flat Vibrating Vibration Motor DC Motor for Arduino - Blue
It needs 3,7V and 90mAh max to start and after it has started, the motor can be operated with 3V - 5,3V and 60mAh max. But we wouldn’t recommend to operate it above 5V (if you are planning to use the motor for another purpose).
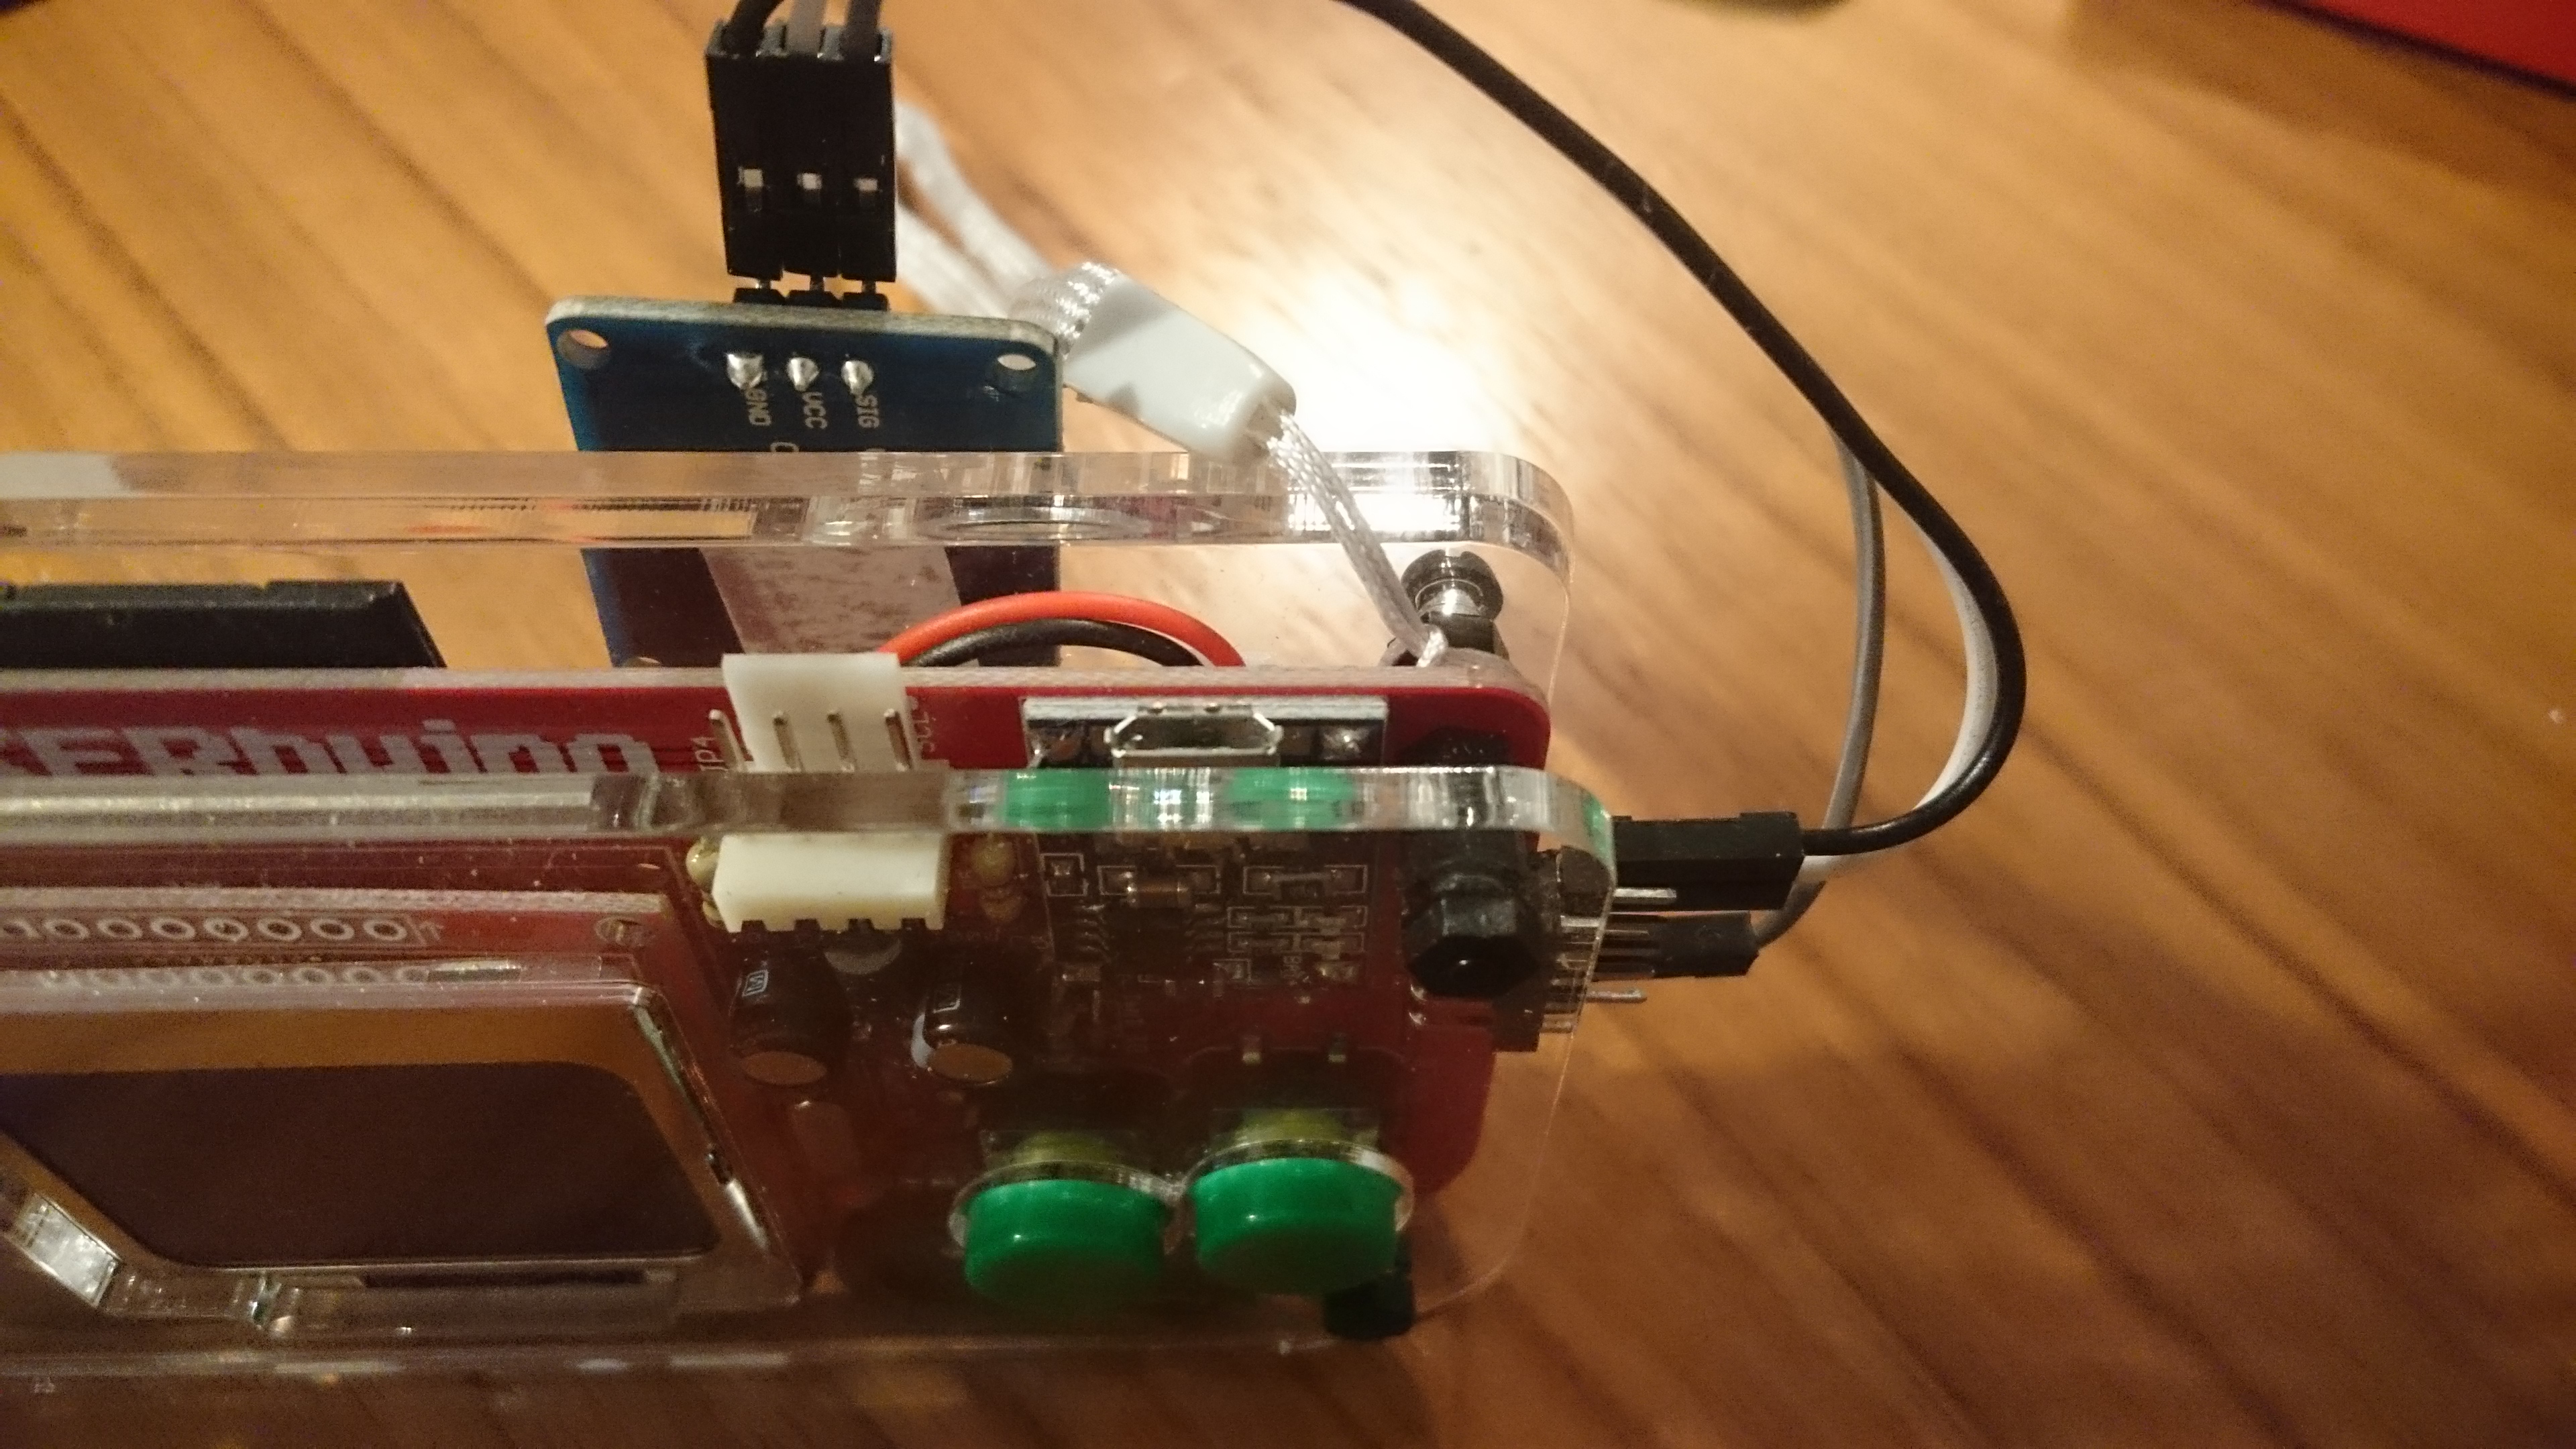
The vibration motor breakout board has three pins: VCC, GND and SIG. VCC and GND should be pretty obvious. The SIG pin is used to control the motor. The motor spins as long as the SIG pin has a HIGH signal applied to it.
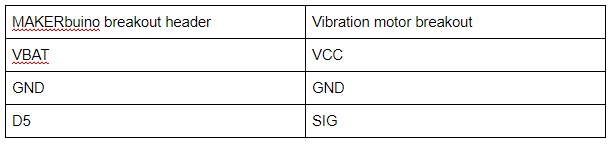
To get the vibration motor up and running we’ll need to use VBAT to power the motor. This way we won’t put too much load onto the voltage regulator (and because we need 3,7V to start that thing up). We’re using the breakout header to connect the motor to the MAKERbuino. The connection diagram looks like this:
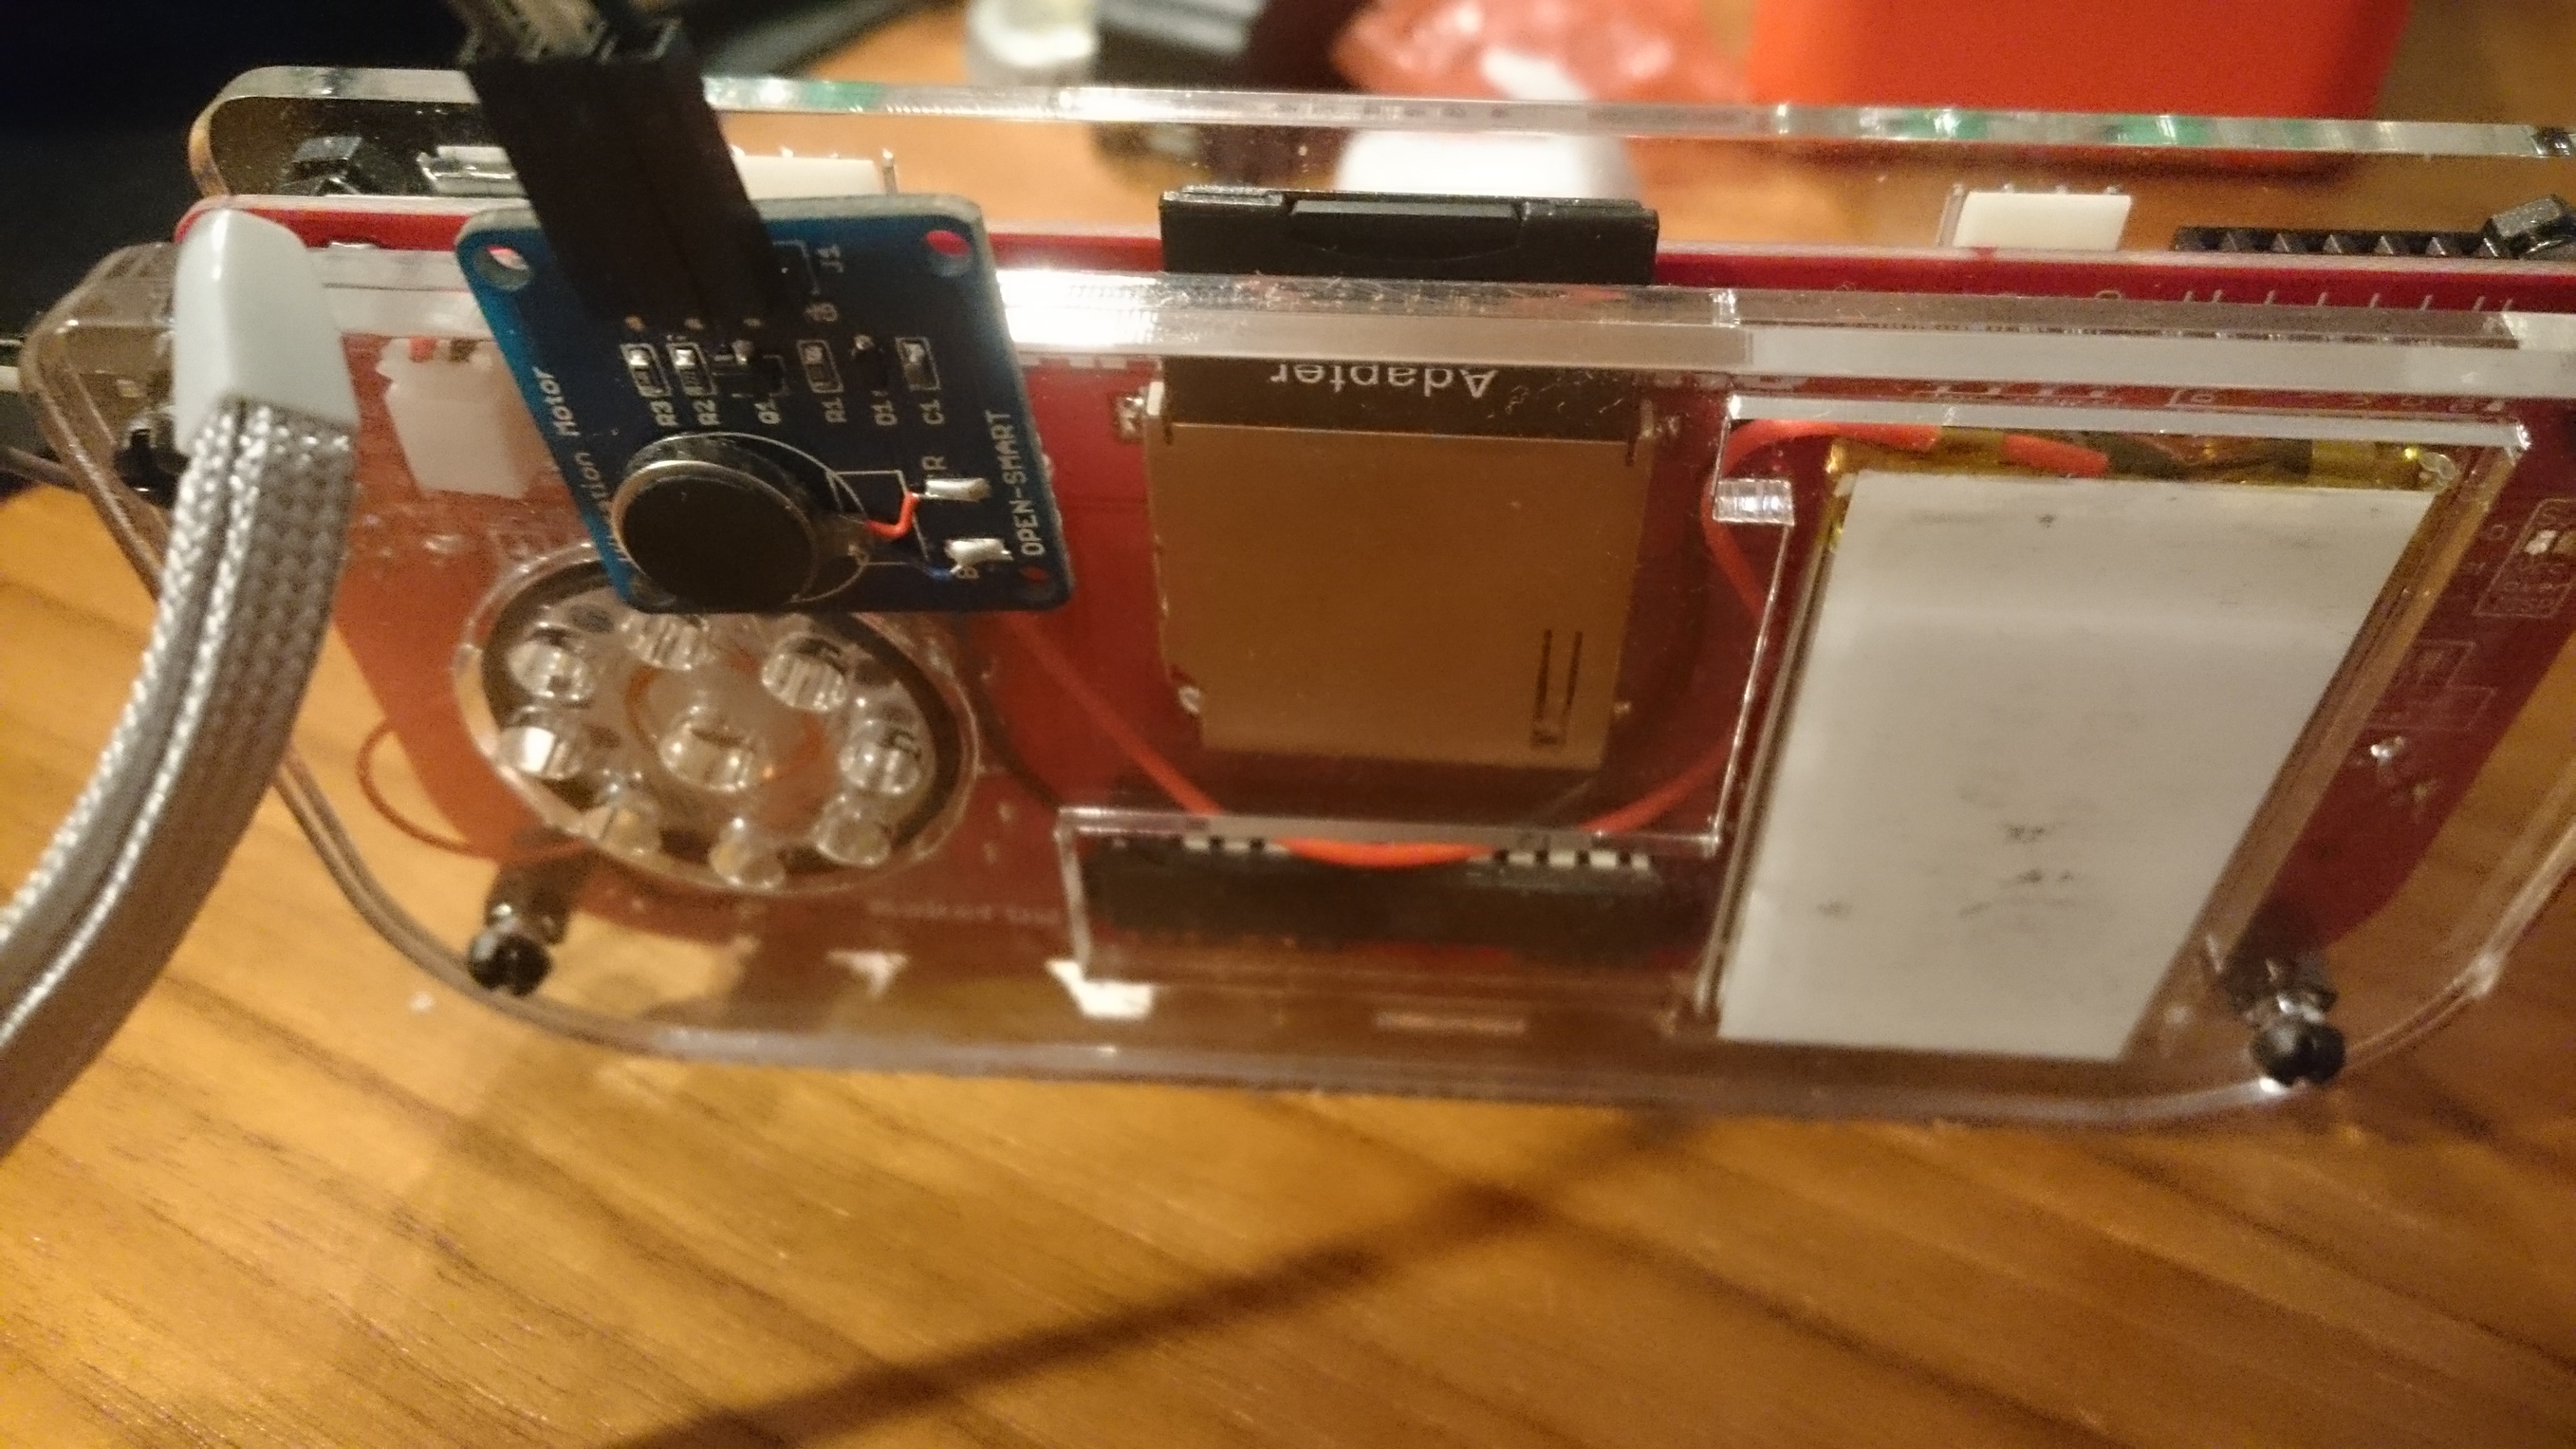
It looks like this if you’ve just connected it:

Unfortunately the motor will spin up right after powering up the MAKERbuino. It seems like pin D5 is preset to HIGH. So we’re cutting the cable connecting D5 to the SIG pin and solder a switch in between in the near future. But for now we’ll leave the SIG pin unconnected until we’ve loaded the software to test the motor. The code is, of course, pretty easy to understand as well.
#include <SPI.h>
#include <Gamebuino.h>

Gamebuino gb;
#define vibrationPin 5

void setup() {
  pinMode(vibrationPin, OUTPUT);
  digitalWrite(vibrationPin, LOW);
  gb.begin();
  gb.battery.show = false;
  gb.titleScreen(F("RumbleBuino"));
}

void loop() {
  if(gb.update())
  {
    if(gb.buttons.pressed(BTN_C))
    {
      gb.titleScreen(F("RumbleBuino"));
    }
    if(gb.buttons.repeat(BTN_A, 1))
    {
      digitalWrite(vibrationPin, HIGH);
    }
    else digitalWrite(vibrationPin, LOW);
  }
}
Even if we’re calling digitalWrite(vibrationPin, LOW) before calling gb.begin() the vibration won’t stop until we’ve started the testing tool by pressing the A-button. We can therefore assume that it has no effect since pin 5 will be set high either by the gb.start() or the gb.titleScreen() function (or both).
As long as we’re holding down the A-button the vibration motor will do its job. This is a pretty good start but not very convenient for ingame usage.
So I’ve rewritten the code to offer some different testing methods. I’m using the directional buttons to set a different vibration time. From 1 to 20 (counting clockwise from the Up-button).
#include <SPI.h>
#include <Gamebuino.h>

Gamebuino gb;
#define vibrationPin 5
int vibrationDuration = 0;   //measured in frames (20 frames per second)

void setup() {
  pinMode(vibrationPin, OUTPUT);
  gb.begin();
  gb.battery.show = false;
  gb.titleScreen(F("Vibration Test"));
}

void loop() {
  if(gb.update())
  {
    if(gb.buttons.pressed(BTN_C))
    {
      gb.titleScreen(F("Vibration Test"));
    }
    if(gb.buttons.pressed(BTN_UP))vibrationDuration = 1;
    if(gb.buttons.pressed(BTN_RIGHT))vibrationDuration = 5;
    if(gb.buttons.pressed(BTN_DOWN))vibrationDuration = 10;
    if(gb.buttons.pressed(BTN_LEFT))vibrationDuration = 20;
    if(vibrationDuration > 0)
    {
      digitalWrite(vibrationPin, HIGH);
      vibrationDuration--;
    }
    else digitalWrite(vibrationPin, LOW);
  }
}
This approach makes it very easy to use the vibration feedback within games. We’ve mounted the vibration motor onto the backside of the MAKERbuino using some double sided tape, but we’re working on a way to integrate it seamless into the MAKERbuino