I can’t figure out how to insert the microcontroller. I’ve tried bending the pins at every angle. It doesn’t go in. Looking with a magnifying glass, I’m not even sure where the point of insertion is. It looks like a valley of metal. There’s a tiny hole at the inner most side. There’s gaps slightly above and below each spot. Where does the pin go? The picture and instructions are simply not enough to understand this.
Hey there,
Thank you for supporting MAKERbuino and I am sorry for the problems that you’re experiencing.
First, you need to bend the pins to be perpendicular compared to the microcontroller’s body.
After that, you need to insert the microcontroller with both your thumbs into the socket.
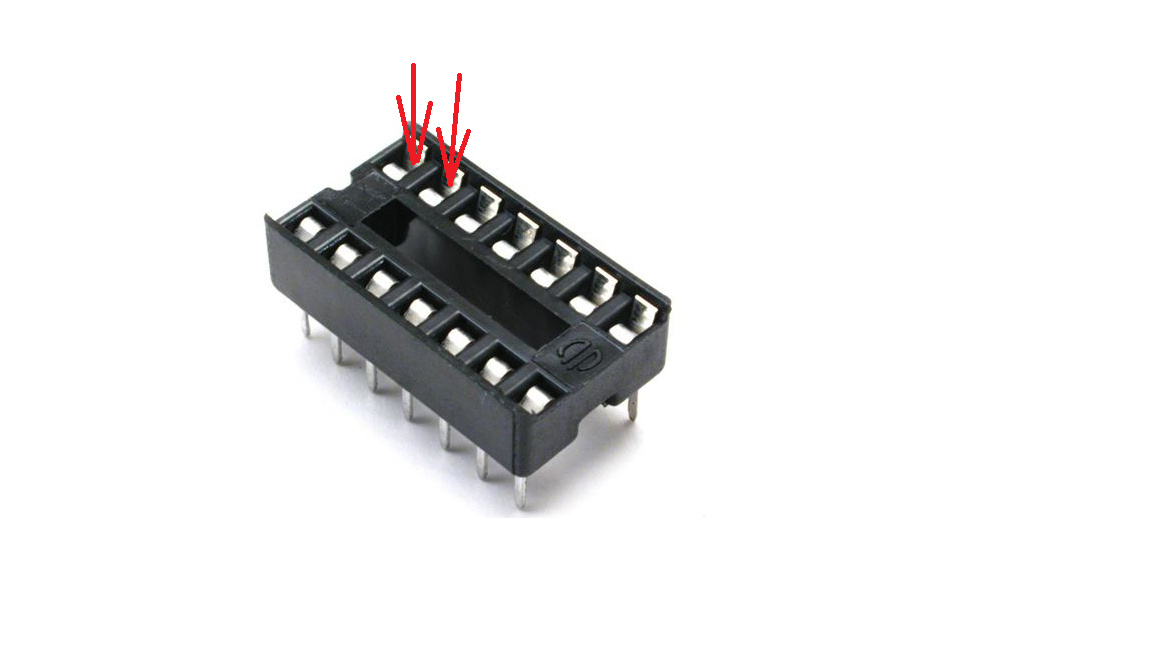
The point of insertion is at the bottom of the valley of metal (please check the photo below).
By the way, I understand that putting the microcontroller into its socket is one of the most challenging parts of the build. That’s why we’ve presoldered the microcontroller by a machine on our new product (MKAERphone) and we plan to apply that same technique to MAKERbuino as well.
If you experience more trouble with this, please give us some photos and we’ll help you out.
Thanks!
Oh no… I really like the removable microcontroller – it saved me once when I had to check if another Arduino board was working…
Well perhaps the reduction in the number of support requests would be worth it.
Yeah, I understand that and it’s also easier to repair the thing if the microcontroller dies.
Although, people that never did this before tend to break microcontrollers’ pins so this is more of a bug than a feature.