Can`t download program on Makerbuino (Inventors kit project)

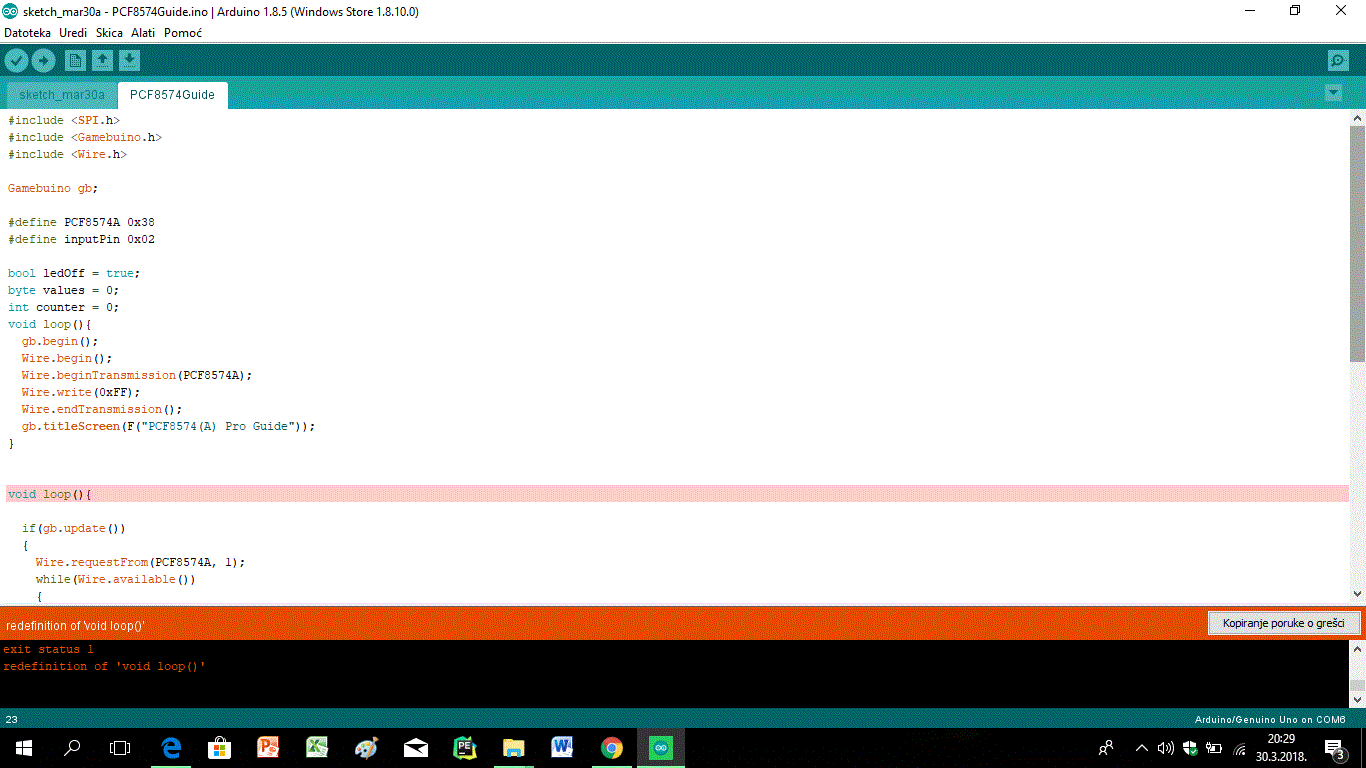
I have used Inventors kit in order to make project with LED lamps. I wish that lamps are working when I press the button on Makerbuino. So, I connected Makerbuino with laptop and I copied program from Makerbuino web site and tried to put it on Makerbuino (btw, experimental pad with all elements is already set.) but there is an error:
exit status 1
redefinition of “void loop ()”

Please, help.

Seems you have two void functions declared. You should have a void setup() and a void loop() function.
Was the first loop function supposed to be setup()?

2 Likes

@Jan_Belak, thank you for supporting MAKERbuino and welcome to the forum.

@Craig_Page is correct, the code has two void loops and won’t compile since there can only be one.

Where did you get this code from?
Can you please copy and paste the code into a comment here?

Thanks!

1 Like

Thank you for your comment. Can you, please, correct this code:

#include <SPI.h>
#include <Gamebuino.h>
#include <Wire.h>

Gamebuino gb;

#define PCF8574A 0x38
#define inputPin 0x02

bool ledOff = true;
byte values = 0;
int counter = 0;
void loop(){
gb.begin();
Wire.begin();
Wire.beginTransmission(PCF8574A);
Wire.write(0xFF);
Wire.endTransmission();
gb.titleScreen(F(“PCF8574(A) Pro Guide”));
}

void loop(){

if(gb.update())
{
Wire.requestFrom(PCF8574A, 1);
while(Wire.available())
{
values = Wire.read();
}
if((values & inputPin)==0)counter++;
else counter = 0;

if(counter == 5)
{
  ledOff = !ledOff;
  counter = 0;
}
Wire.beginTransmission(PCF8574A);
Wire.write((inputPin | ledOff));
Wire.endTransmission();

gb.display.cursorX = 0;
gb.display.cursorY = 0;
if(ledOff)gb.display.println(F("LED Off"));
else gb.display.println(F("LED On"));

values = 0;

if(gb.buttons.pressed(BTN_C))                      
{                                                 
  gb.titleScreen(F("PCF8574(A) Pro Guide"));
}

}
}

Change the first declaration of void loop() to void setup() like so:

void setup(){
gb.begin();
Wire.begin();
Wire.beginTransmission(PCF8574A);
Wire.write(0xFF);
Wire.endTransmission();
gb.titleScreen(F(“PCF8574(A) Pro Guide”));
}
1 Like

I did this and there was another problem. It can help.

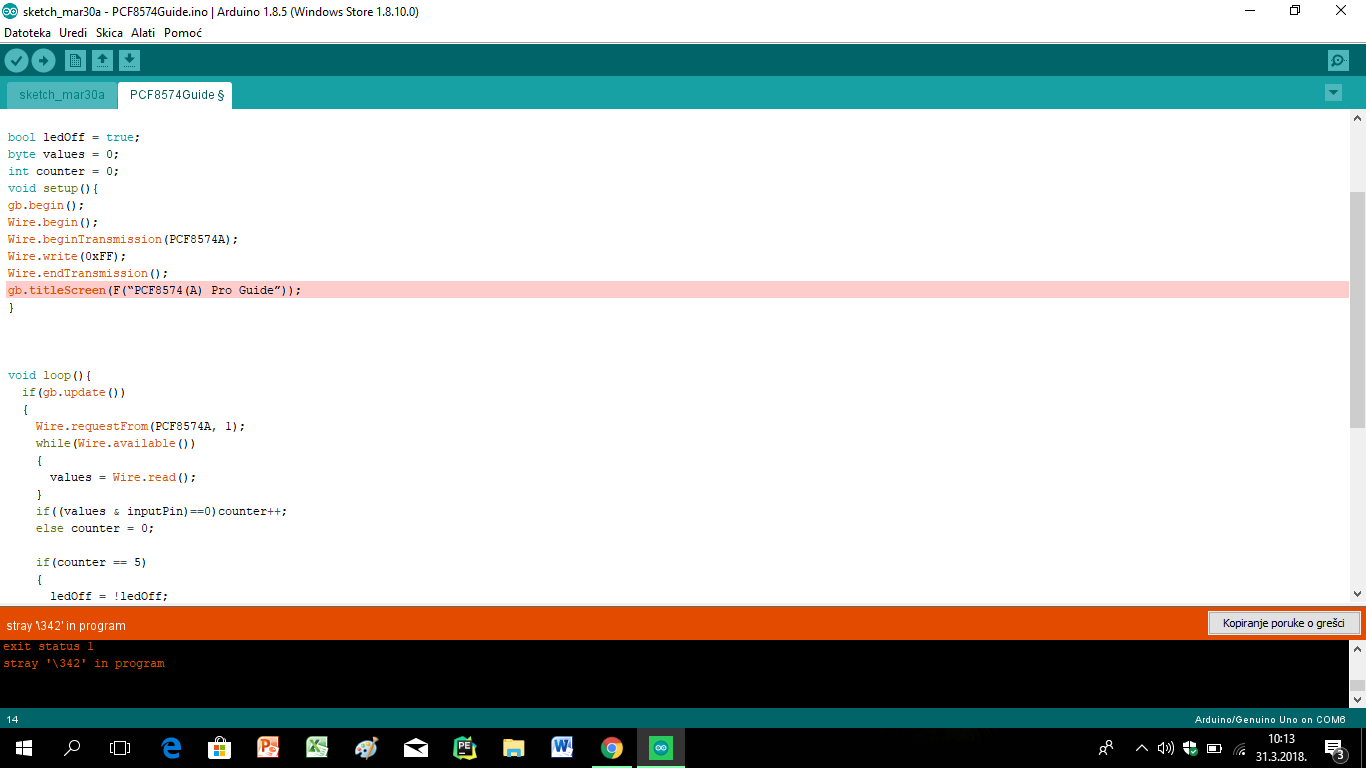
If you’ve directly copied from the website, it will paste unicode text instead of ascii text. The compiler won’t work with unicode quotation marks (")
Try erasing the quotation marks and retype them in without using copy/paste.

The problem are these in bold:
gb.titleScreen(F( “ PCF8574(A) Pro Guide ” ));

Just retype the quotes and it should work.

1 Like

Now that I have re-enrolled the quotes again, it is repeated the past mistake.
Thank you for so much effort.

I’m not sure what’s going wrong here. Apparently you have another void setup() somewhere?

Try using this:
https://github.com/MAKERbuino/PCF8574guide
Select view code. Download the ino file and try compiling that.

If that doesn’t work then perhaps arduino needs updating? I’m at a loss from this point.

2 Likes

@Jan_Belak, I agree with @Craig_Page, download the file from the repository and open it with Arduino.

If you’ve never used GitHub before, you just press the green “Clone or download” button and select “Download ZIP”.

2 Likes

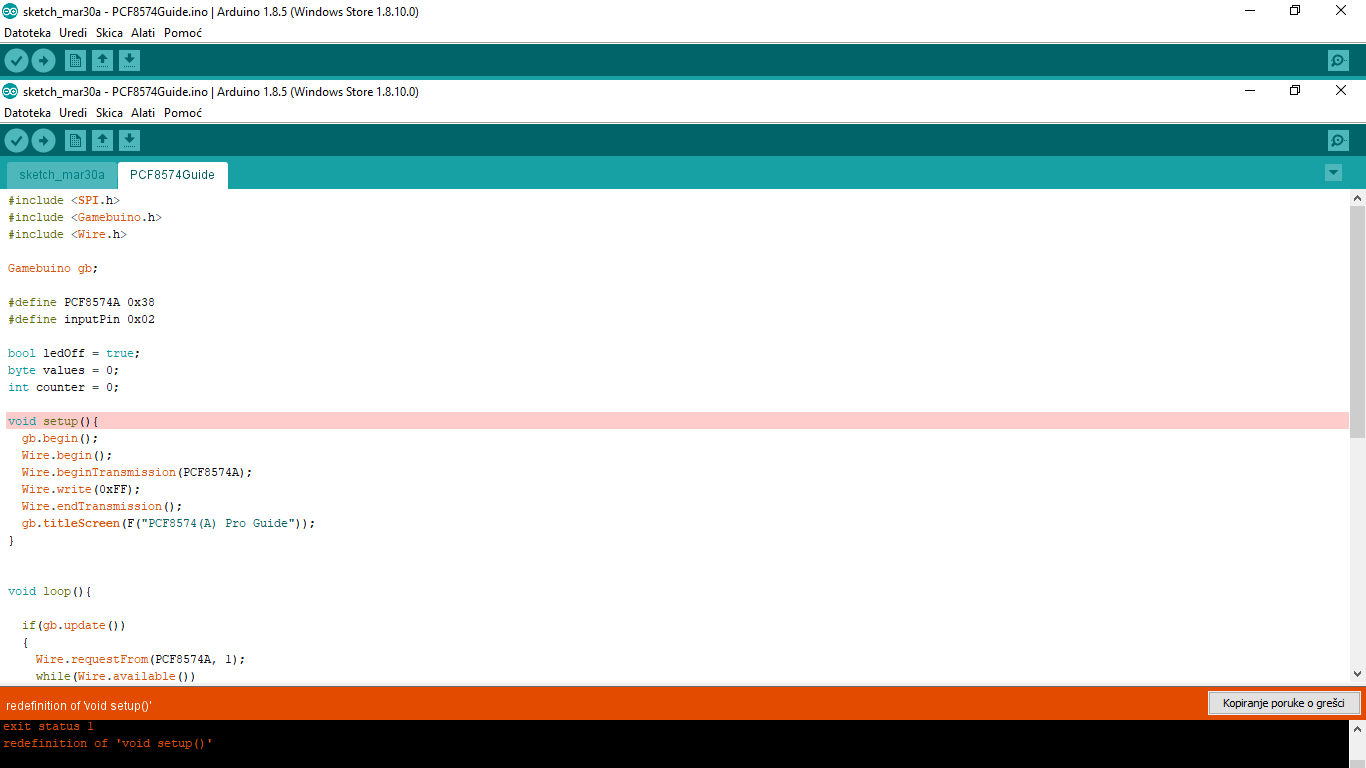
OK, I did all this (I put this code in arduous and tried again to switch to MAKERbuino but the same mistake happened). @albertgajsak @Craig_Page told me if this code will not work for you to update my MAKERbuino, so how do I do this?

It’s nothing to do with the MAKERbuino, it’s the compiler (Arduino) that may not be doing what it’s supposed to do.
I’m at a loss now, but I’m gonna have a go at replicating what you’re doing here and see if I can get the same result.

EDIT:
I’ve compiled it using Arduino and no errors were reported. There may be something going wrong within Arduino, check if you’ve got the correct libraries downloaded using the getting started guide:


Make sure you go to Sketch -> Include Library -> Manage Libraries. Then make sure you’ve got the correct Gamebuino library INSTALLED as shown below. Don’t use Classic or META:

1 Like

Hi, HAPPY EASTER! As you live in the picture I tried to install what you told me but I do not have that only CLASSIC I META. How to get to that right.

In which case, have classic installed if you’re using the MAKERbuino. META if you’re using the gamebuino META device. Remove META if you don’t have a gamebuino META.
I’m just thinking that it could be conflicting with each other. Unless someone can correct me if I’m wrong… I’m just guessing from this point.

I do not know what’s happening again. @albertgajsak can you help me somehow?

@Jan_Belak,
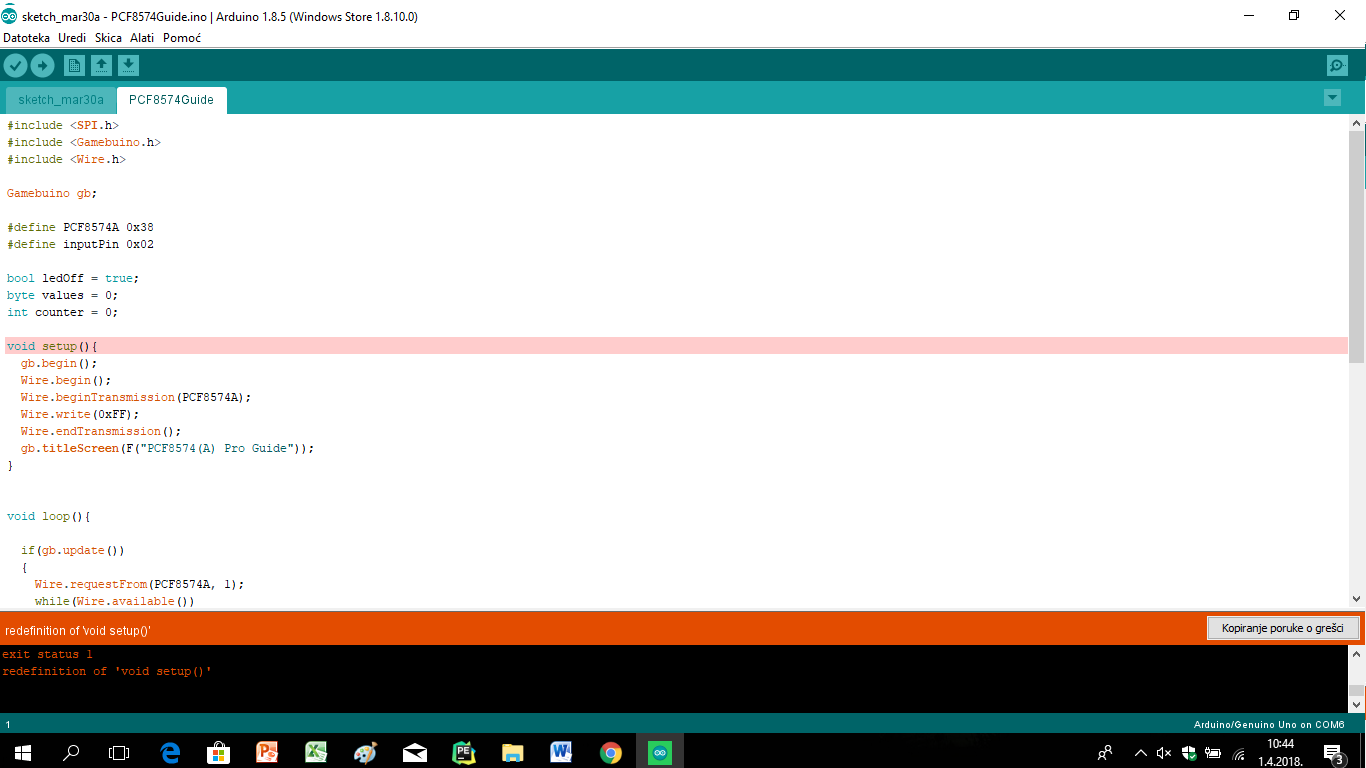
I believe that you have two tabs opened in your Arduino project and that is preventing the code from compiling correctly.

Please, create a completely new Arduino project, delete everything from the newly created project and copy and paste the code in the Arduino window.
You mustn’t have two tabs opened!

Cheers!

Uh, now it’s all good except here:

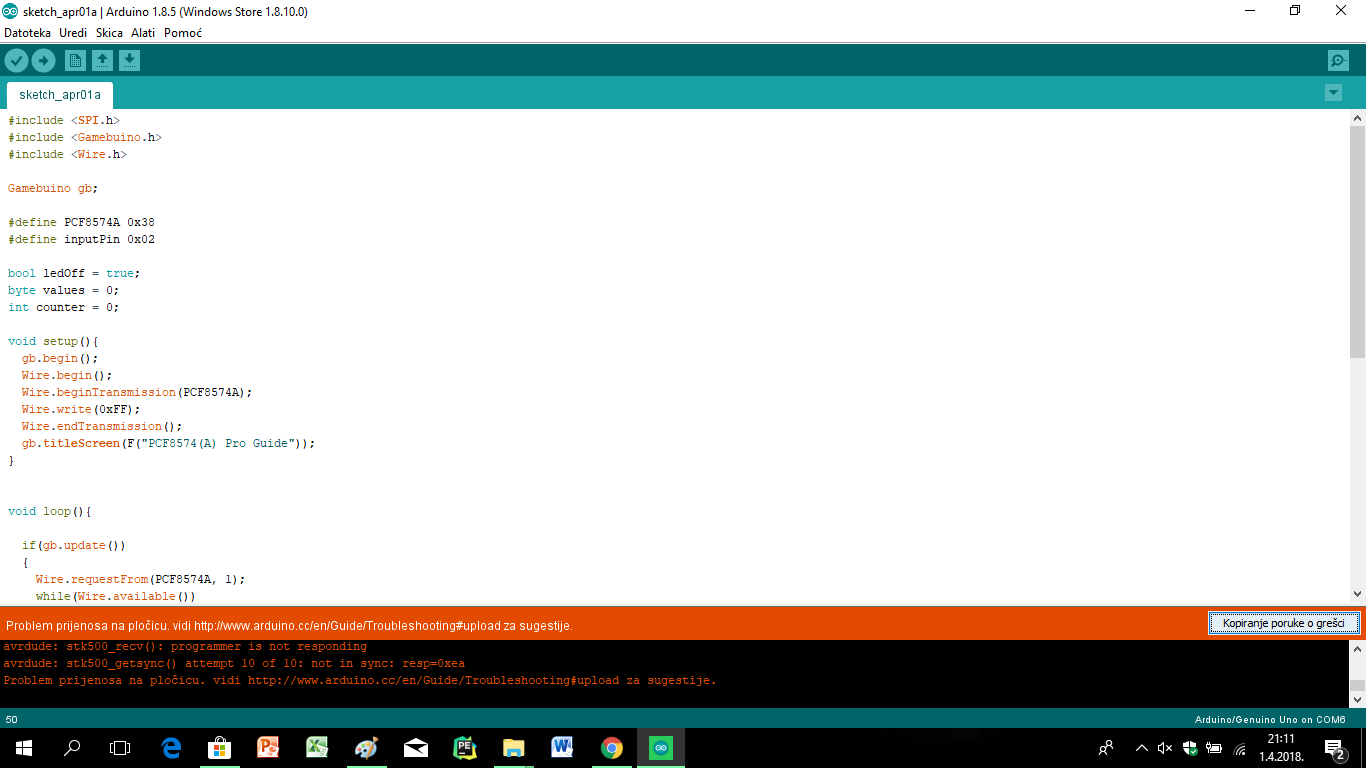
Ok make sure your MAKERbuino is plugged in to your computer correctly. Check that your cables are plugged in the correct pins on both the programmer and the MAKERbuino. Check with the online guides to check if they’re in the correct order.


Also check if you’ve got the correct drivers installed for the programmer.

1 Like

Hi, I tried to put the wires in line with the photo you sent me, but when I joined all the strings they wanted to be hot, here’s the picture:

@Jan_Belak, you have bad soldering joints and solder bridges on the connector and you need to remove those before trying to upload a program to your MAKERbuino.