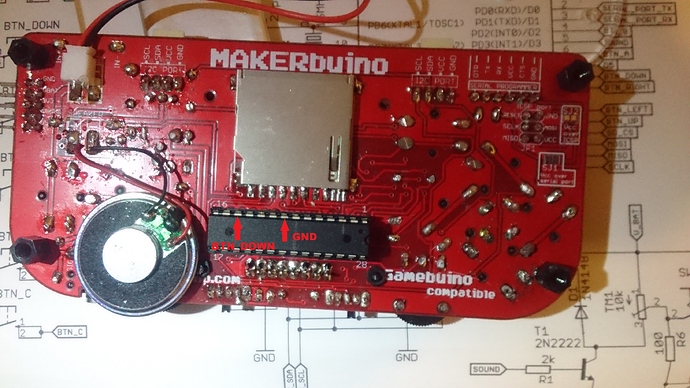
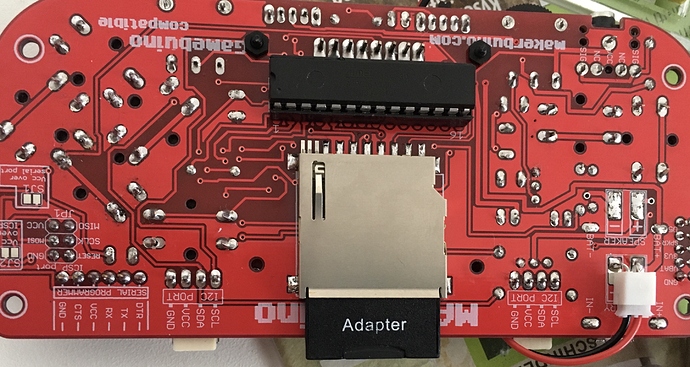
Hello there, I’ve just got to the end of stage 5 and connected the battery. I have done the contrast/dimmer test, worked find. But the button test failed. Only my down button doesn’t * up when I press it. All the others work, I have taken all the solder off and re-soldered twice but it’s still not working. I even went passed this step to test the sound which is all ok. It’s just my down button that isn’t working. Any ideas??? Thanks
Do you have a multimeter?
Check the resistance between pin 12 of the ATmega and GND. If the switch isn’t pressed there should be a huge resistance and if you keep the button pressed there should be almost no resistance.
Counting pins is pretty easy. Pin 1 is always marked. You can even see the mark on your picture!  Remember when you had to watch out for the notch on the ATmega? Turn your MAKERbuino 180° so that the notch is on the left side. You’ll see a small circle above the bottom left pin. This is pin 1. Just start counting the pins counter clockwise.
This is a picture from the ATmega328P datasheet:
Just measure the resistance between pin 8 and pin 12 of the ATmega 
Hi all,
I have similar issue with the up button. i.e. high resistance with not pressed B button, low resistance with pressed B button but always high resistance with or without pressed up button (measured on MCU between pin 8 and 15)
Has anyone an idea how to fix it?
remark: My first thought was my button wasn’t properly soldered and maybe destroyed, therefore I decided to replace the button with new button from electronic store.
Thanks
Florian
Hey Florian!
Well, the first thing you should definitely do is check the solders. Even though from looking at the image, everything seems to be fine there could always be some micro bridges as well as residual solder somewhere on the board that is causing this issue.
Just please double check for that and clean your board from solder in places where it should not be. Then check back so we can advise you some more if this doesn’t work. 
Thanks,
Robert

