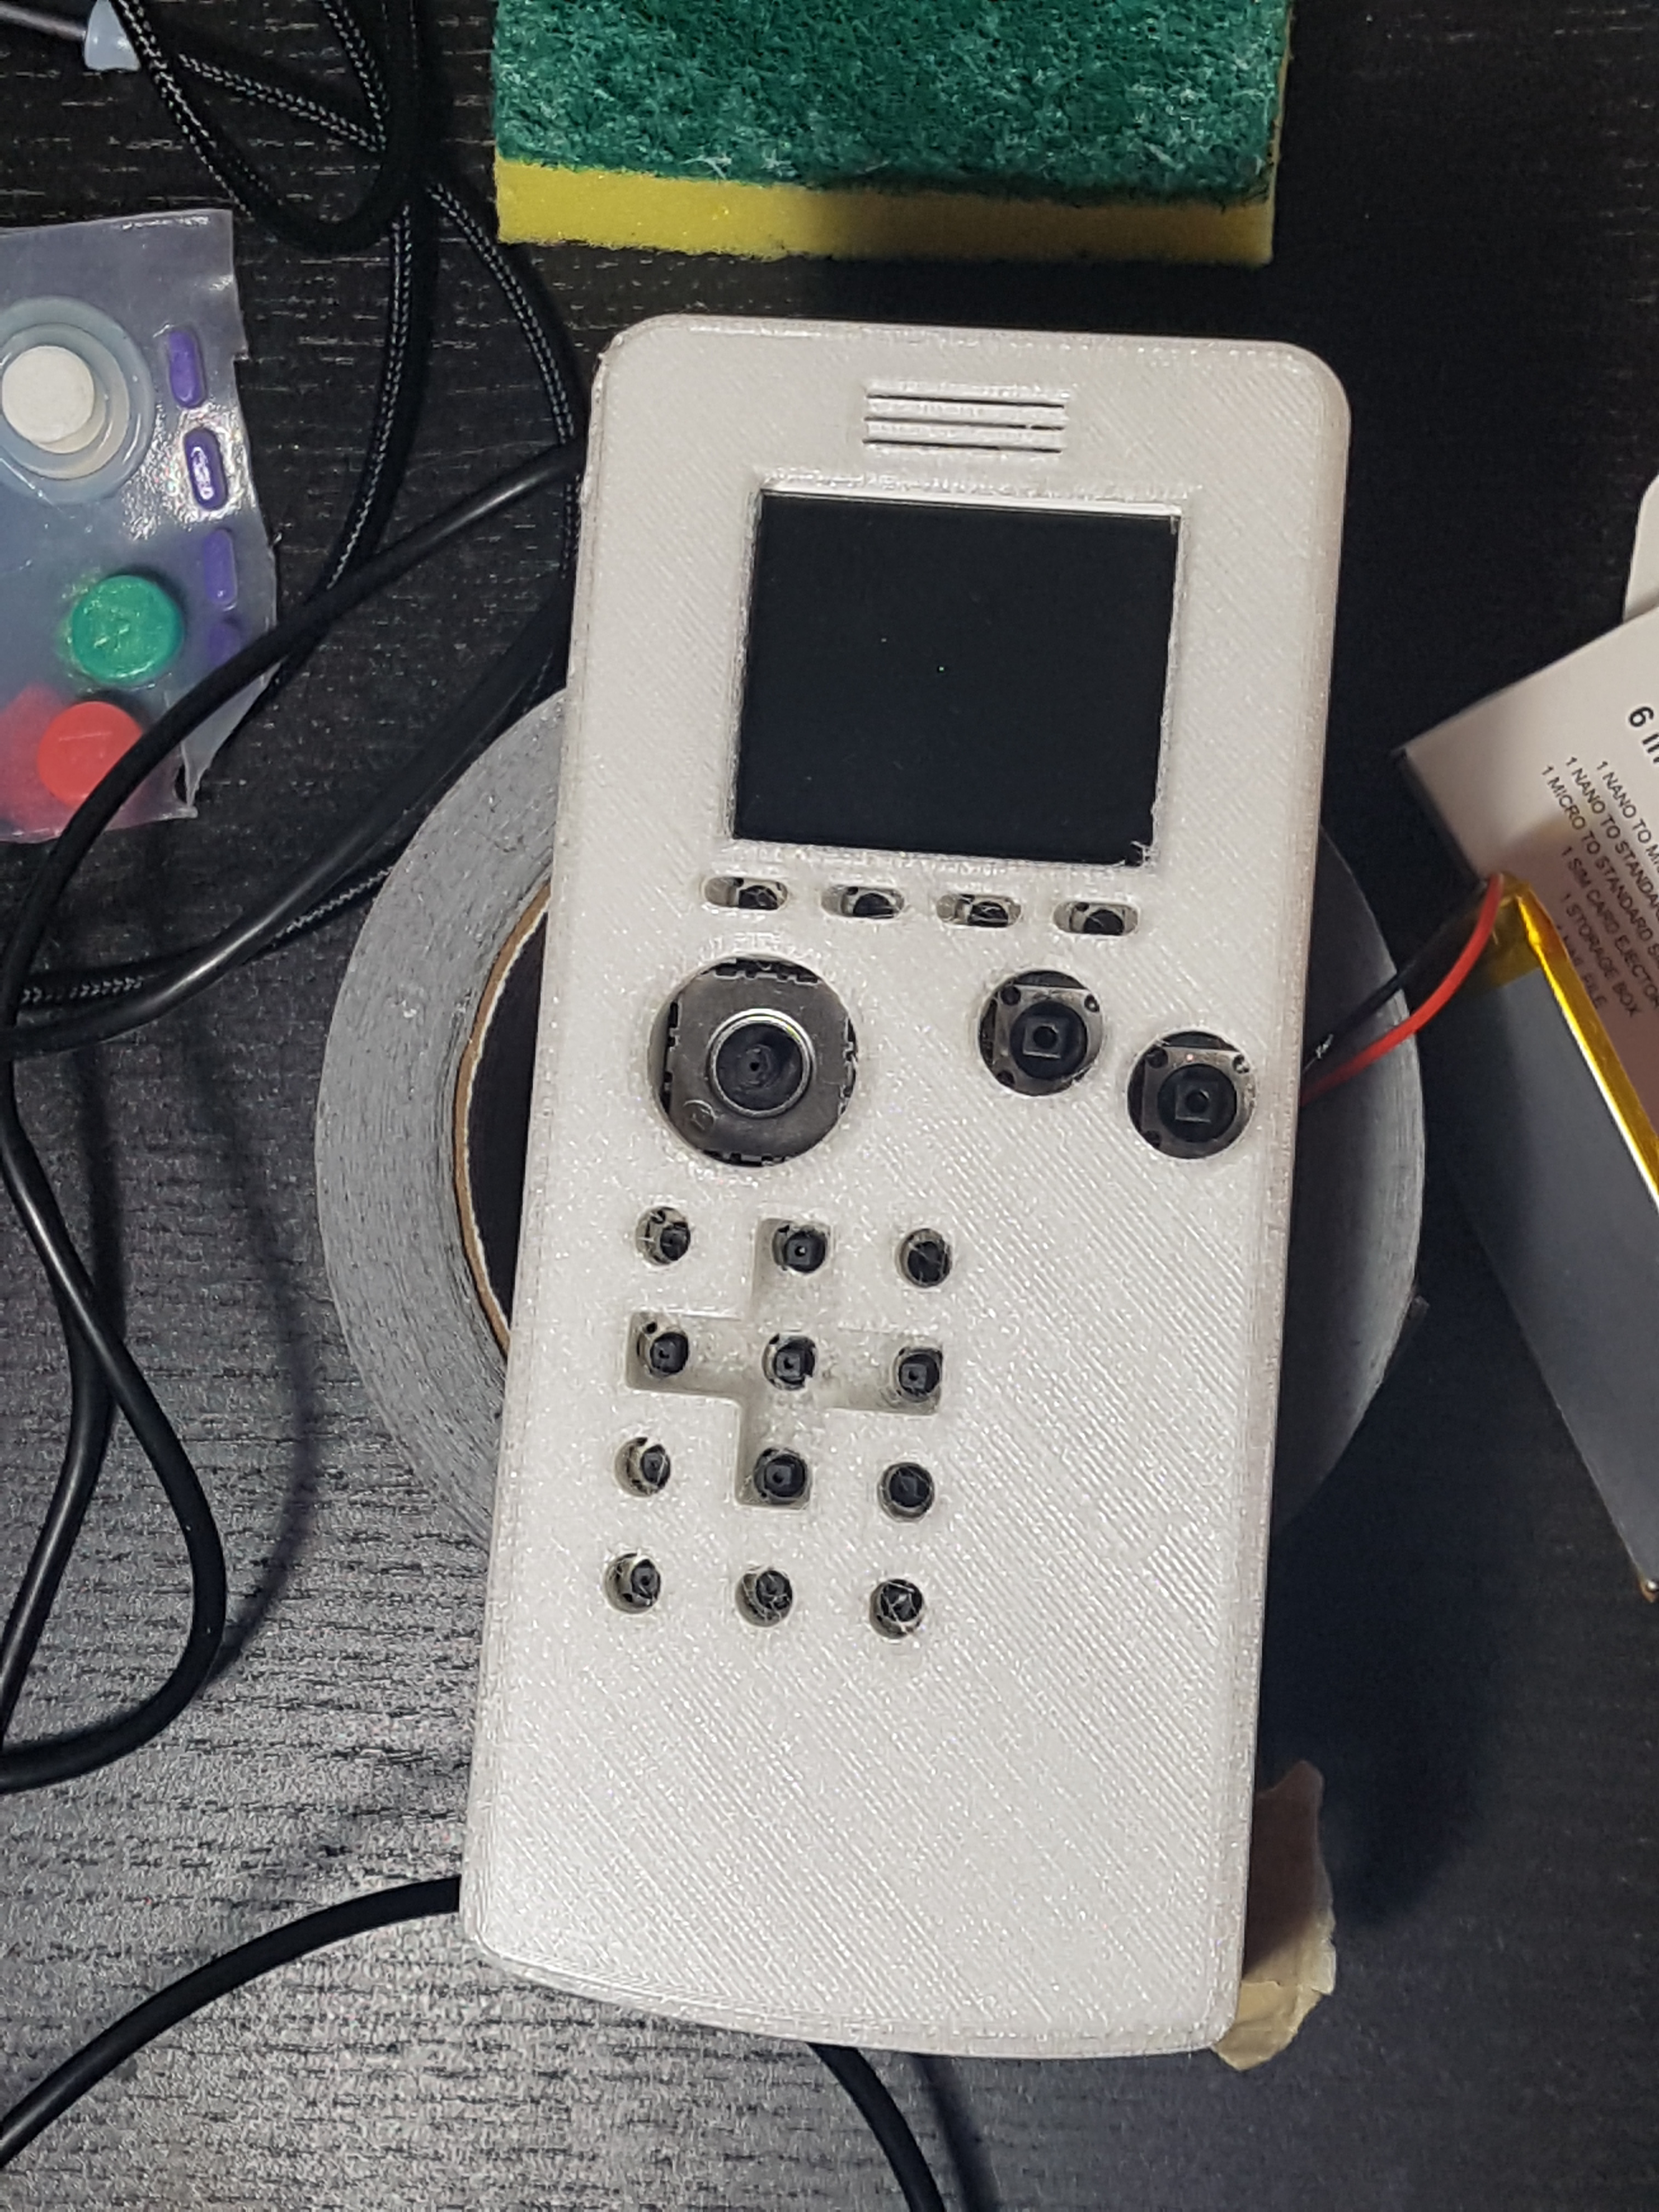
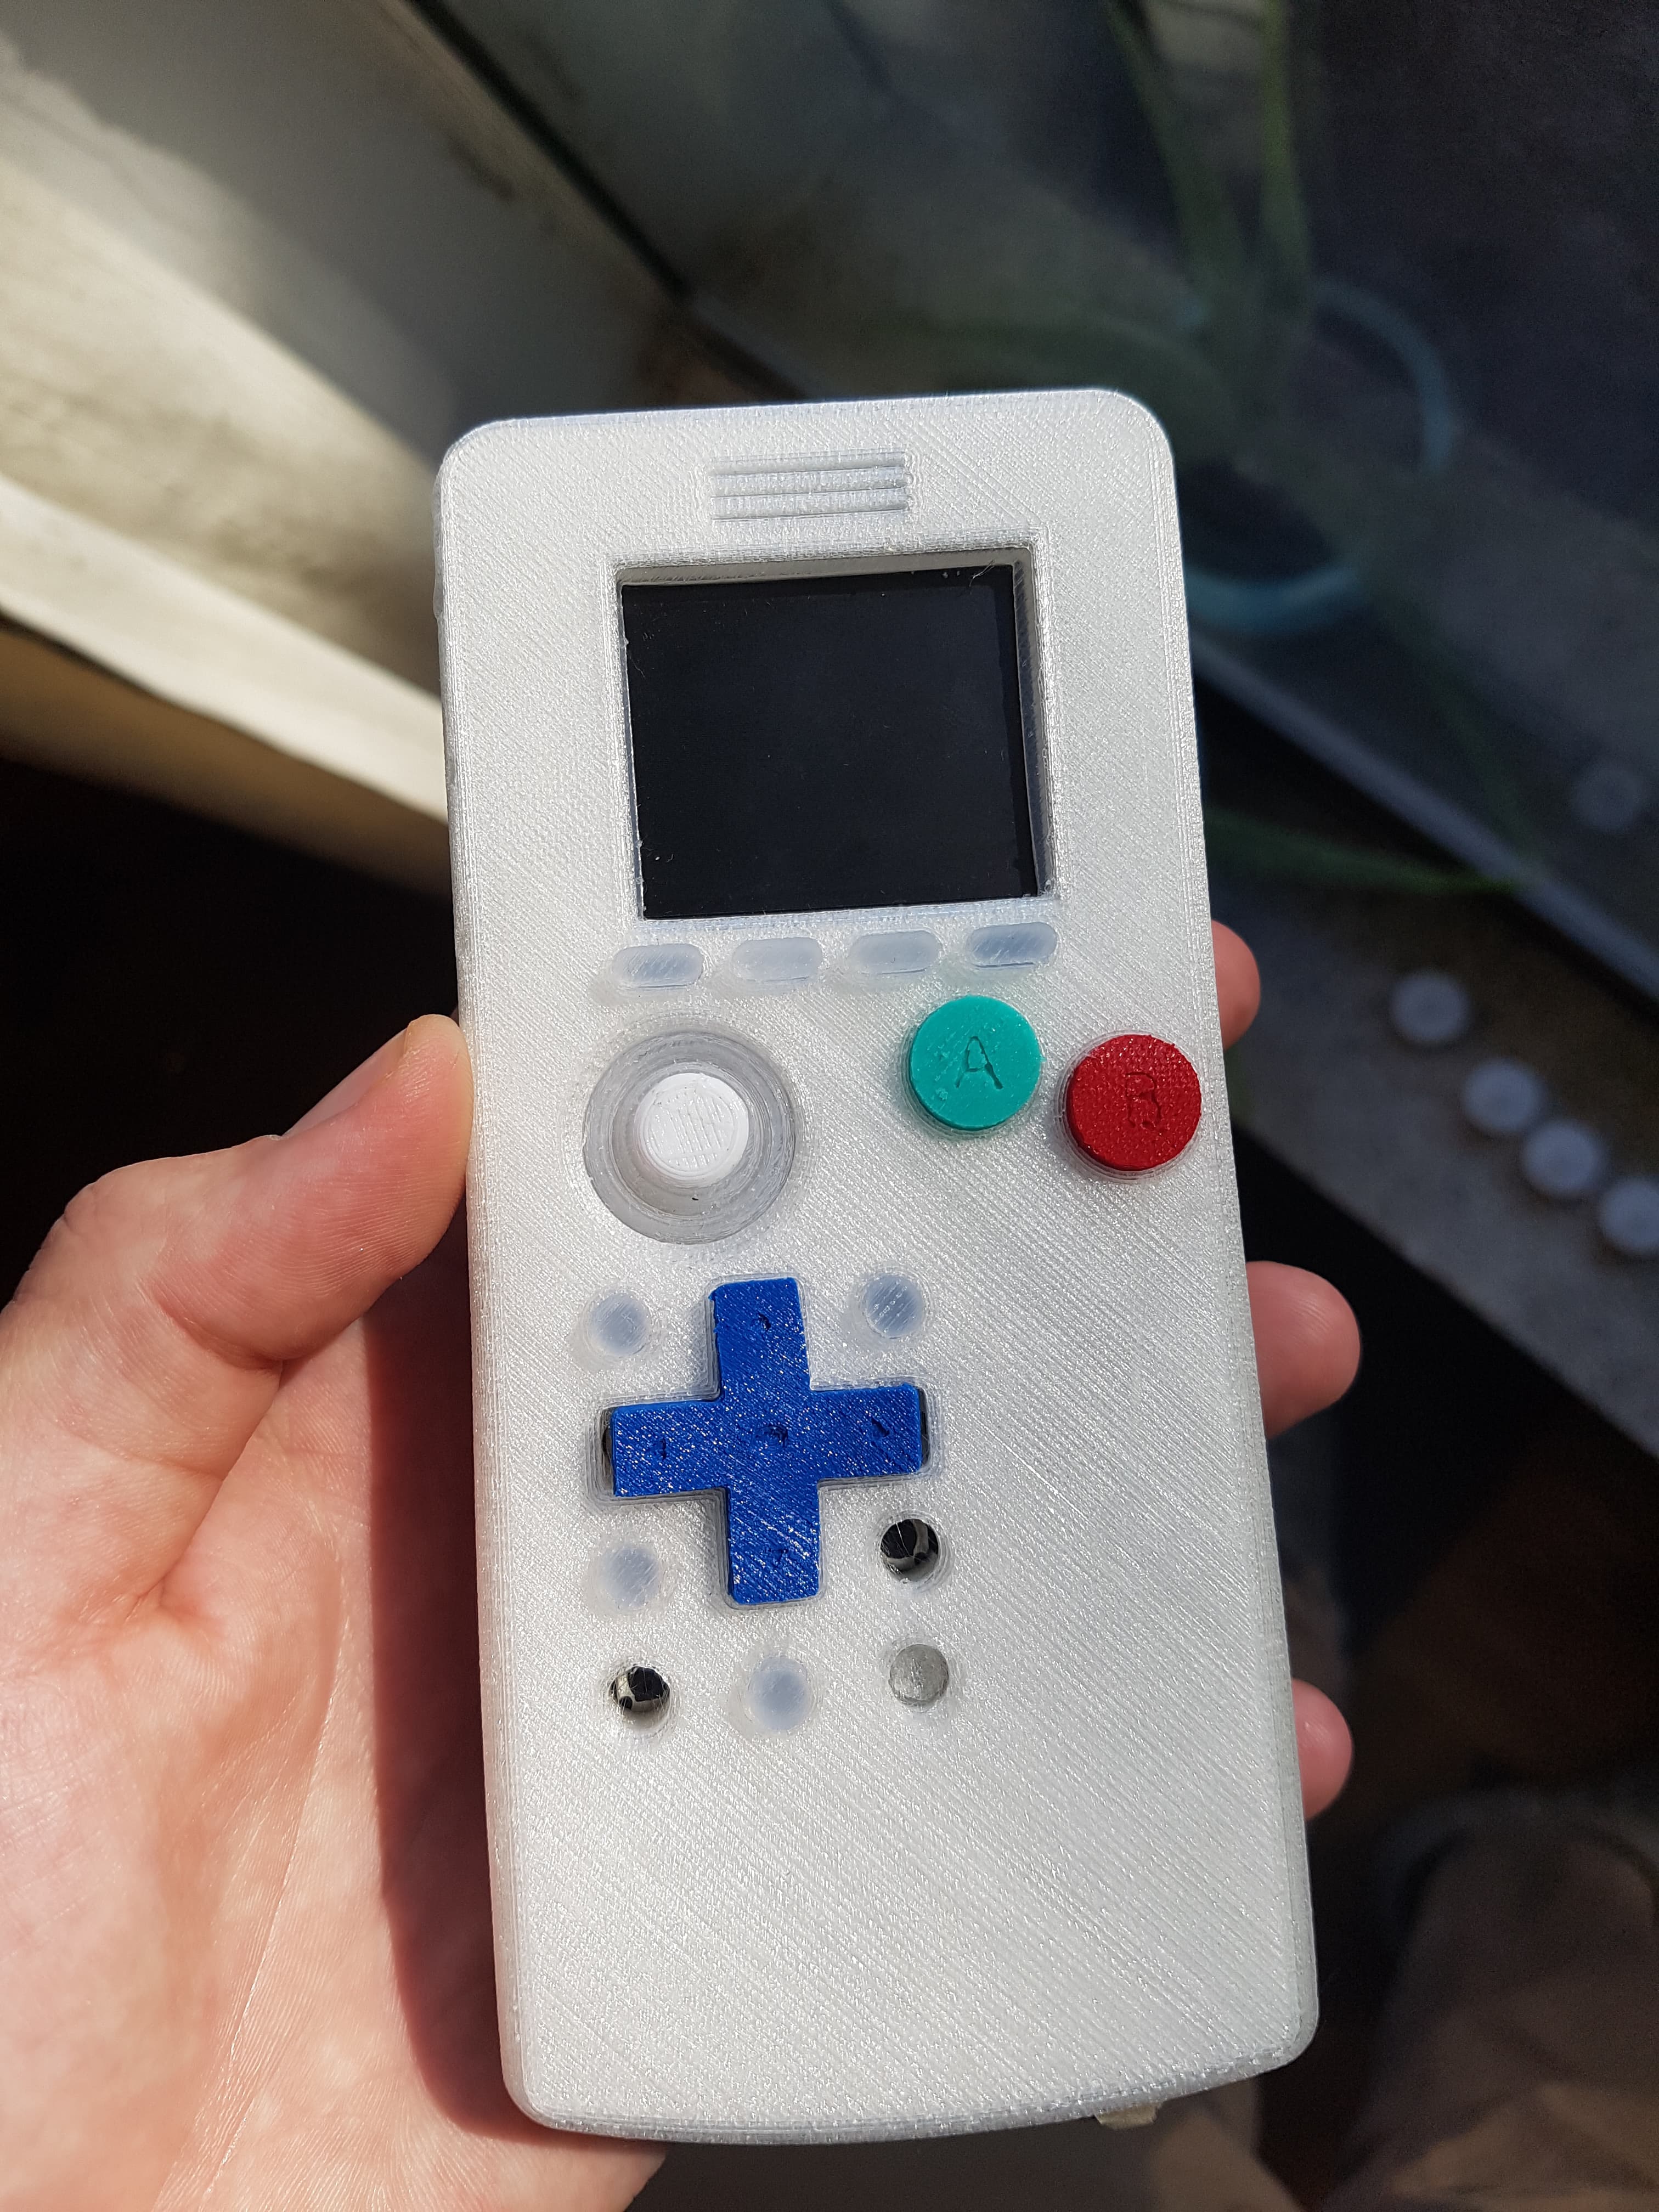
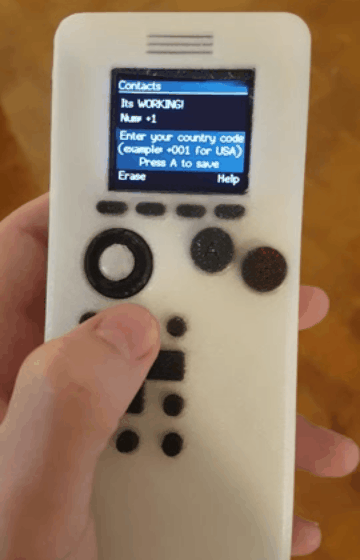
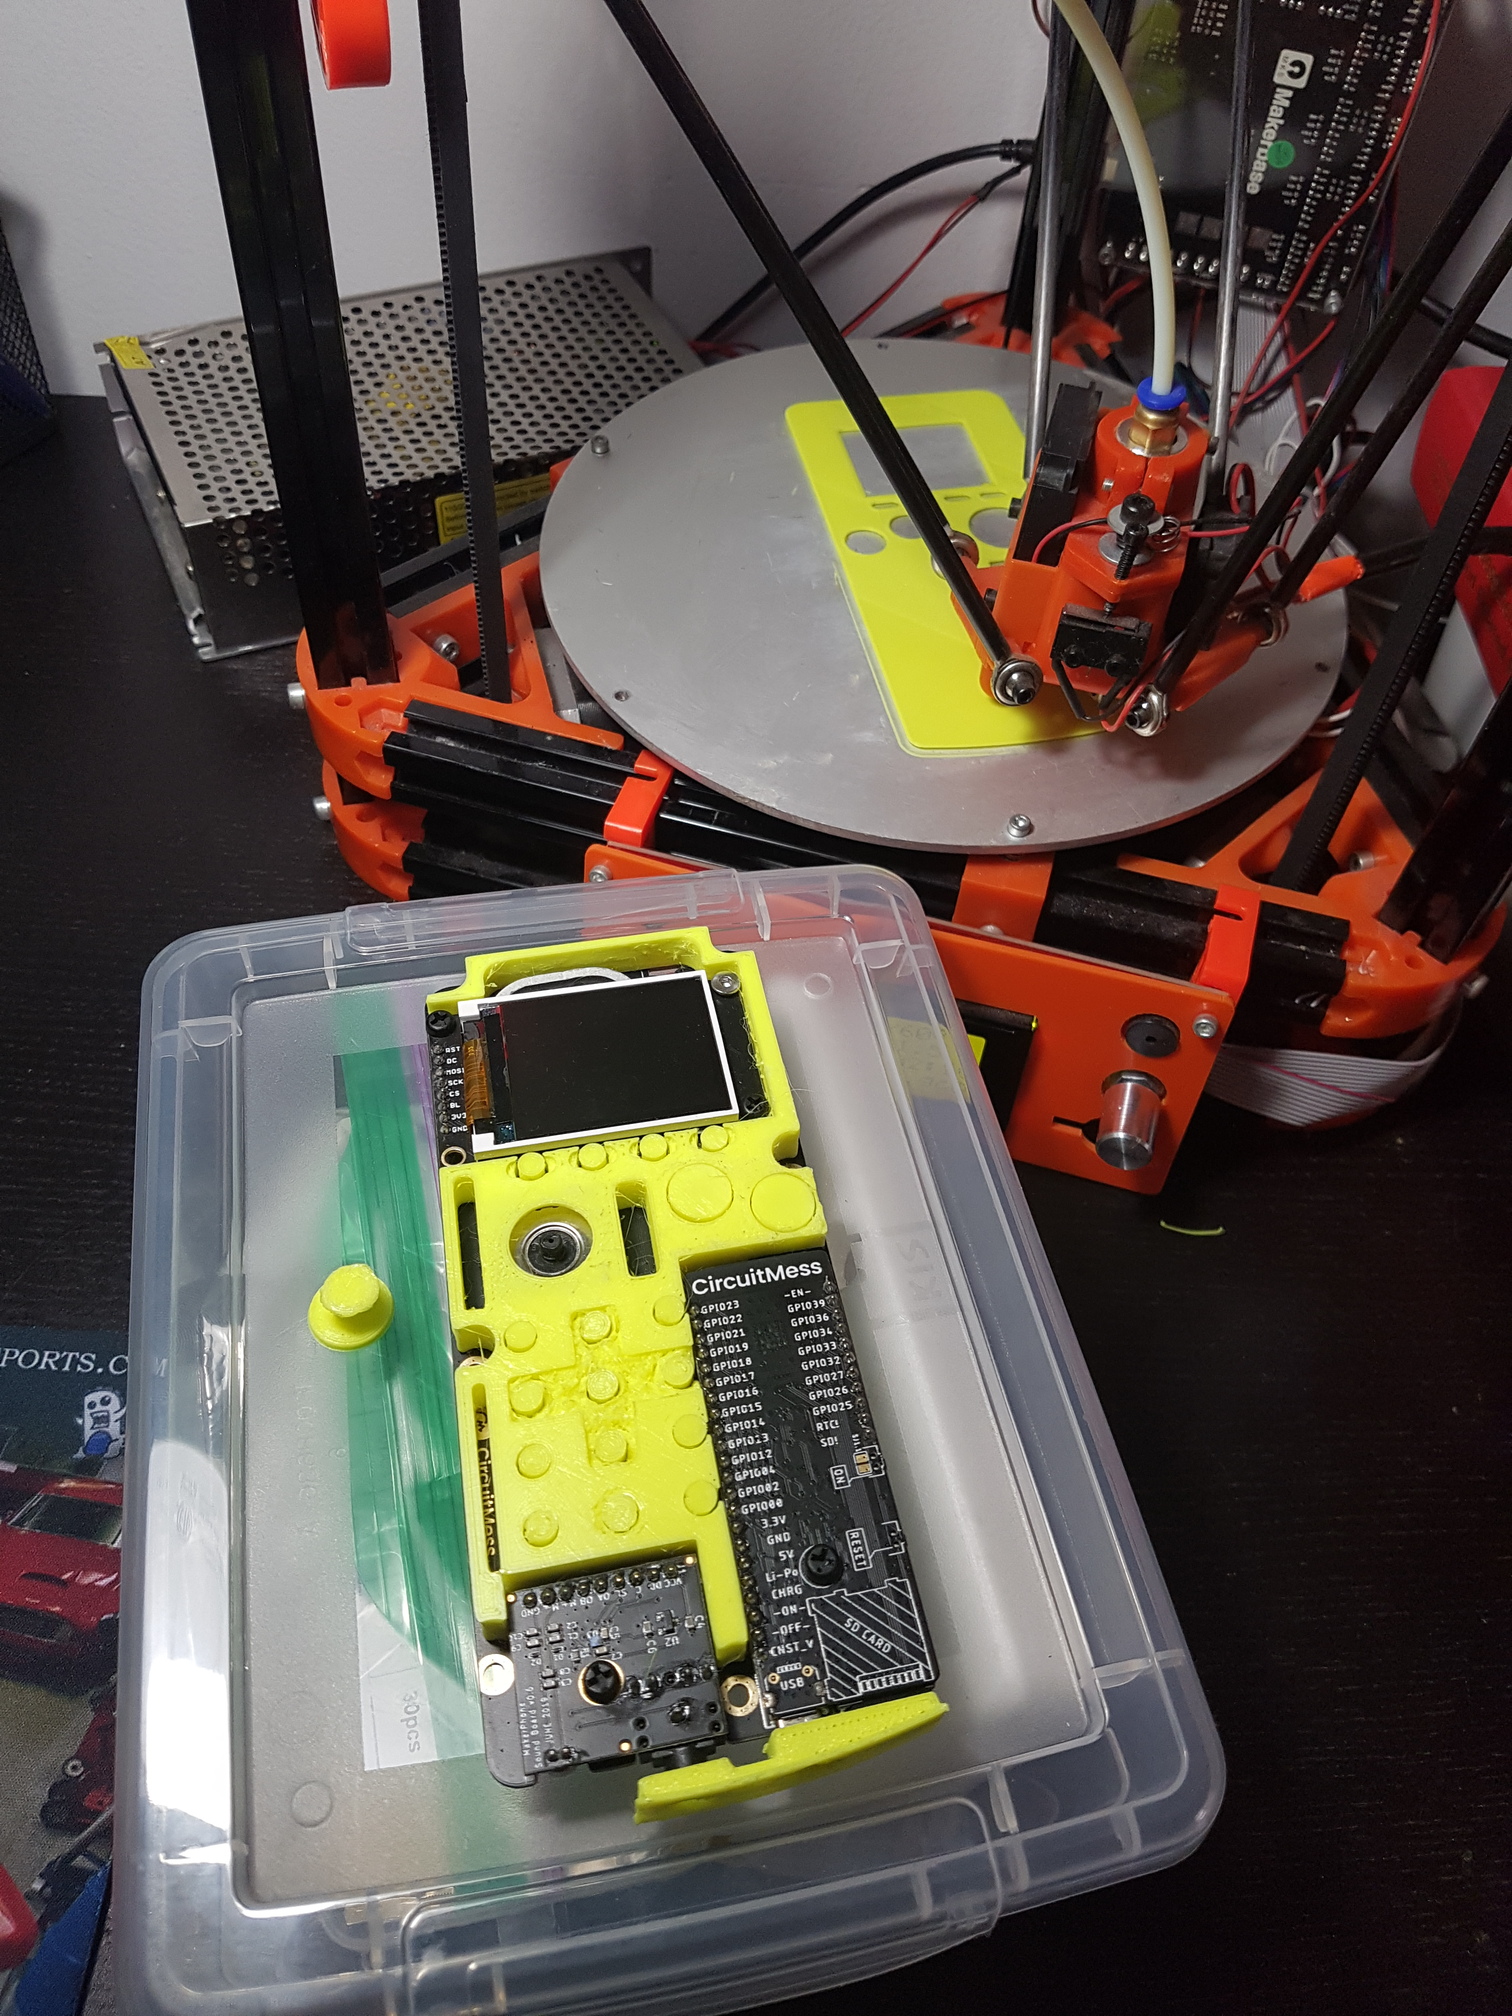
Hello Ringo community! This is my first contribution to the community and I wanted to share a 3D-printed fully-enclosed case I designed for the Ringo. The case features some vintage gameboy aesthetic, a fully closed exterior with possibility for sealing against water, silicone button caps for a soft-touch feel, and all in what I hope will prove to be a sturdy and somewhat space-efficient package:
I loved the Ringo from the moment I stumbled across it, but figured that it needed a bit more protection against the elements if I was going to adopt this as my daily usage phone because I am not easy on my electronics. This is my attempt to beef up the phone a bit for my daily use.
I’ll have some final .STL files ready soon, I’d prefer not to release them until I have a fully-assembled phone working to prove them, but I expect to be finished within a week or two (including assembly instructions). In the meantime while I CAD and 3D print my time away, I wanted to get your opinions! Would anyone be interested in using this case? Thanks for your feedback!
Since I am limited to one picture per post, I have also included this to follow-up:
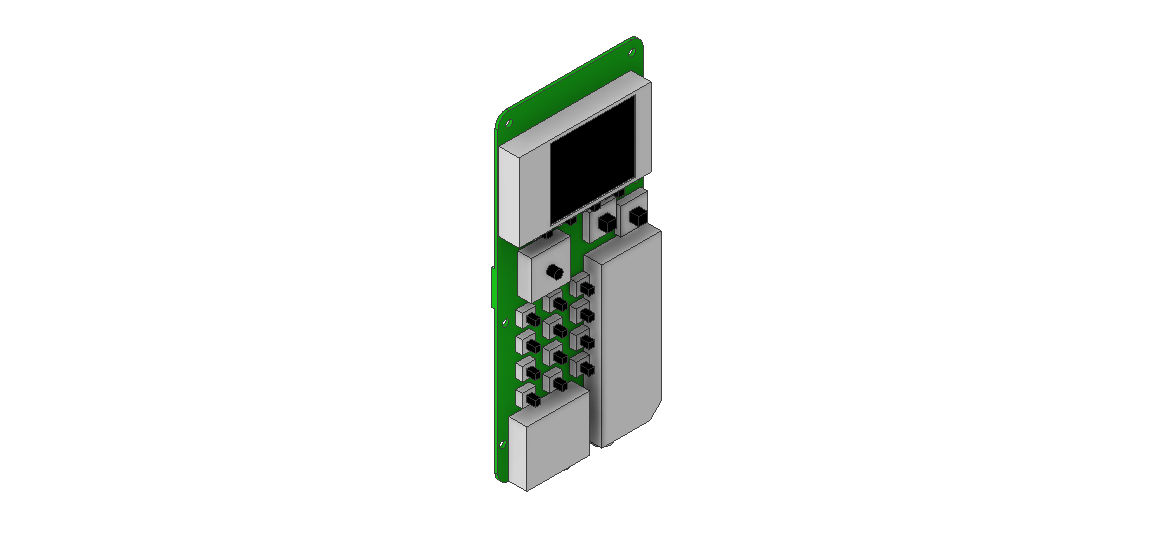
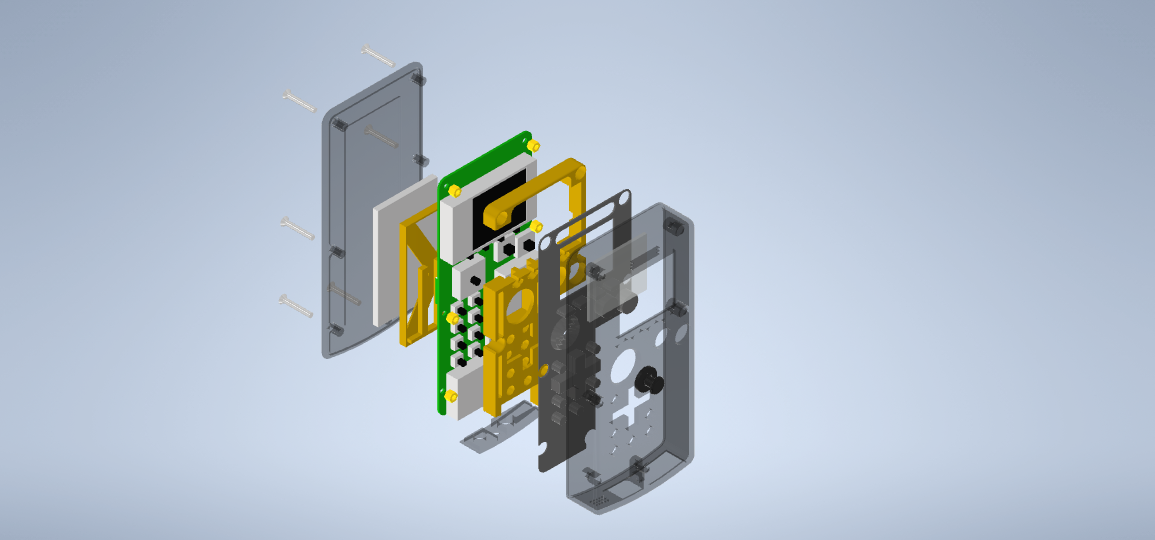
To get a feel for the construction I’ve created an exploded view, note that all the buttons are joined via a single flexible piece of silicone to create a better barrier against weather and all other new pieces are either plastic or metal if they are printed or hardware, respectively (also an acrylic screen protector):
Thanks Robert! I’ve actually been working on this in iterations of varying speeds since April, making adjustments as needed, so I have printed some already:
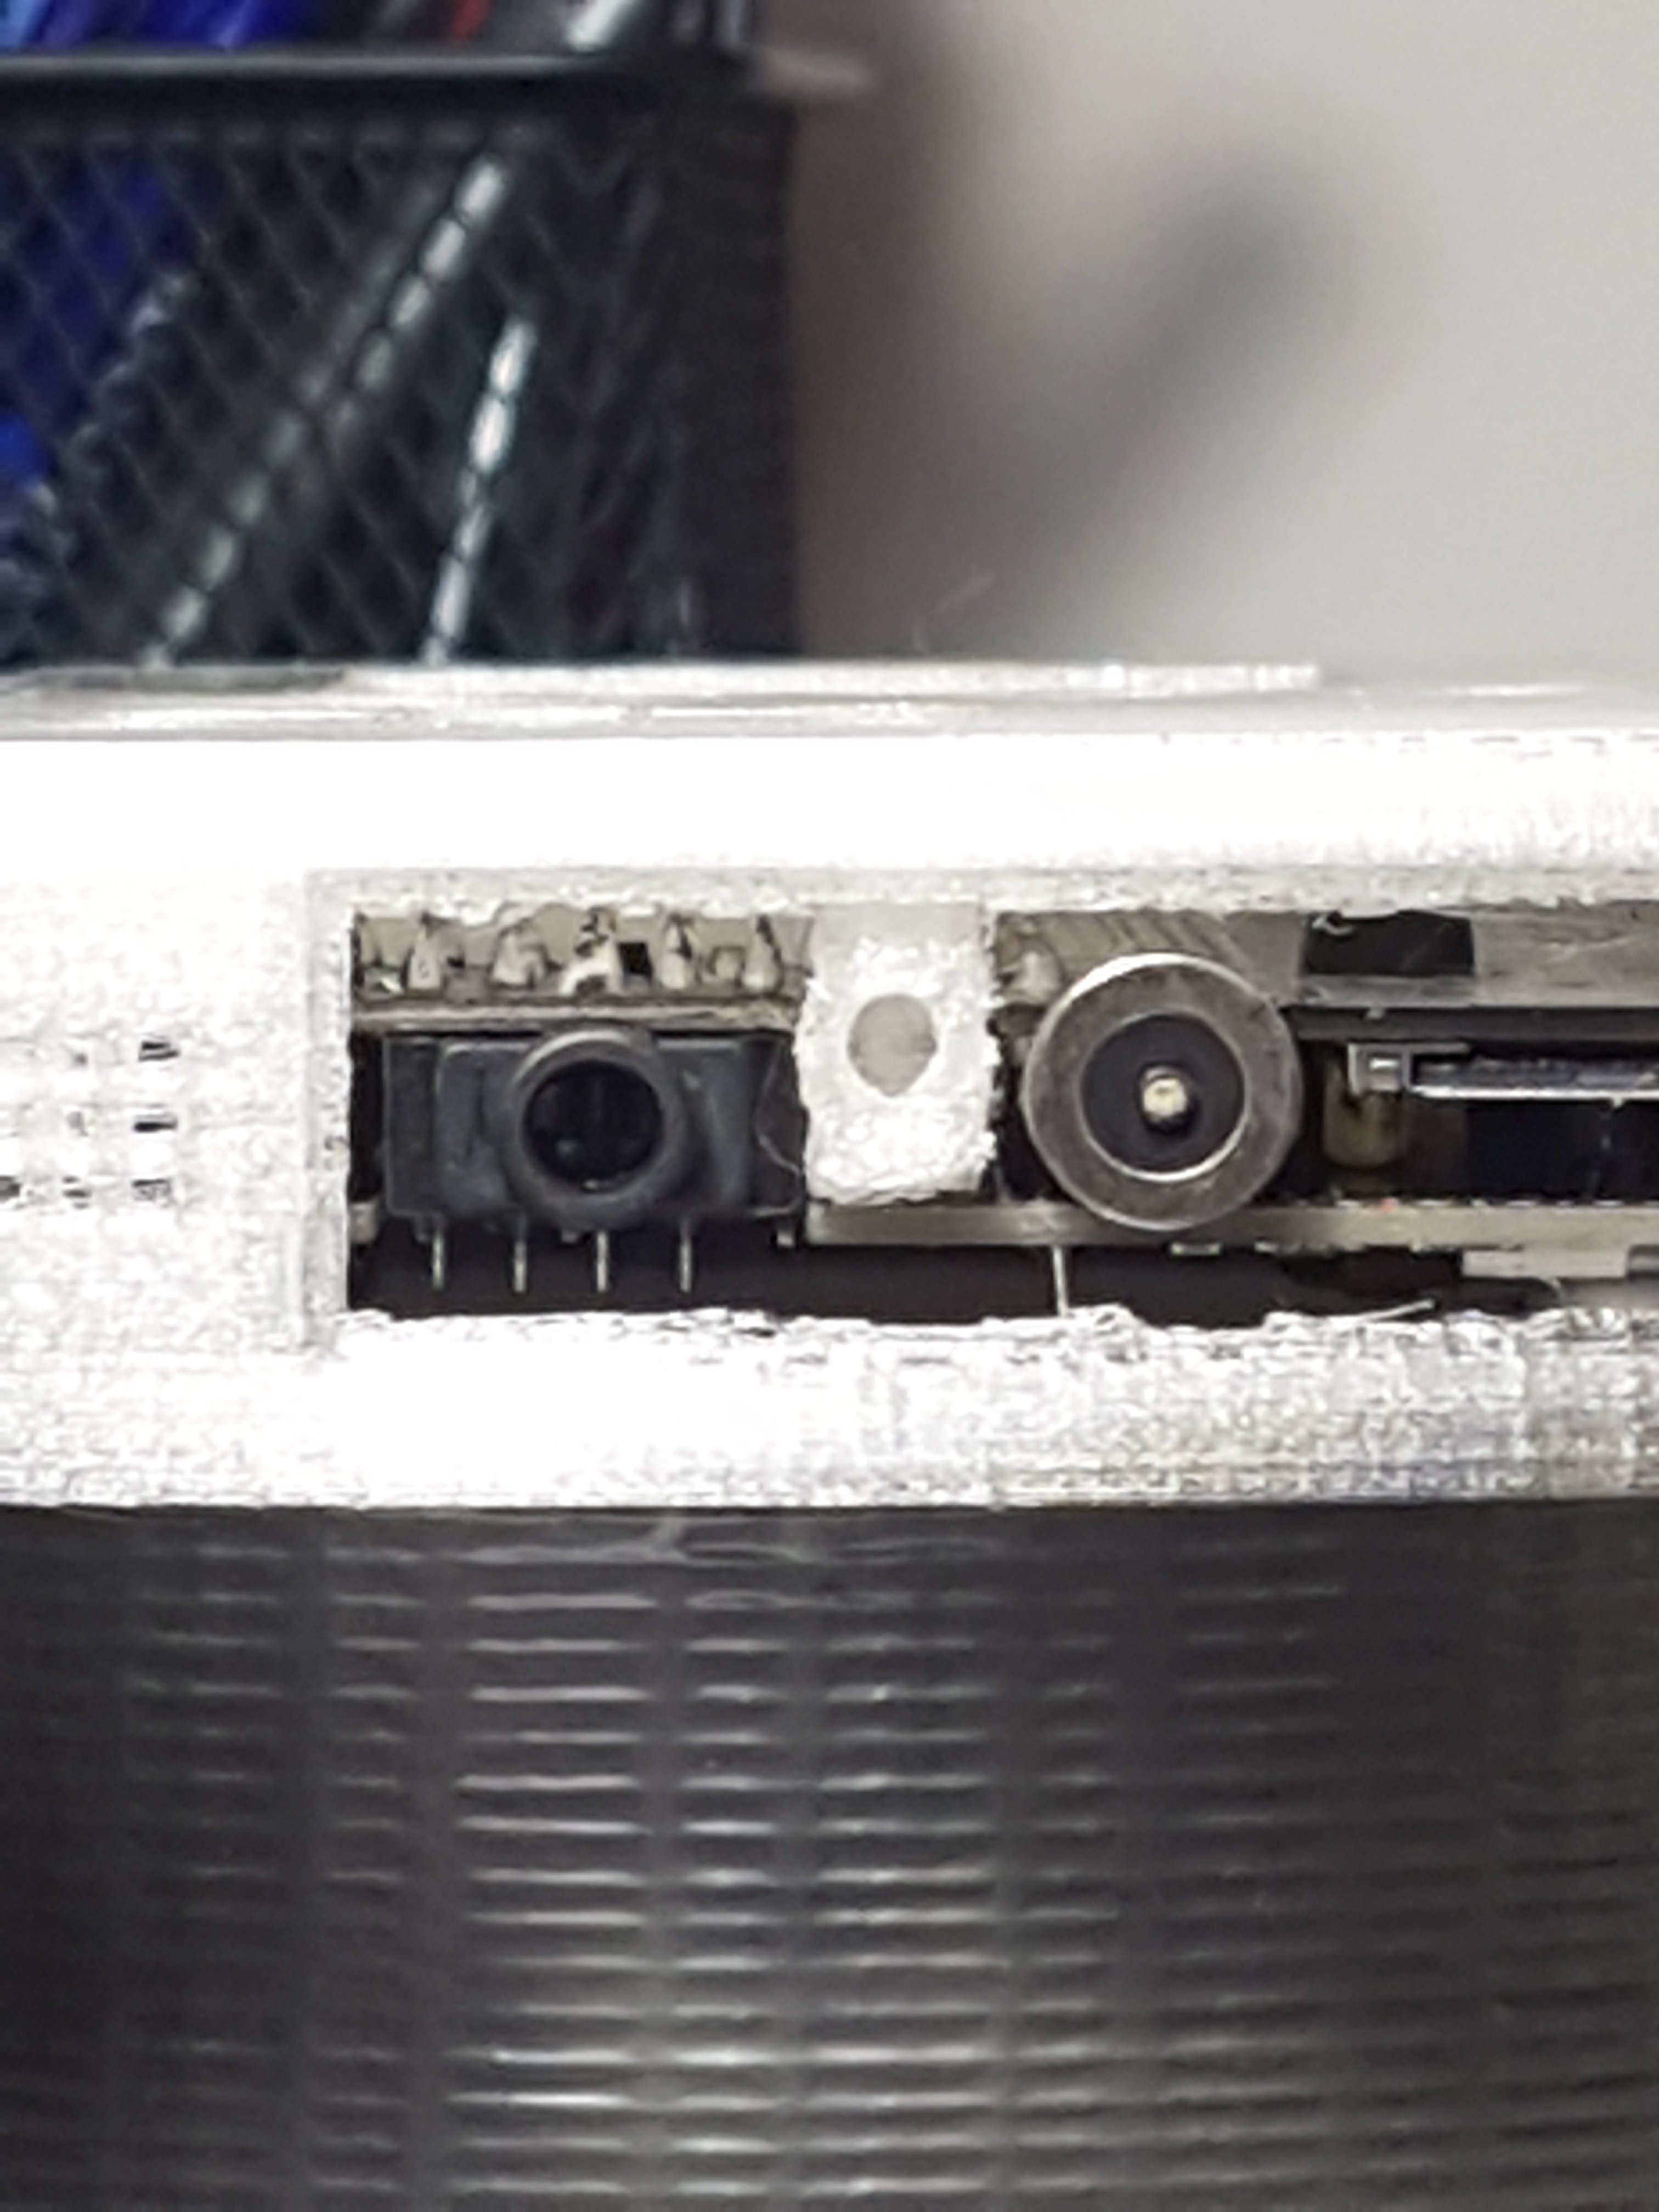
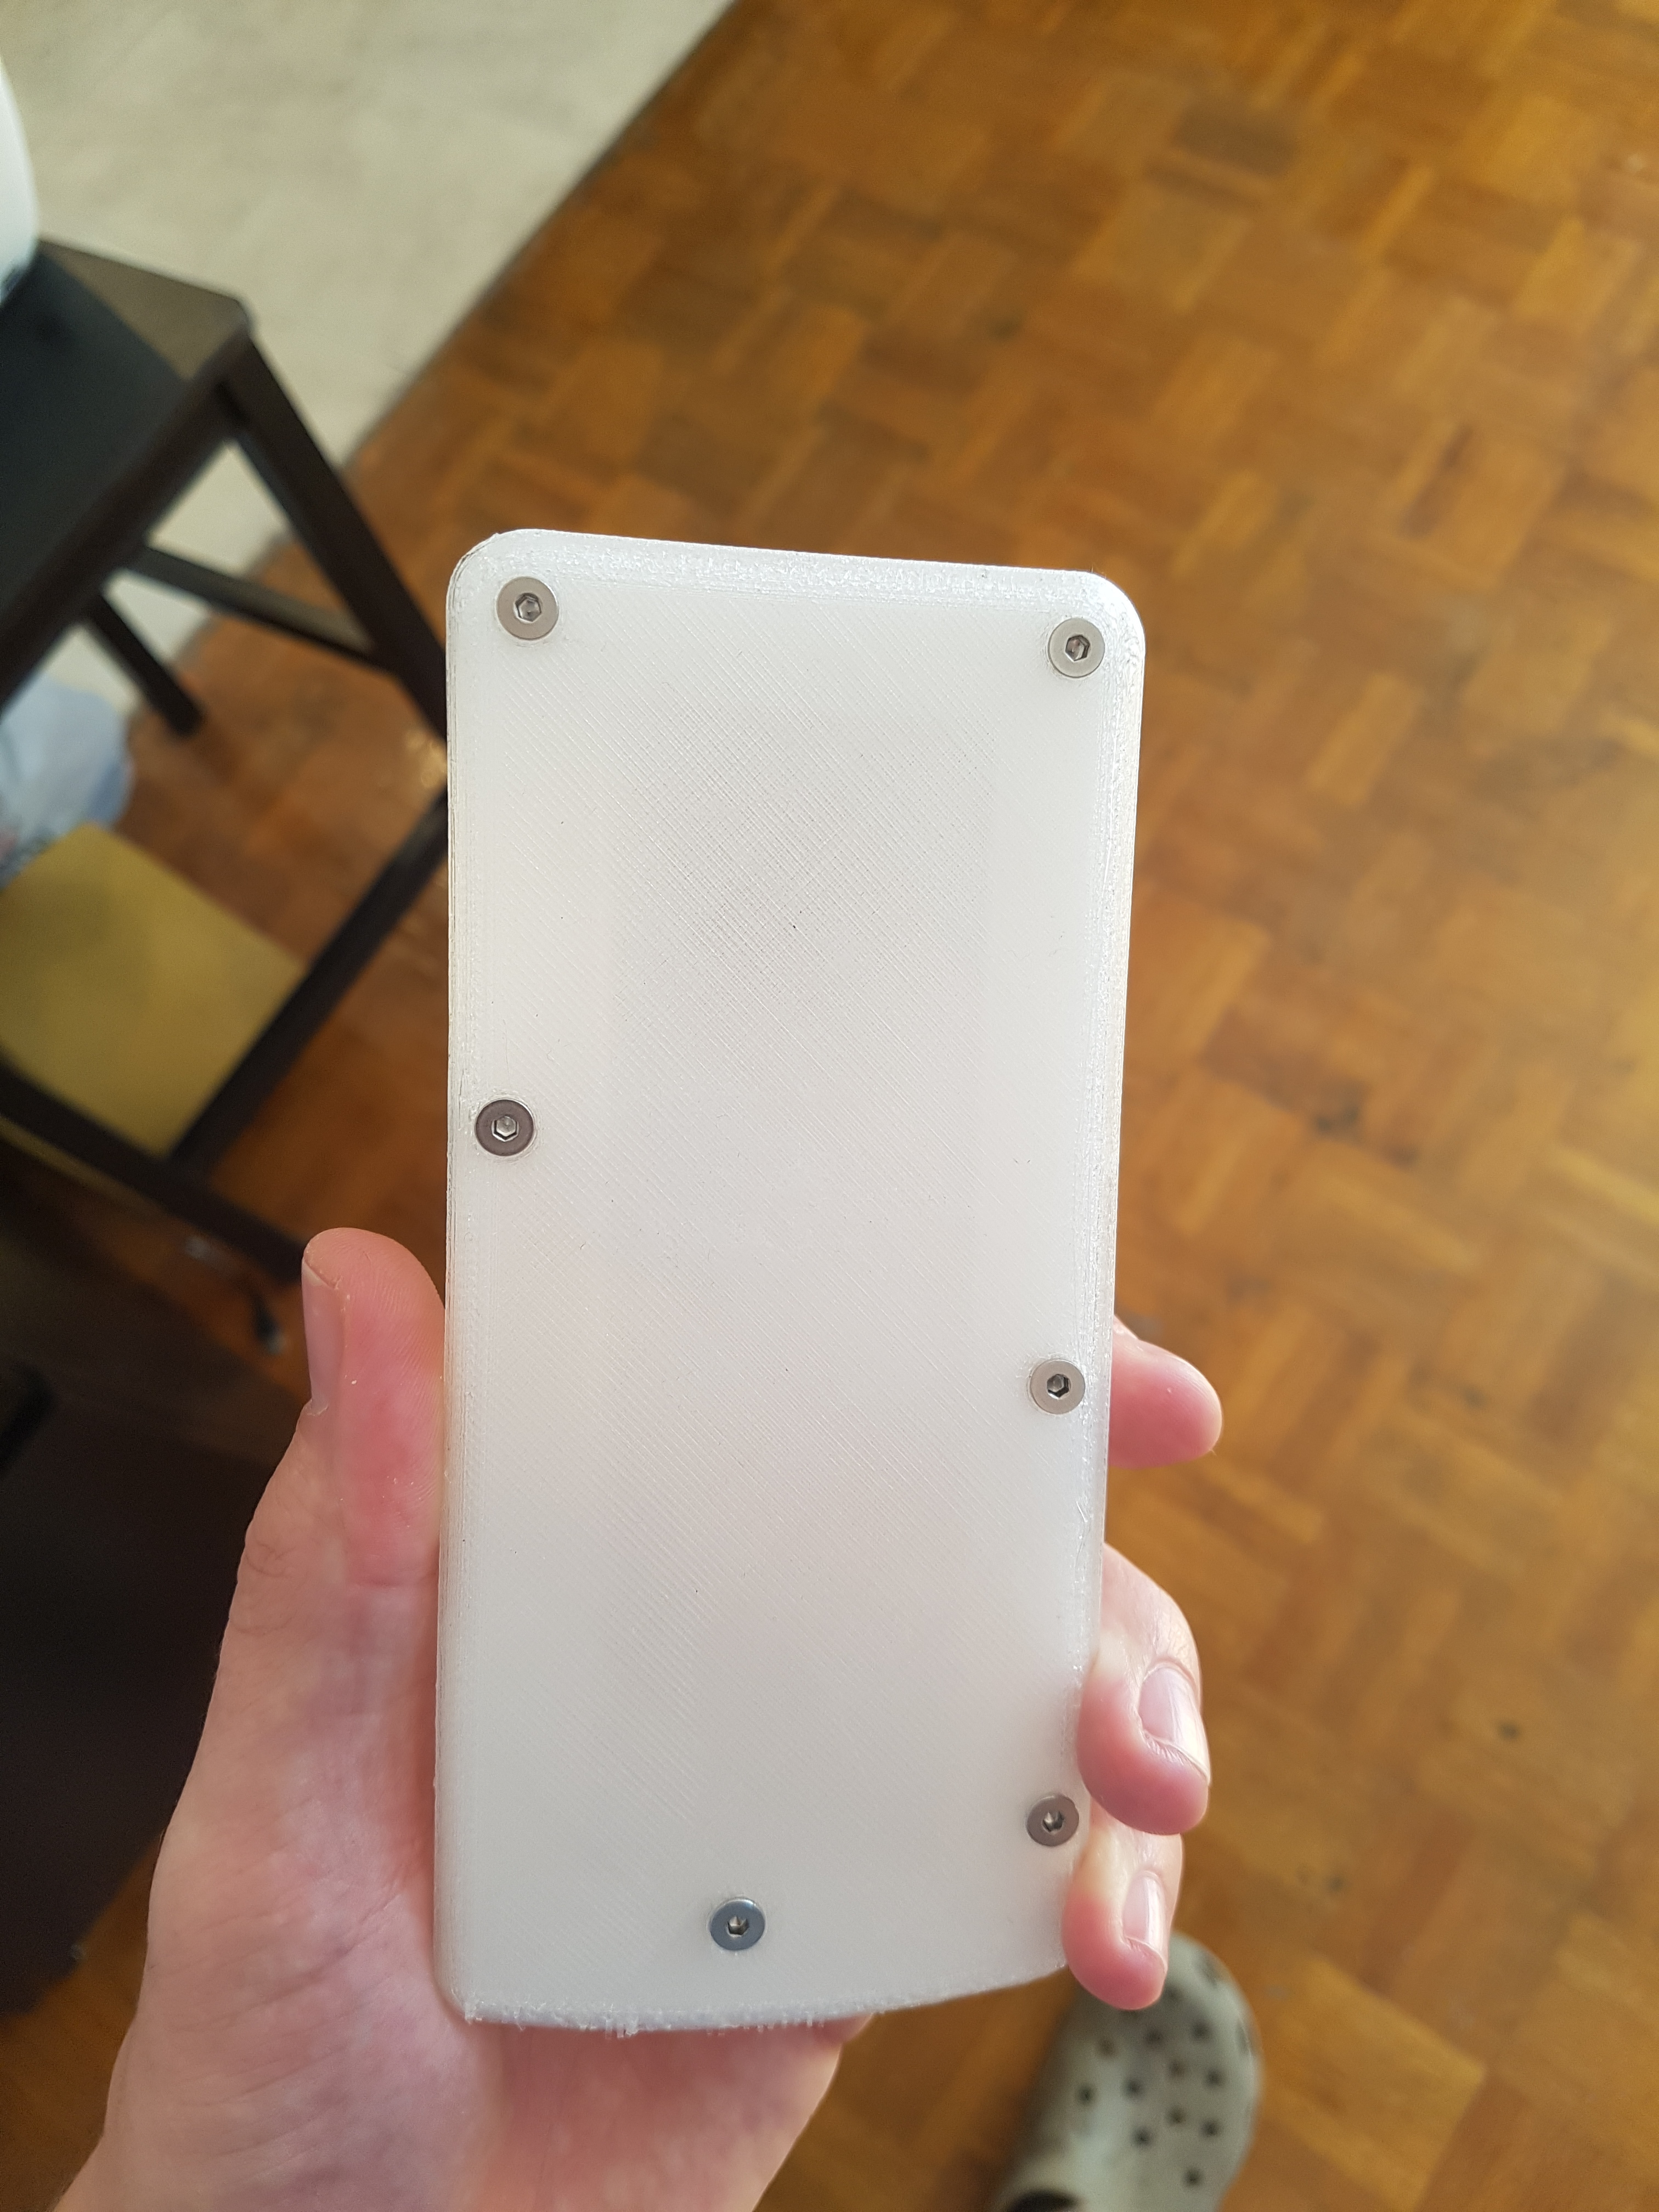
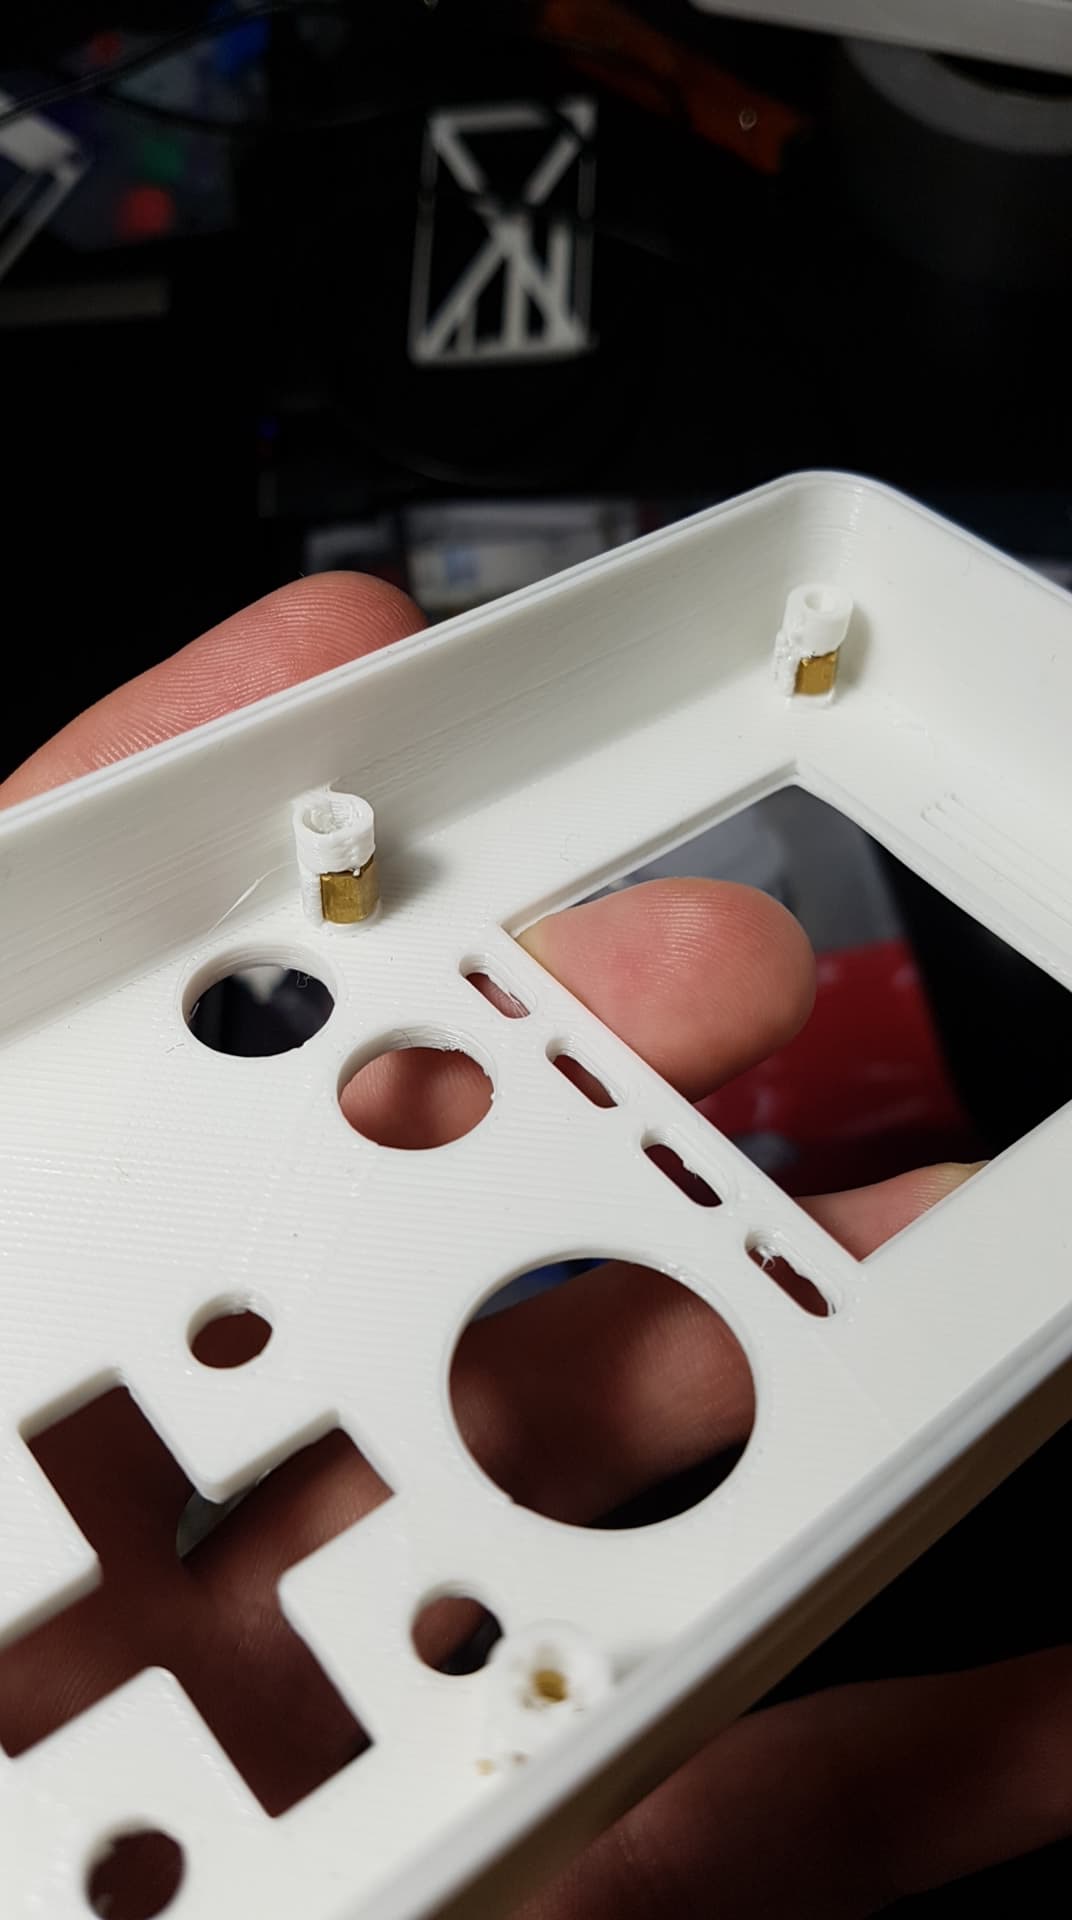
Here’s a close-up of the major remaining design issue (it’s already been addressed in the next revision, this will always be a weak spot though given the difficulties of 3D printing small details) but basically the front piece of the case contains the provided standoffs so that the threads holding the phone together can have some added strength over plastic, without sending screws through the front face:
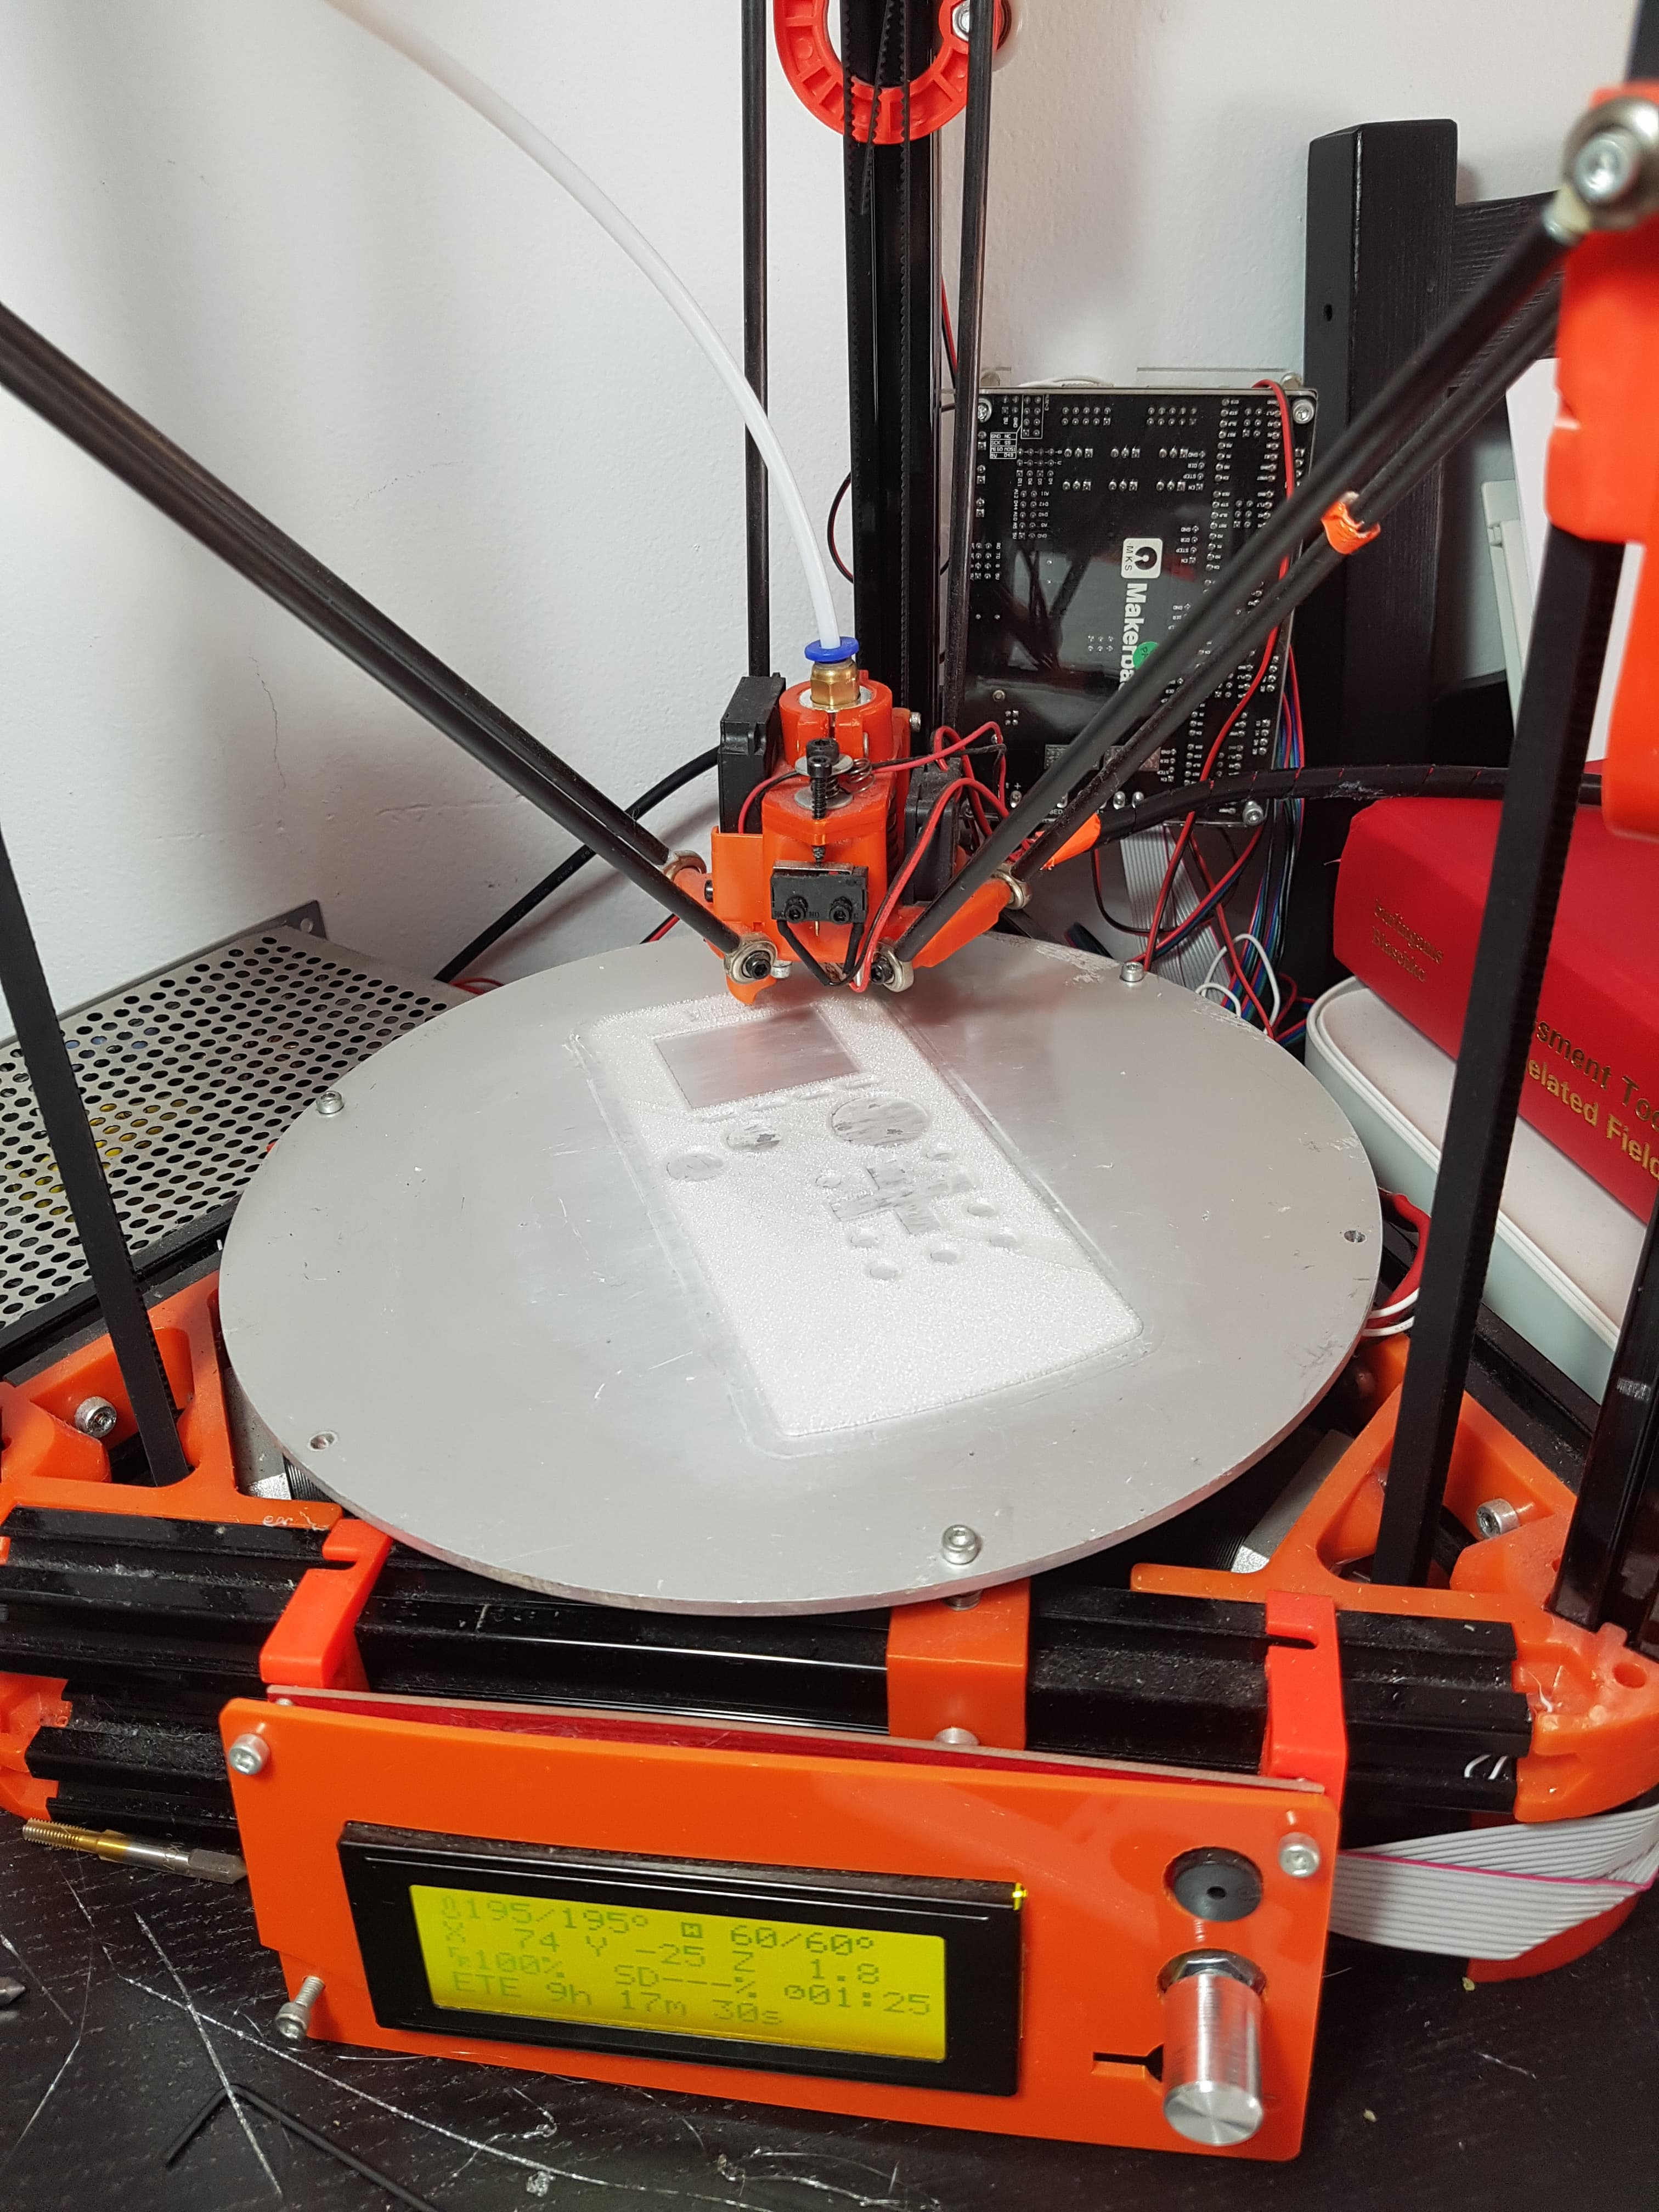
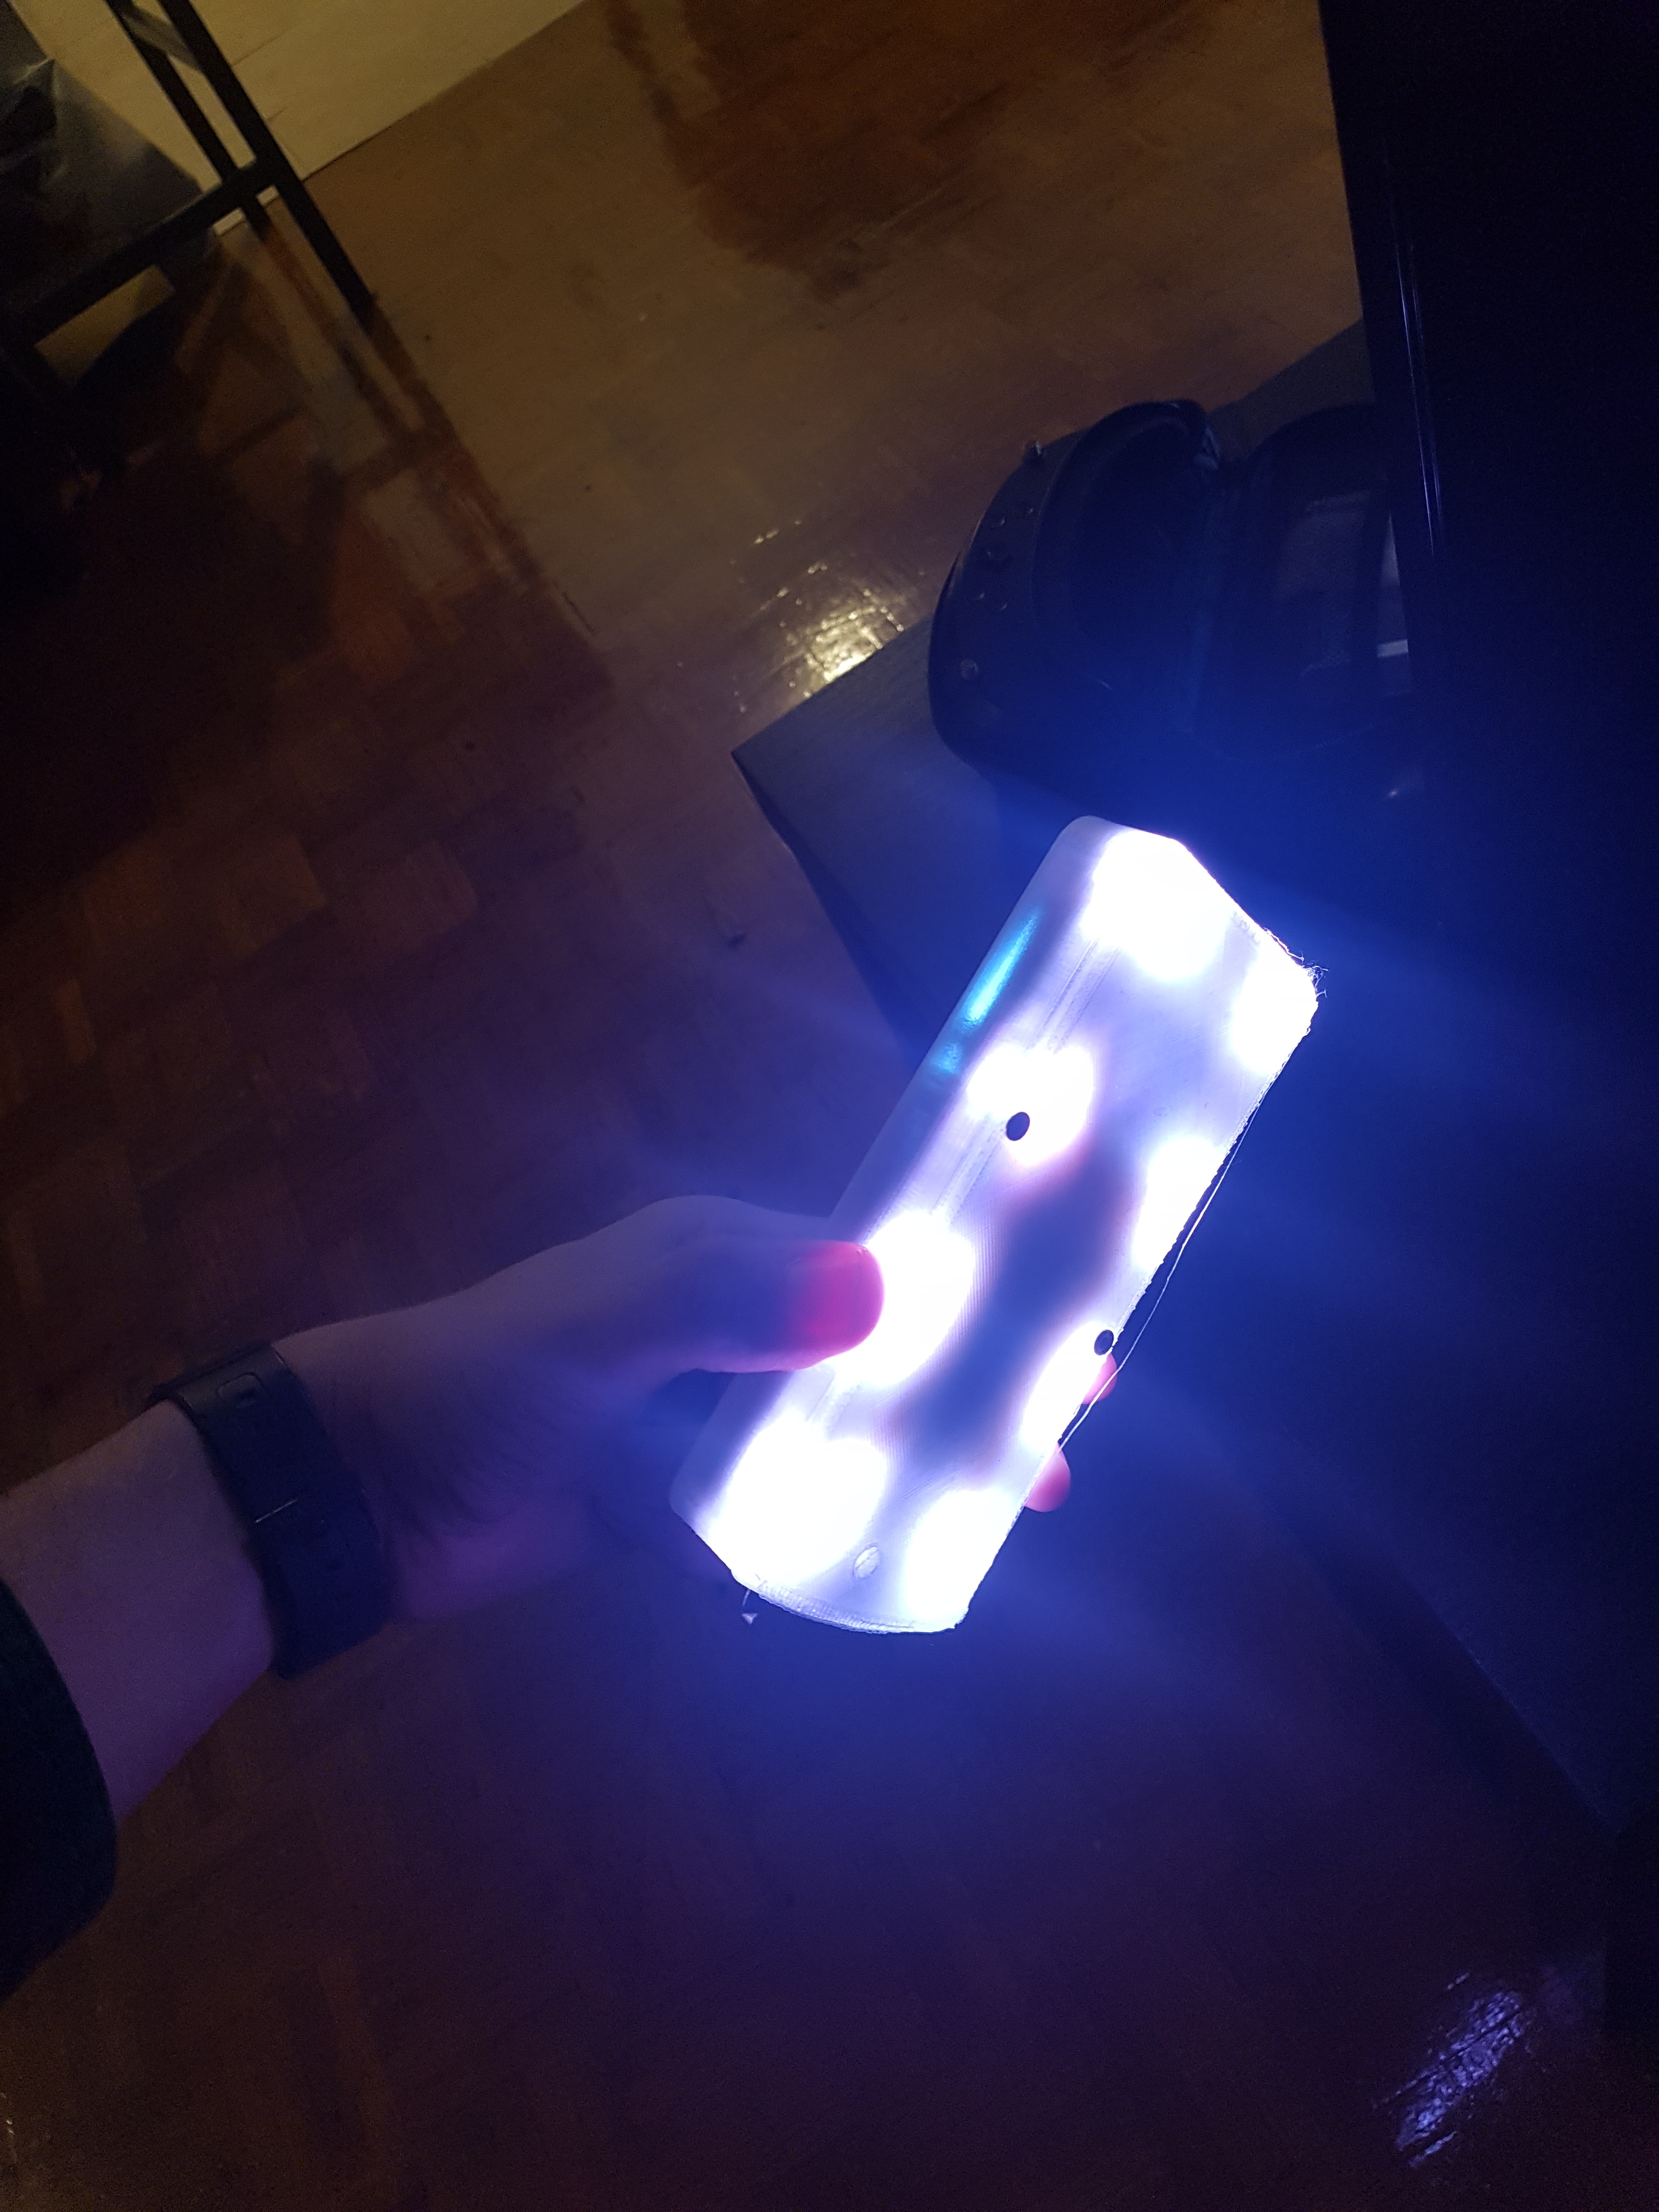
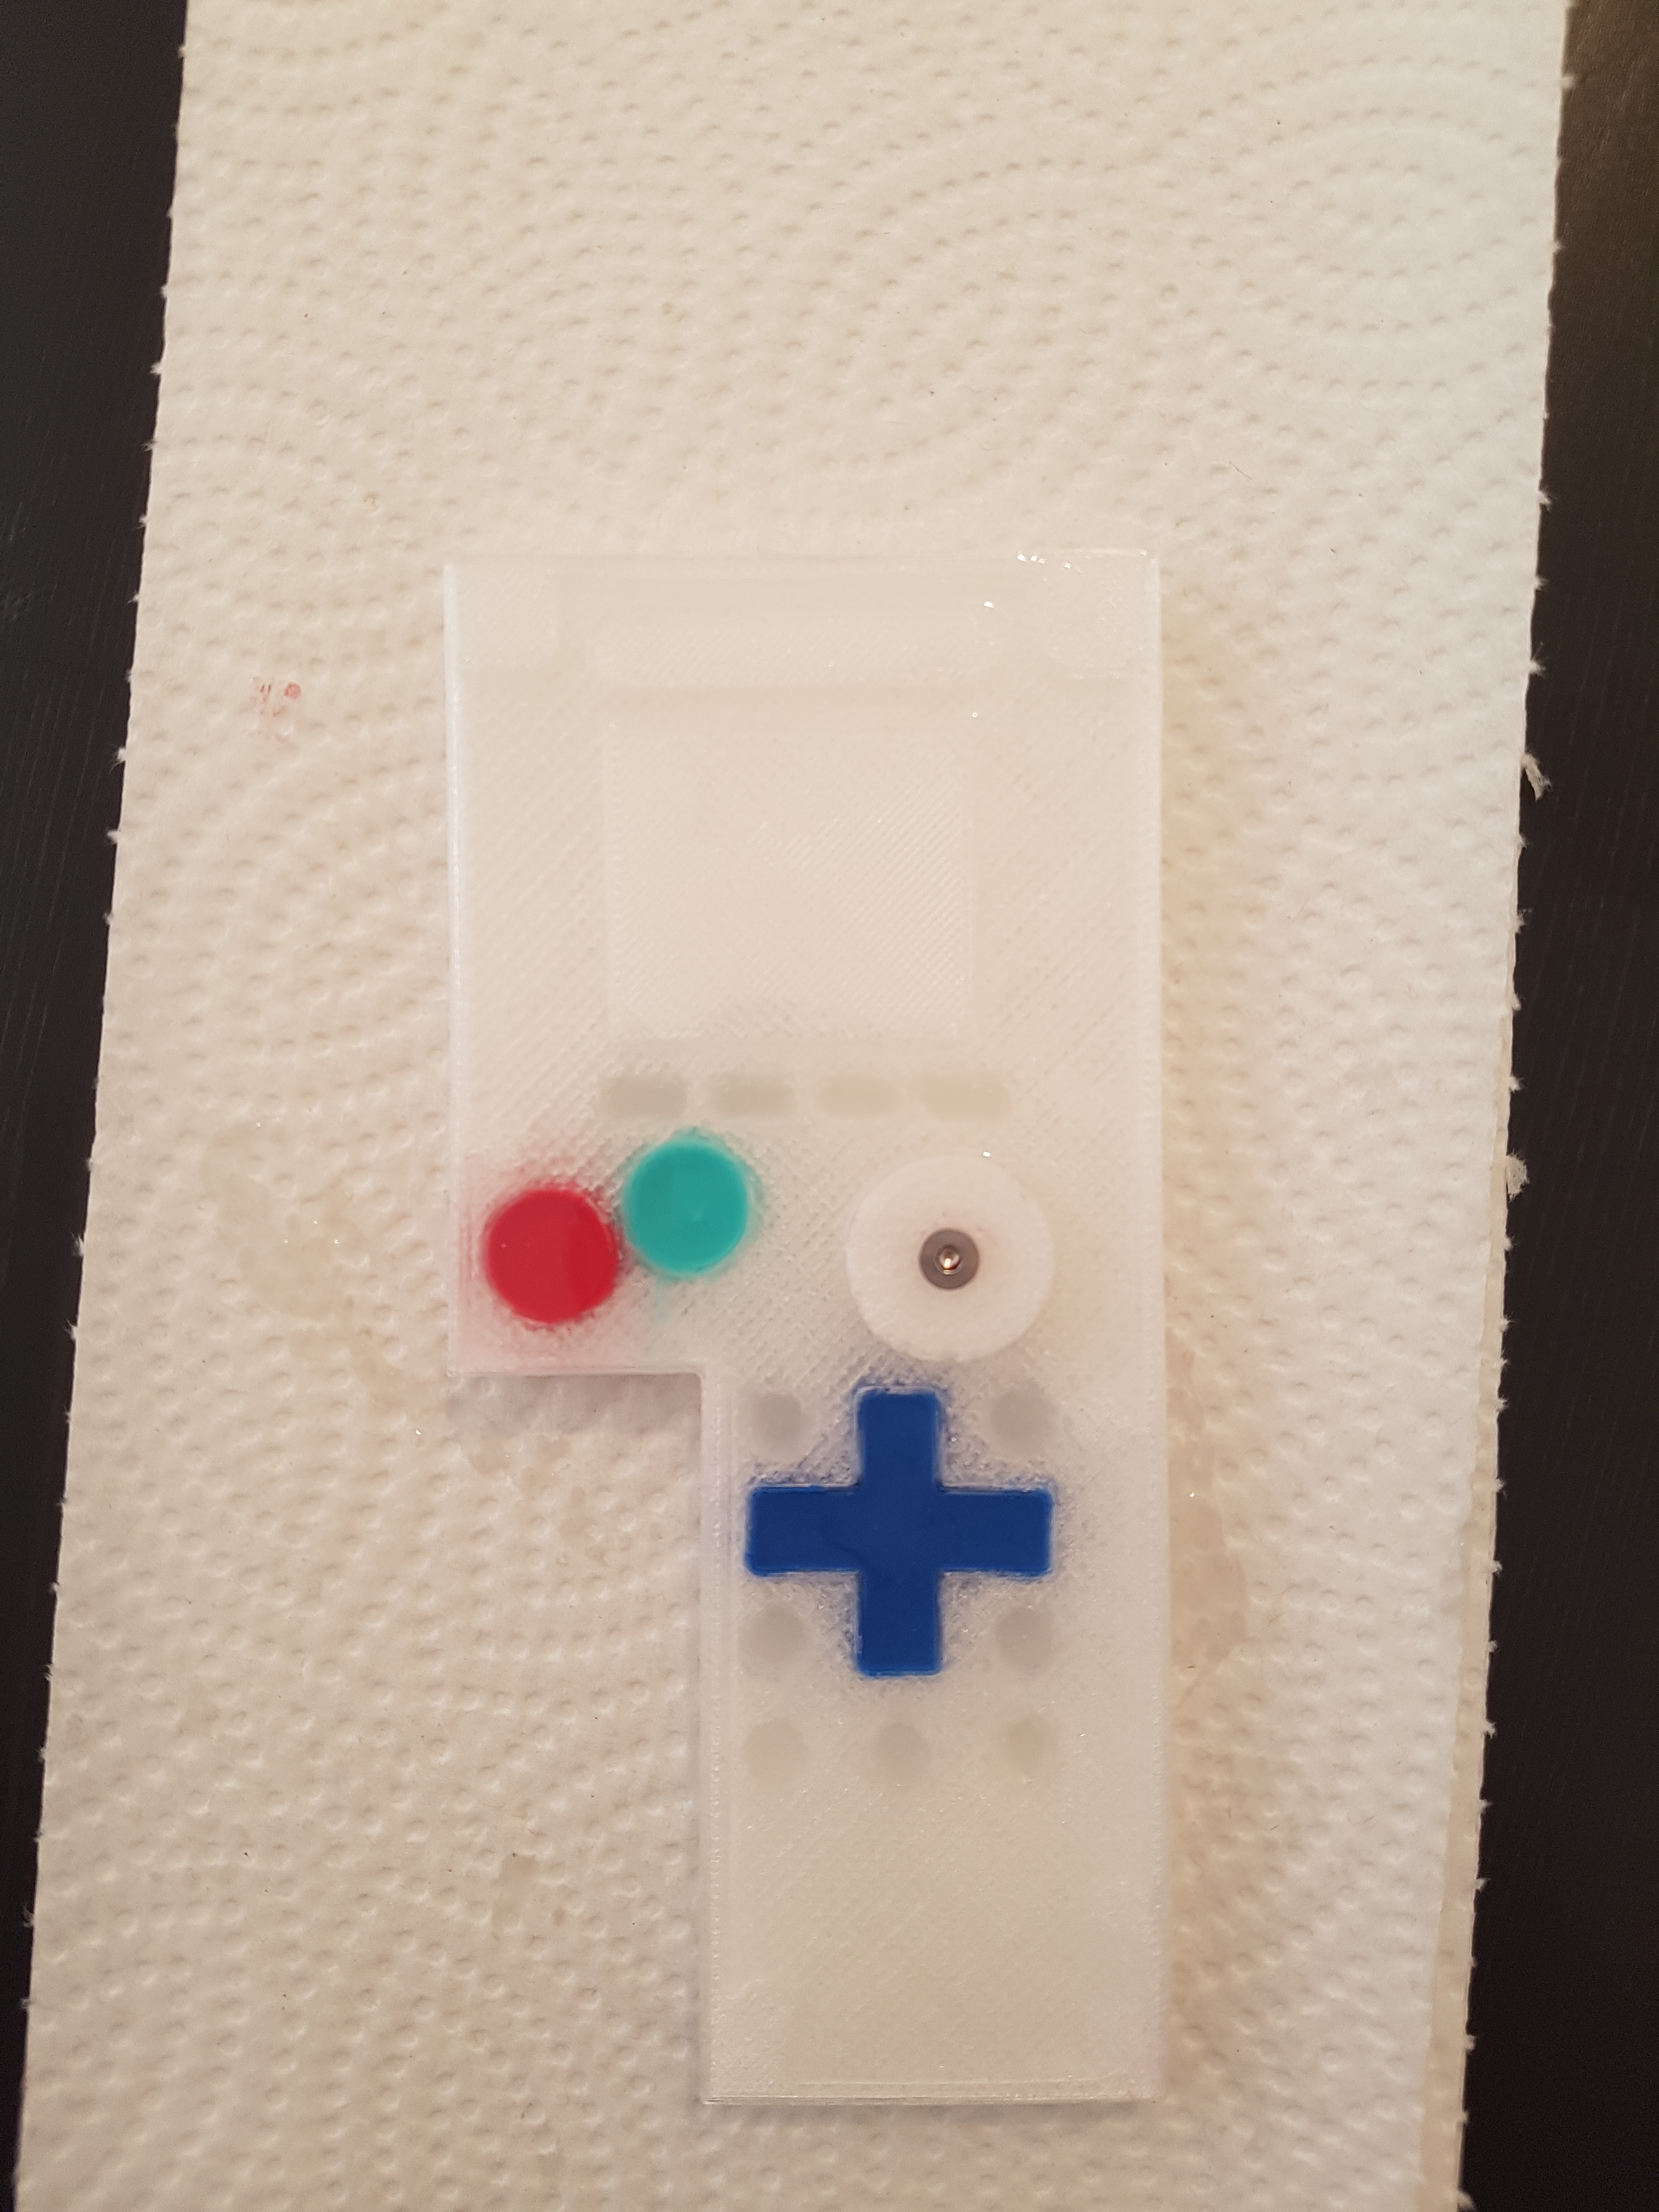
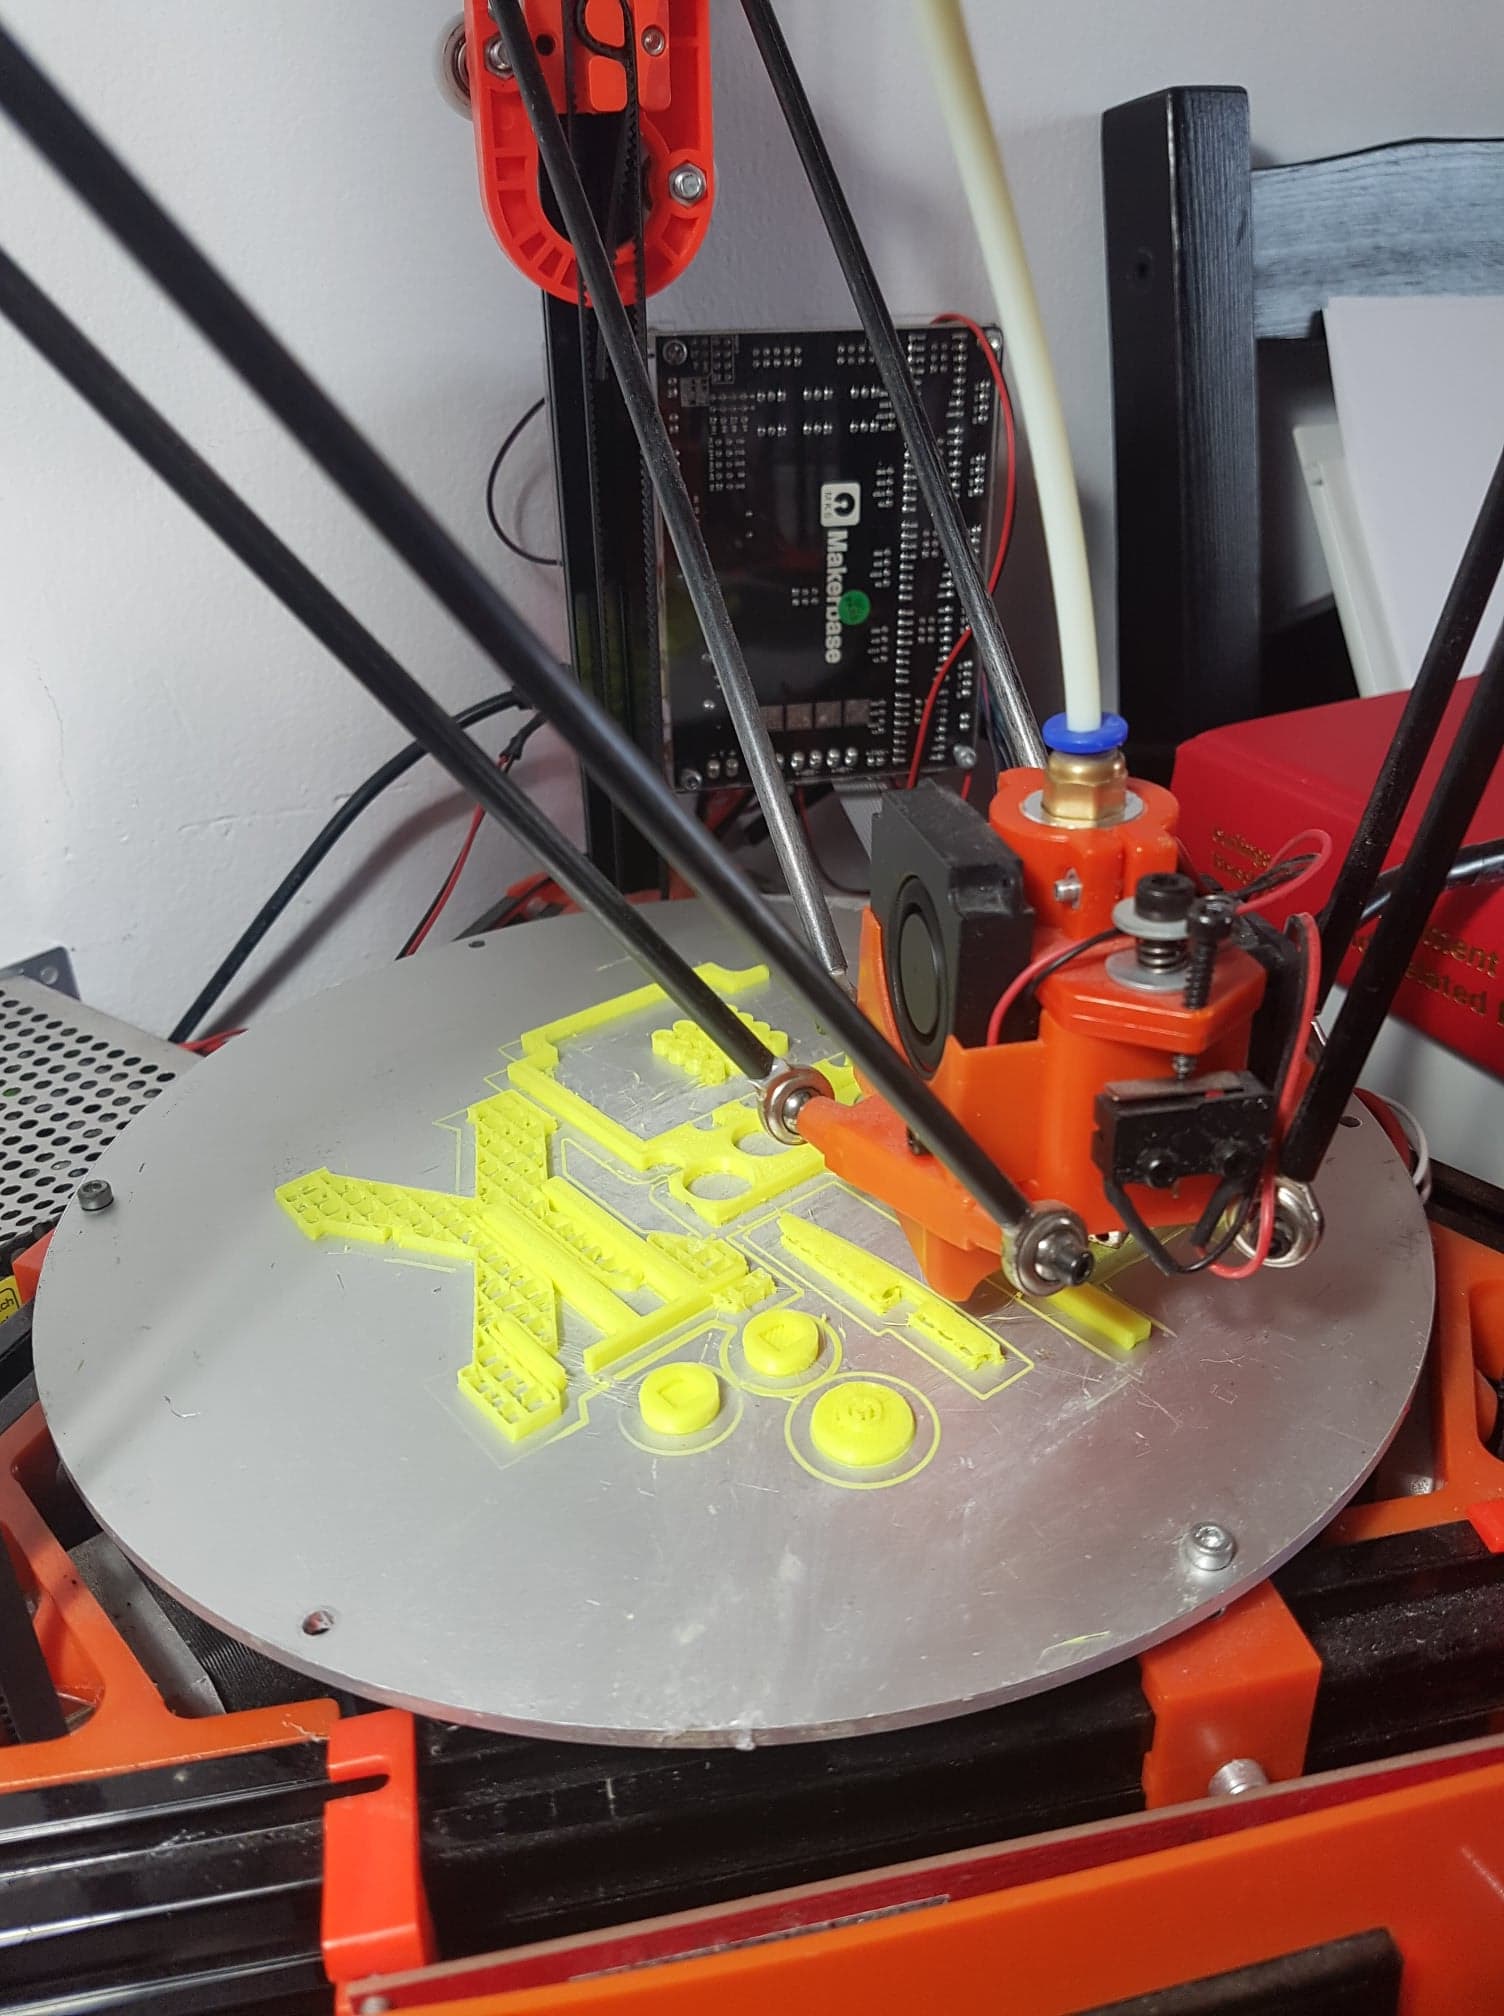
More to follow! I’m printing as quickly as I can but my old DIY delta printer is not a quick machine. Current print is transparent but I also love the Sony Sport nostalgia of the yellow. Buttons can be carefully cast to any tint-able colors to match a colour scheme I went for a blue D-pad, green A button (cure inhibited in picture), and a red B button!
Future plans may include full waterproofing and probably creating an otter-box-like silicone outer case to protect against dropping, but if there are suggestions or demand for some features I’d happily take some input!
Wow @John, this is amazing!
Future plans like waterproofing and silicone outer case sound very cool
The nostalgic yellow is my favourite as well
I’m looking forward to the updates in the future!
Thanks for the feedback everyone! Glad to hear you all like it and that there’s interest in using the case .
@delpozzo Hahaha I love the sandwich bag idea! Also I was trying to think about game design when I made the case. Since this phone has some amazing and unorthodox hardware targeted at gaming I figured putting a D-Pad over what was formerly buttons 2,4,5,6,8 might open up more buttons to intuitively use in a UI during games!
Regarding making cases for sale @robertCM, I’m keen on the idea and could always use some pocket change! I’ll leave everything open source so anyone can make it themselves, but honestly this has been a challenge and for anyone who would prefer to avoid a long headache I can sell them one (watching 11 hour prints fail repeatedly at the 6 hour mark while you incrementally make adjustments and try again is pretty demoralizing and very time consuming).
Unless demand gets crazy it will probably be best to start by making them custom, I can keep the cost lower if people like natural PLA and we stick to custom button colours, but if another colour is interesting to even just a few people I’d consider buying it! For those who want to print their own parts, I can definitely still sell just the silicone piece because that’s a bit of a trick to do the colours correctly and also very expensive to only make once.
Anyone have suggestions/requests for colour schemes? My ideas so far have been to use the colours from the following: Casio Fraction, Gameboy Color, and the Sony Sports Walkman. Would love to hear what you guys want to see!
In the meantime, here’s some of the button caps sitting in the silicone retainer and (yet another ) front case in the making:
Hey John,
great job, these look very fine.
I look forward to you releasing the files, I expect this will be done through https://www.thingiverse.com/ or a similar platform.
Love the old Game Boy look, I still got my old first gen game boy and all the games I had. Very nostalgic.
While I will be printing all the other parts, I will be in line to order the silicon button section from you.
Glad to see there’s some interest! For the benefit of @Coyote72 and others who are interested in doing the printing, here’s the flimsiest bit of the design and the final part quality is quite dependent on process quality. Unfortunately, to clear the boards on the Ringo it can’t be any bigger, but if printed at 100% infill with an undersized hole it should be possible to cut threads with a M3 tap, the tradeoff being that the threads get weaker while the structure around them gets stronger without having cutouts for inserting nuts. I’ll probably release two variants of this part so people can choose what suits them best.
In the meantime, the silicone and pigments are the mail and the mold has been designed! I’m going to try printing the mold myself but if the casting comes out poorly I’ll get one made with SLS or SLA. Stay tuned!
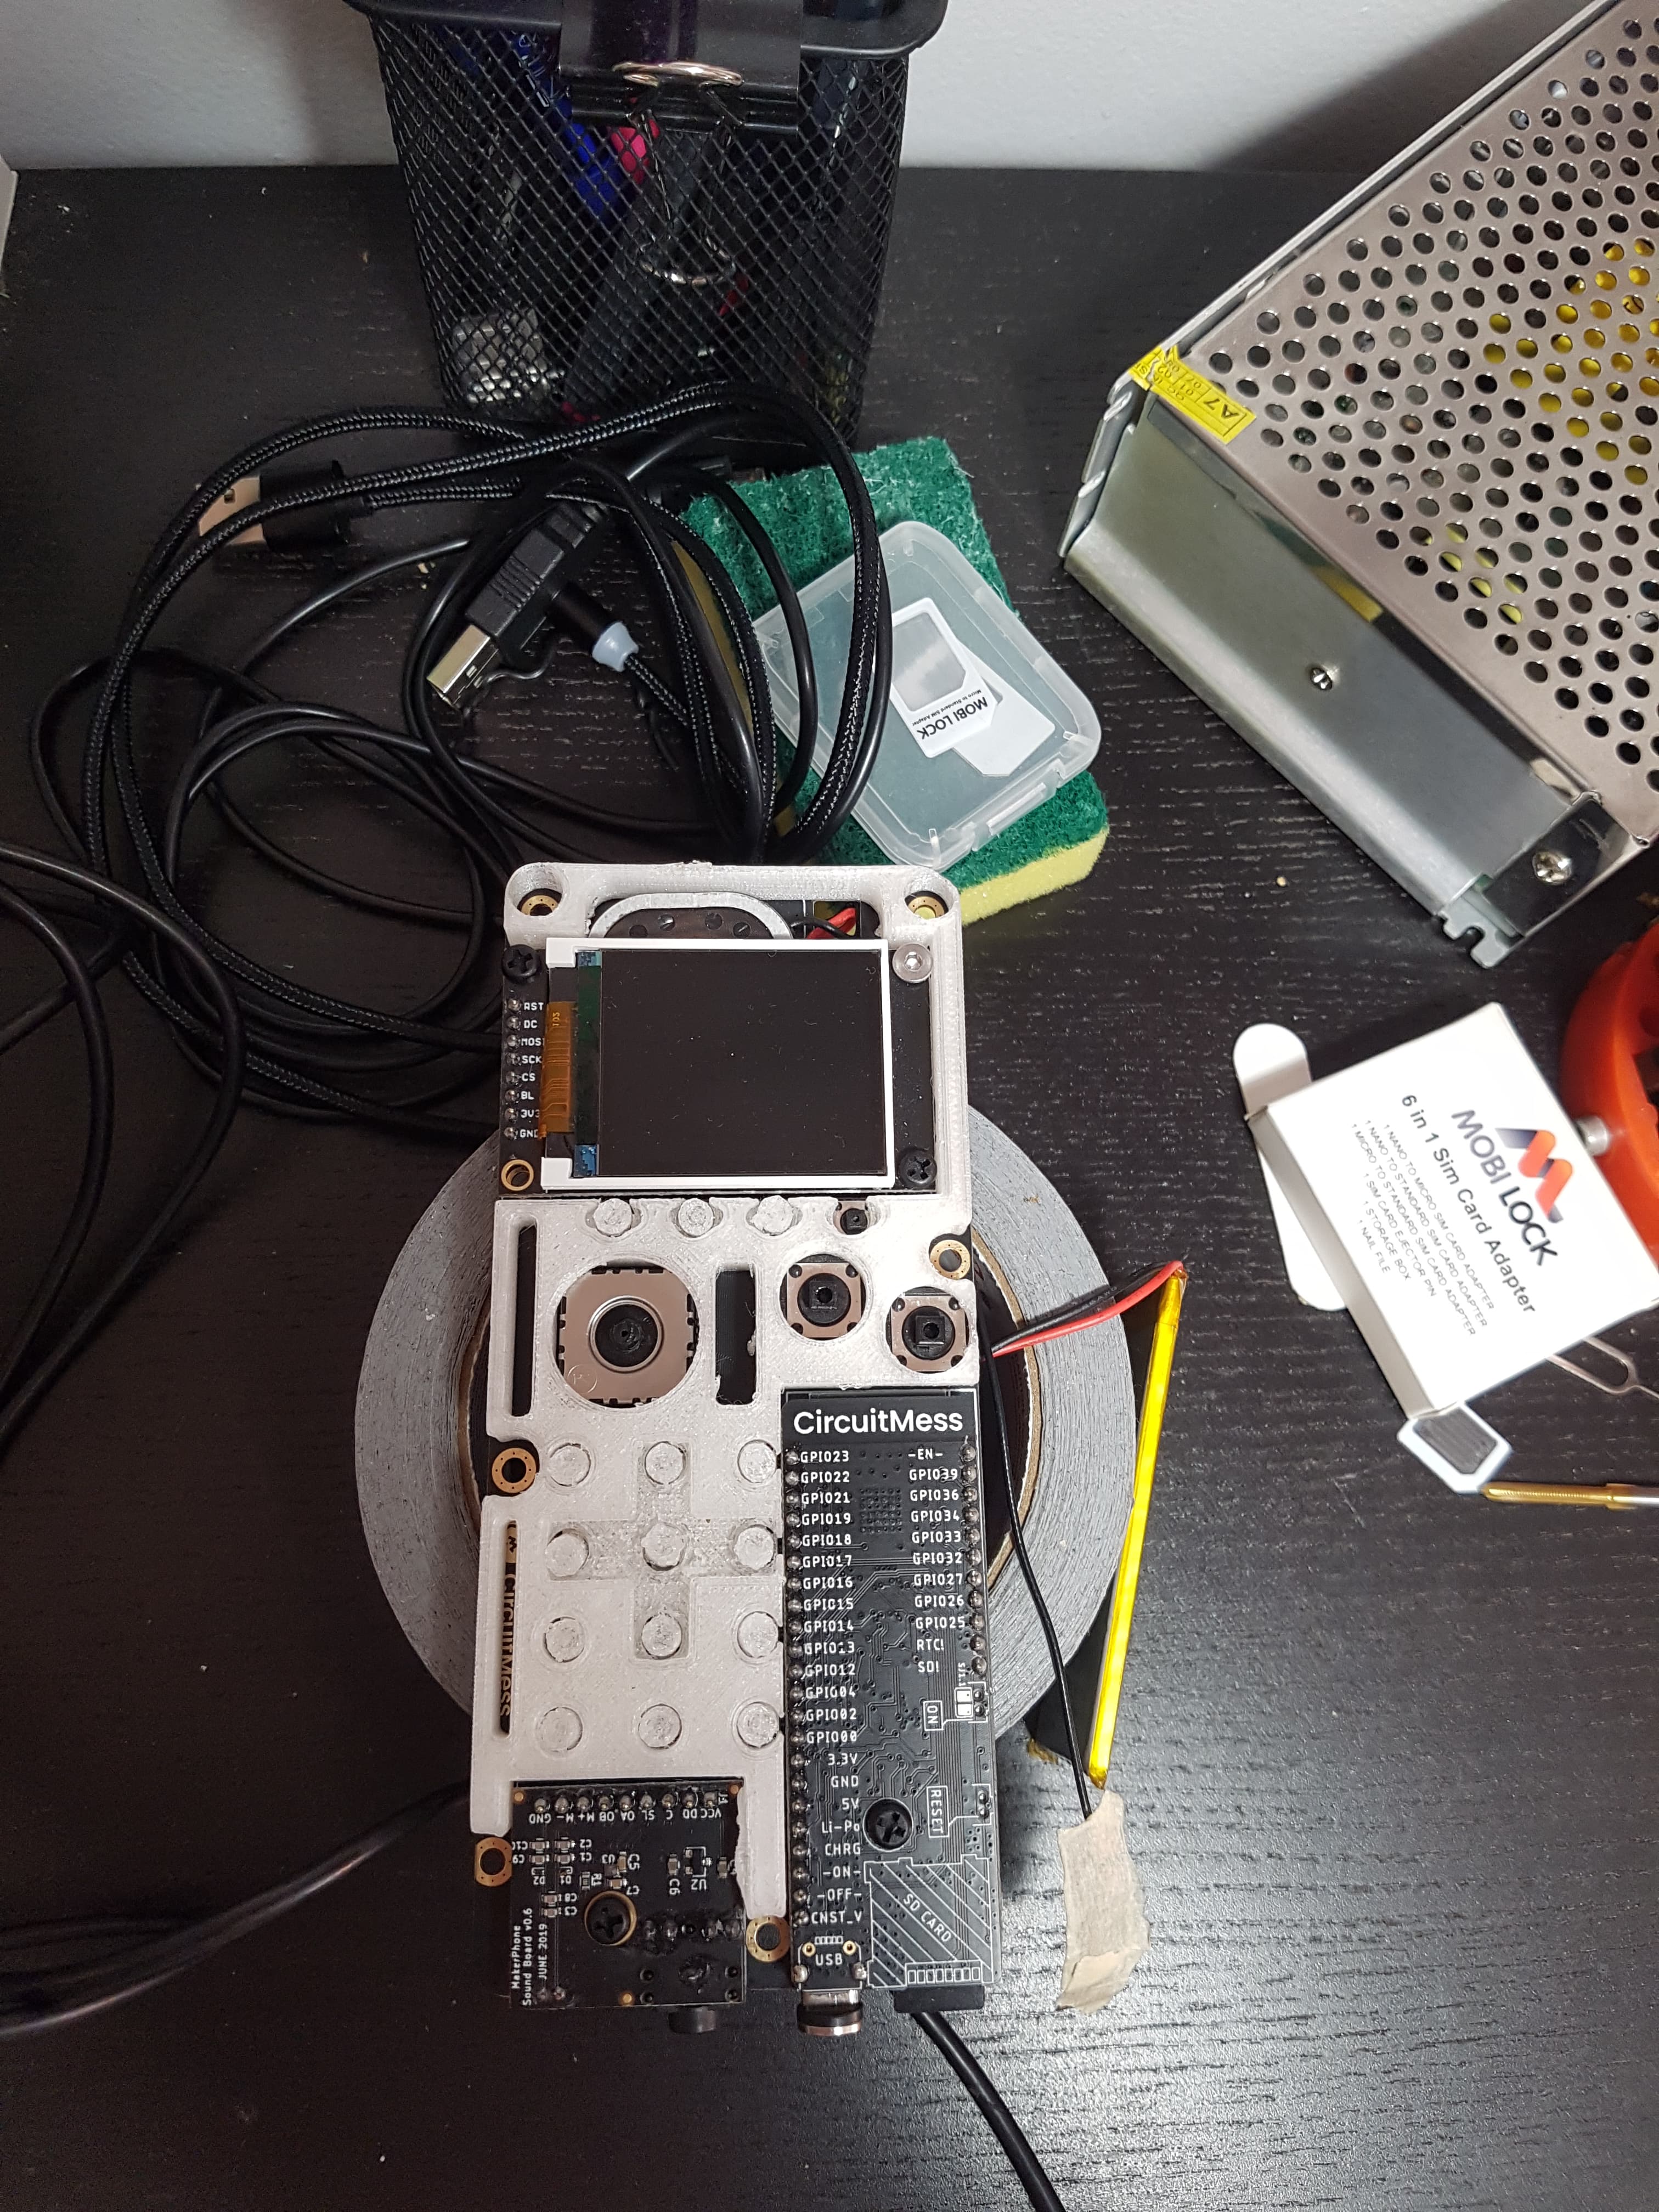
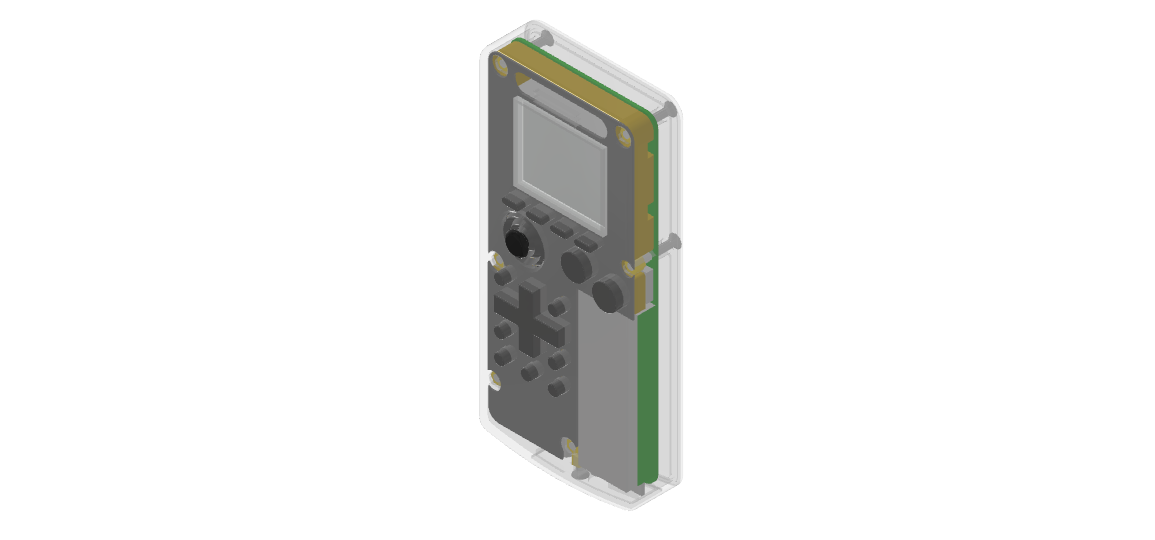
Also, I realized just recently that my first post shows a CAD model of the assembled Ringo board which I made from my Ringo, this served as the template for my case design and I’m sharing it for anyone that wants to get a sense of the 3D positioning of some critical features on the board. The model is not fully detailed; only includes the basic structure, the extreme volumes of the various boards, and hardware I found relevant (excludes the somewhat-movable speaker, watch out!). I decided to upload the file to GrabCAD:
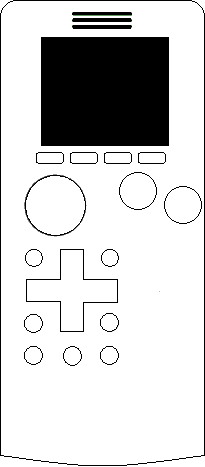
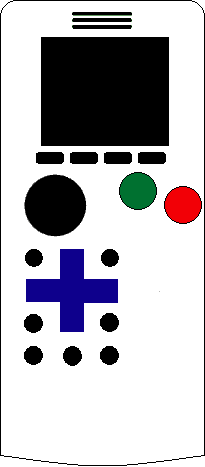
The remaining files for the case I’ve designed are coming soon, I should be able to prove them within the next week or so as I intended. In the meantime, for those who are interested in some silicone and/or a printed case, I have created a blank image of the case which can be coloured in MS paint to help people visualize the colours they want:
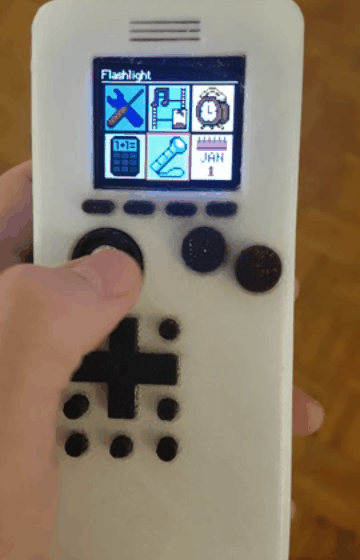
Silicone arrived, back of case printed, part of the front of case broke when I manhandled a nut into one of those cutouts that had filled in with overprinted material, but only one of the three I tried fractured. Another setting to adjust. The flashlight through natural PLA is awesome! I’ll cast some silicone tomorrow.
All that remains is for me to print a couple more plastic caps for the buttons, and assemble it and try it out! If it fits good and the buttons aren’t sticking, I will upload the files The rest of the screws tightened up okay, just don’t overtighten:
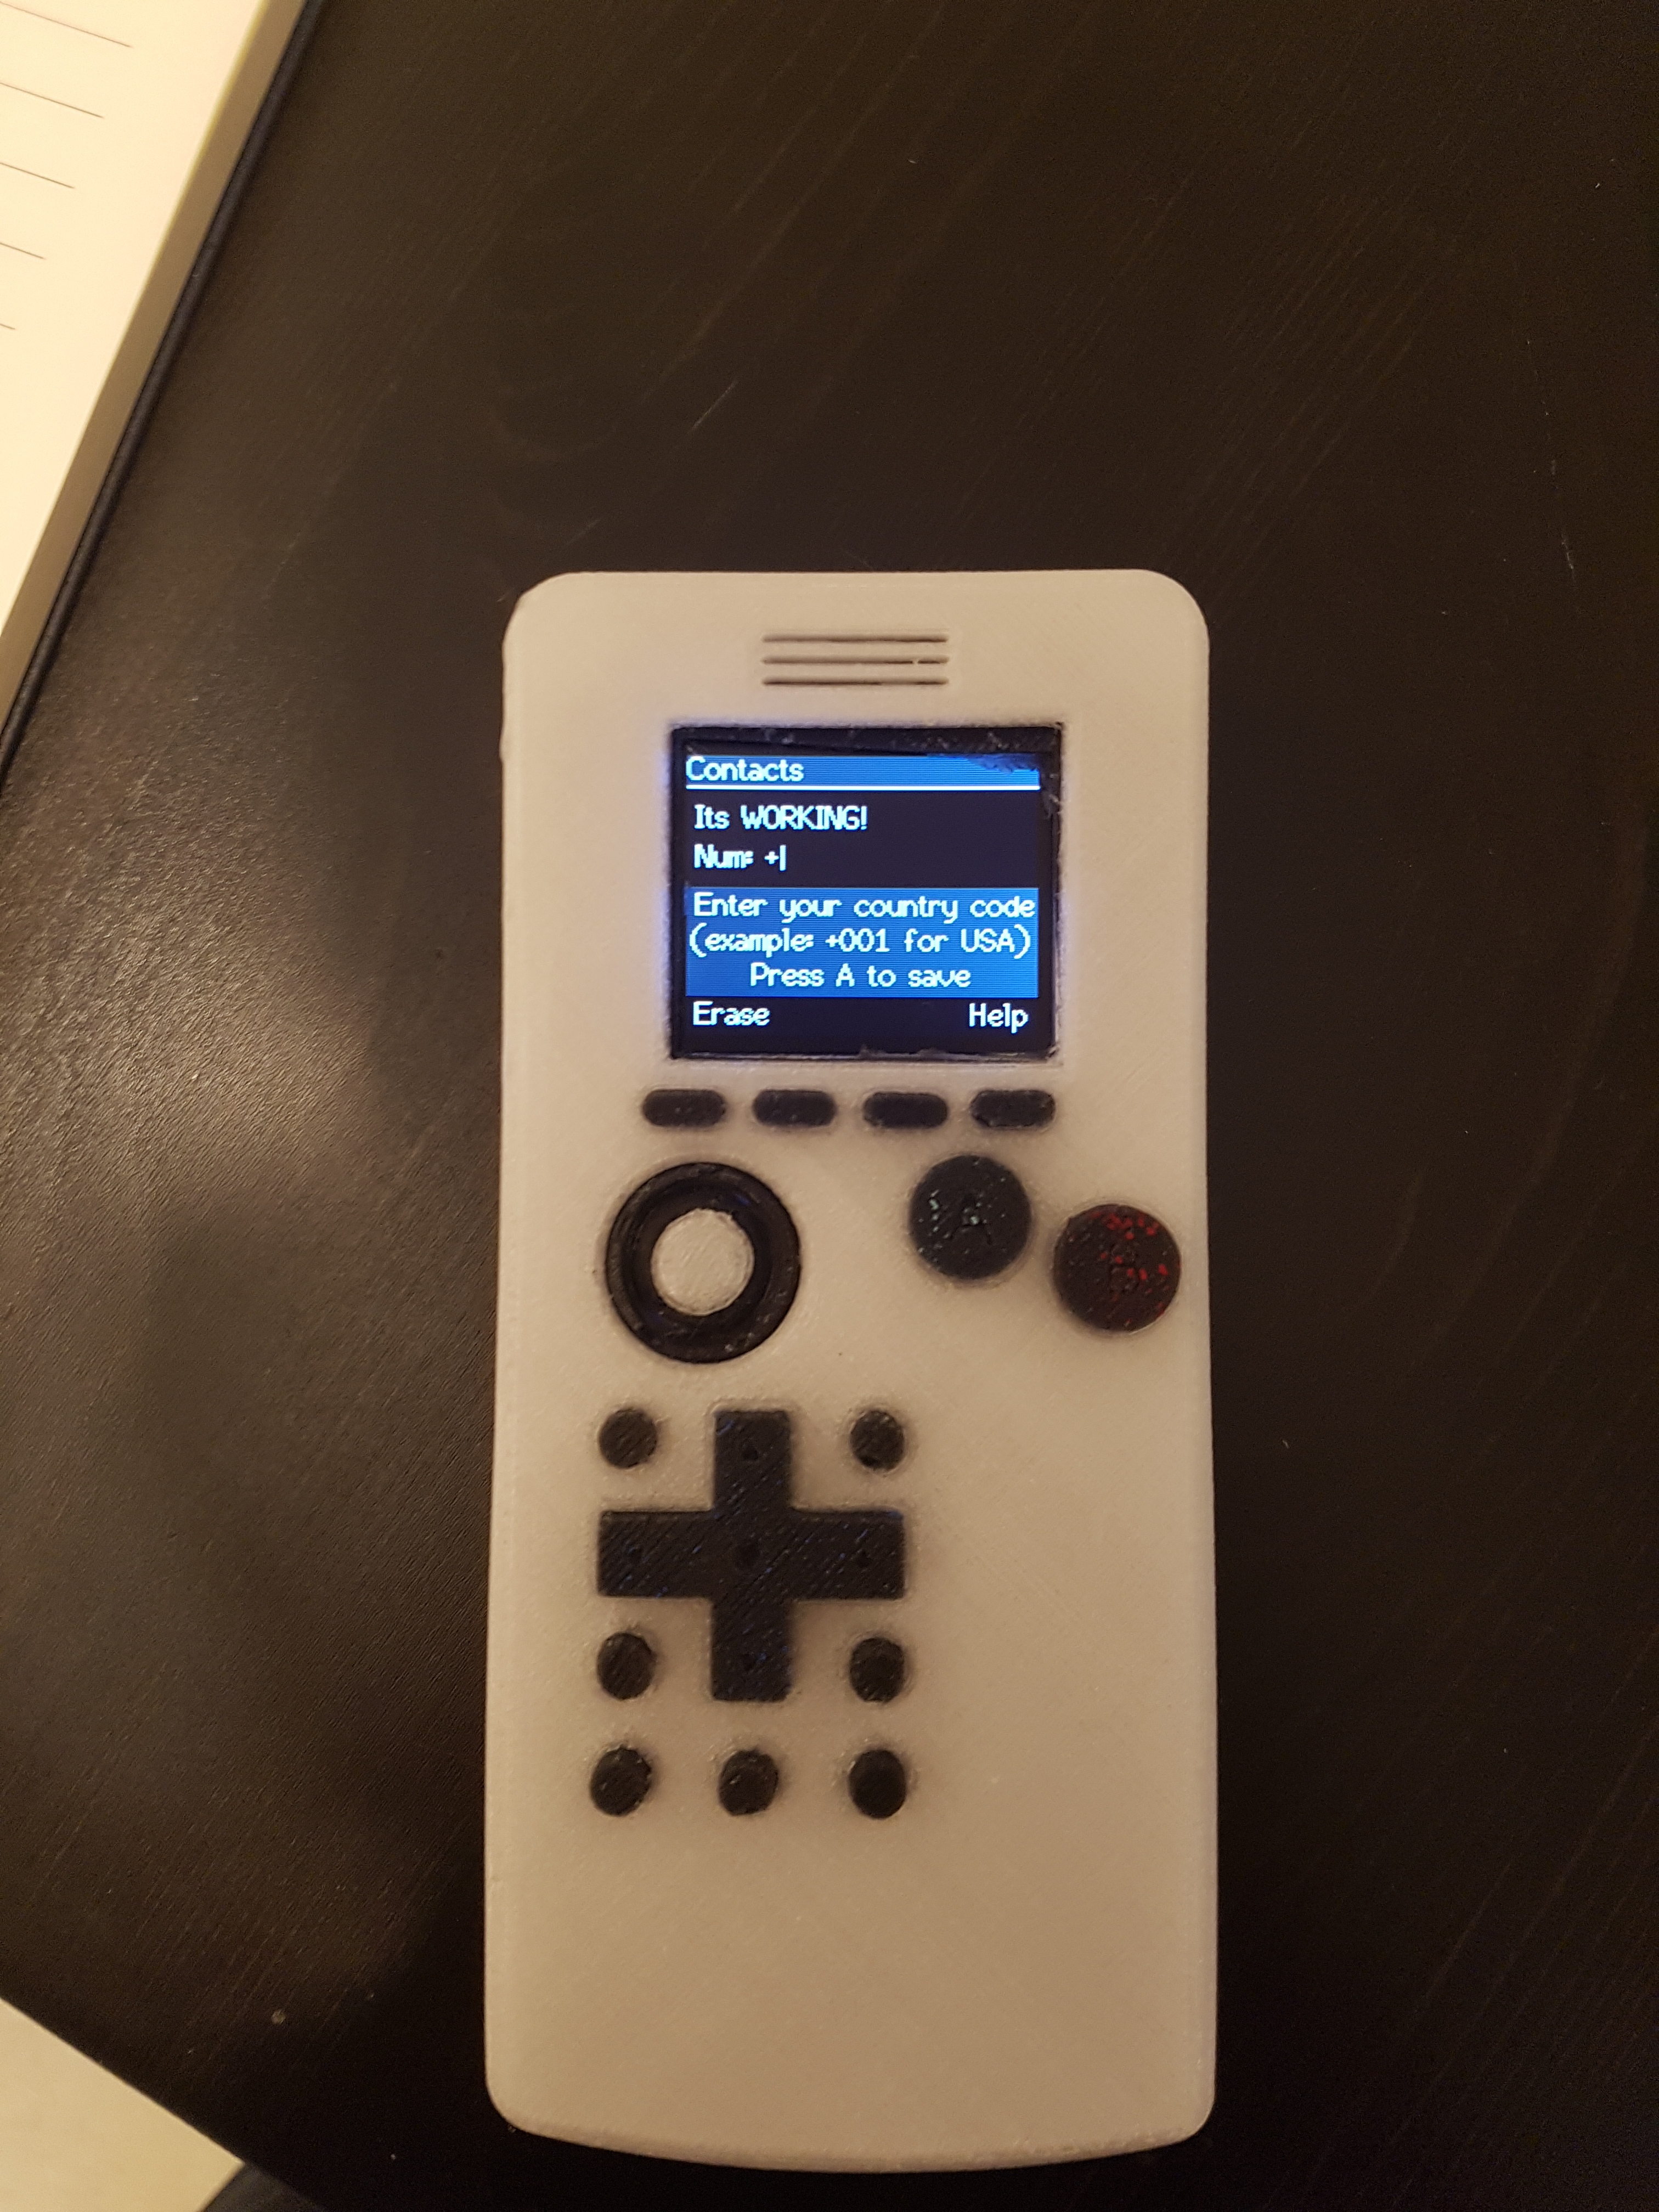
So… because I rushed the first screen a bit and didn’t mix enough clear silicone to make the back of the cover thick enough everywhere some buttons fell off during demolding! Despite this error, the silicone is crazy tough, much more so than the last product I used, and those buttons which did not detach still worked and felt great even can see the ‘A’ and ‘B’ on the buttons, but the arrows on the d-pad didn’t turn out great. The mold really ought to be printed on a better printer, but it works for now. More importantly, all parts of the case are capable of working, I’m still missing pieces for mine but within the next day or two I’ll be fully switched over, and since printing and postprocessing takes some time I decided to upload the files now! Link is below to the parts on GrabCAD, I’ll update with some more successful silicone castings when they are done.
So I can cast the silicone bit with the new material but I dont like how tall the buttons are; when they’re pressed they have a tendency to roll over the face of the phone instead of descend and press the button. Here’s some colours I tried, getting the corrugated boot correct is a trick because that’s a closed-faced section of an otgerwise open-faced mold. If bubbles persist and I can’t get a reliable thickness there I’ll have to thin the rubber a bit more, but that’s just a little tweaking and practicing:
The button caps behind the screen which are uploaded on GrabCAD also need two things: correct exporting and they need 0.2mm off the top. For this assembly there are two versions of the button caps behind the silicone with two slightly different heights. The idea was to slightly preload the button cap top against the silicone using taller caps which would reduce the effort to push the button… if the force wasn’t enough to depress the button… and it nearly is enough force. Turns out that extra 0.2mm compression is too much and should come off! To make the silicone less frictive in the front case as well, another 0.5mm of clearance would be beneficial to the cutouts in the front case. Other than that it’s running good
Expect updates to these models soon:
Front case
Silicone
Small Button caps
I’ll be fixing up the models soon, I’m also making a ton of masks (which have been forming into a pile of neglected fabric lately) so it may not happen today, nothing other than the three listed parts are getting more than updates though so most can be printed now. You might not even experience the issues I’m experiencing at this point because a lot of it can be explained by the hard upper limit on the quality of parts that come out of my extremely affordable and gently damaged 3D printer.
Because ufortunately there’s no settings in my slicer to compensate for worn rod ends and a wobbly frame design, I don’t think I can sell any 3D printed parts out of this printer in good conscience. I will offer to sell cases pre-assembled once I’ve had a chance to upgrade my printing hardware, as well as individual rubbery bits to those who 3D print their own case. I will be getting a new mold made by Shapeways (or by myself if printer upgrade happens first) when I’ve got some cash saved, they quoted me around $100 CAD for it and that’s just a bit much for John right now.
In summary: the case works, it works well, there’s some tweaks to make it better coming soon, and I’m working to save my money and improve my facilities so I can produce these for you nice people at a level of quality that will make me feel good about your using it daily
Many days without an update, so I’ll provide some highlights:
I’ve tested the assembled case and phone for a few days now without any problems, easy as pie! You can even play Pong on the high speed without issue if you’ve never used the case before, this was my most demanding test for this first case and it went great, my girlfriend seemed to enjoy playing Pong for testing purposes too. This case is being sent out to my brother, who was excited to share the development costs so we could make it happen
I’ve printed an updated mold and I am about to cast some more silicone, but I’ve noticed that the pigments I am using stain the mold and transfer colour back onto the next casting, which means that I’ll need to print a new mold for every unique colour scheme and that takes way too much time and material to be practical, so I would really prefer to make and sell the buttons in a single set of colours (unless you want custom buttons, which I can also gladly arrange but will be more expensive). Here’s what I was thinking:
THE MILLION DOLLAR QUESTION: Would you pay $10 (CAD) for the silicone piece with these colours, as I can currently produce them , plus applicable shipping and duty? If yes, they’re for sale now!
If not, lets have some discussion about what needs to change. I expressed concerns about selling 3D printed parts coming from my printer due to it’s limited ability. I do still have these concerns, but the 3D printer quality has only affected end-use plastic parts, the silicone cover once demolded is still fully strong and usable. The main reason I would like to get a mold produced externally is to improve the silicone surface quality, because the castings show so much detail that the print layers are very visible and the rubber also looks 3D printed. If that doesn’t bother you it’s a fine part, I personally just like that which I produce to look as mass-manufactured as possible, but unfortunately it’s going to be a while before I can get to that surface quality.
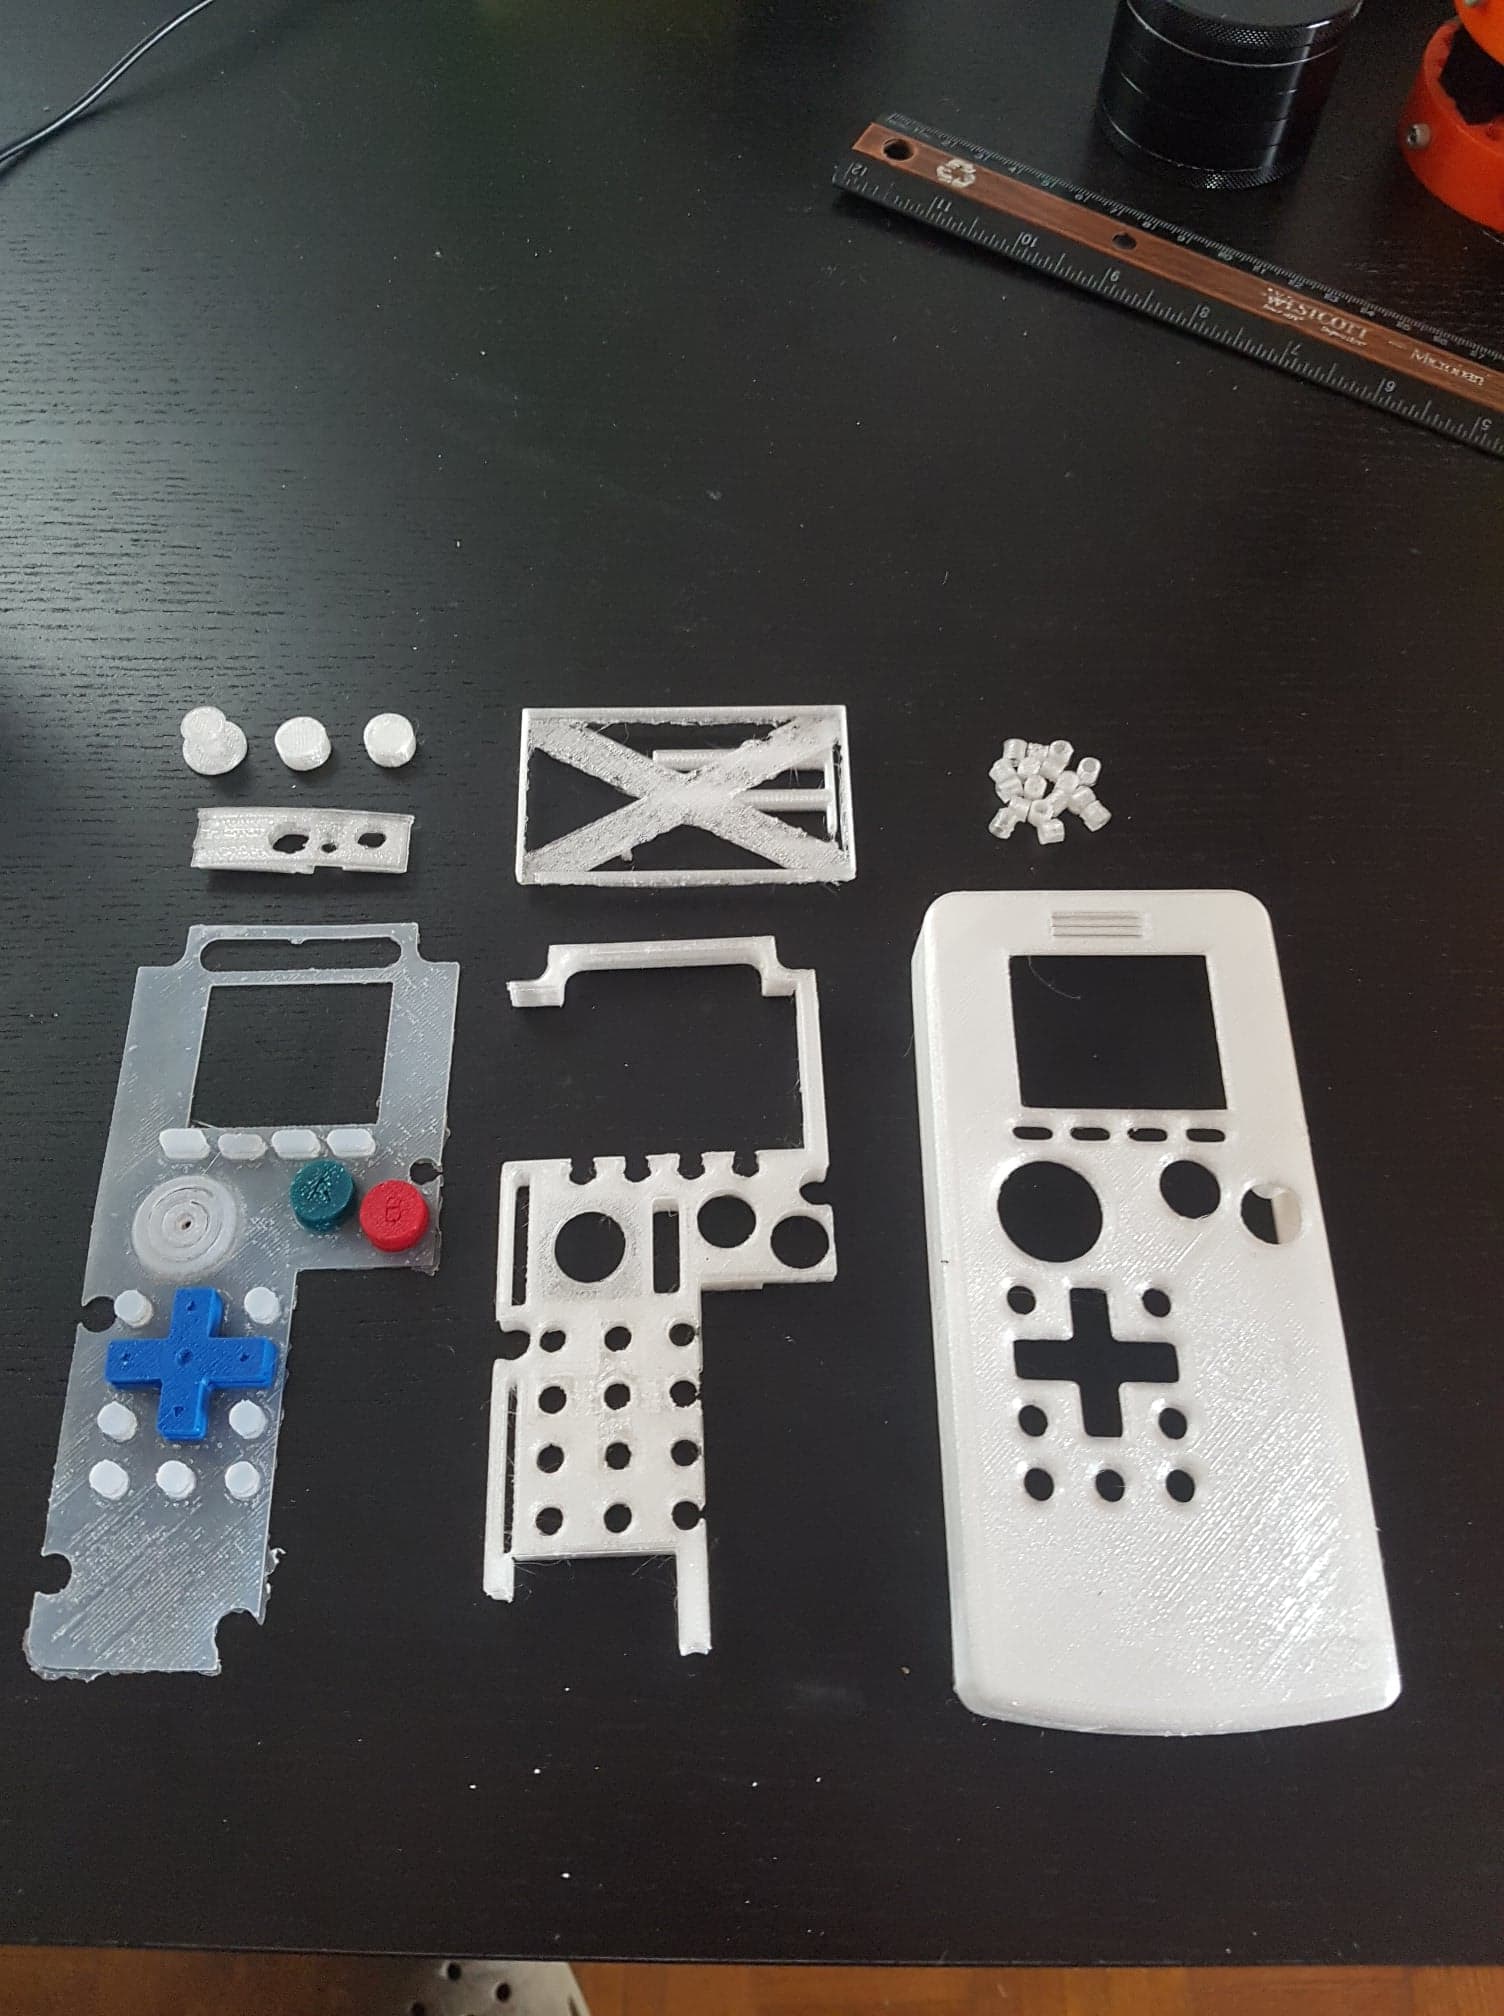
Has anyone tried printing any pieces of the case? I’m excited to hear feedback from anyone who’s going to try using it! Here are the pieces I produced for my brother in natural PLA, including a set of buttons with the proposed colours (minus black small buttons):


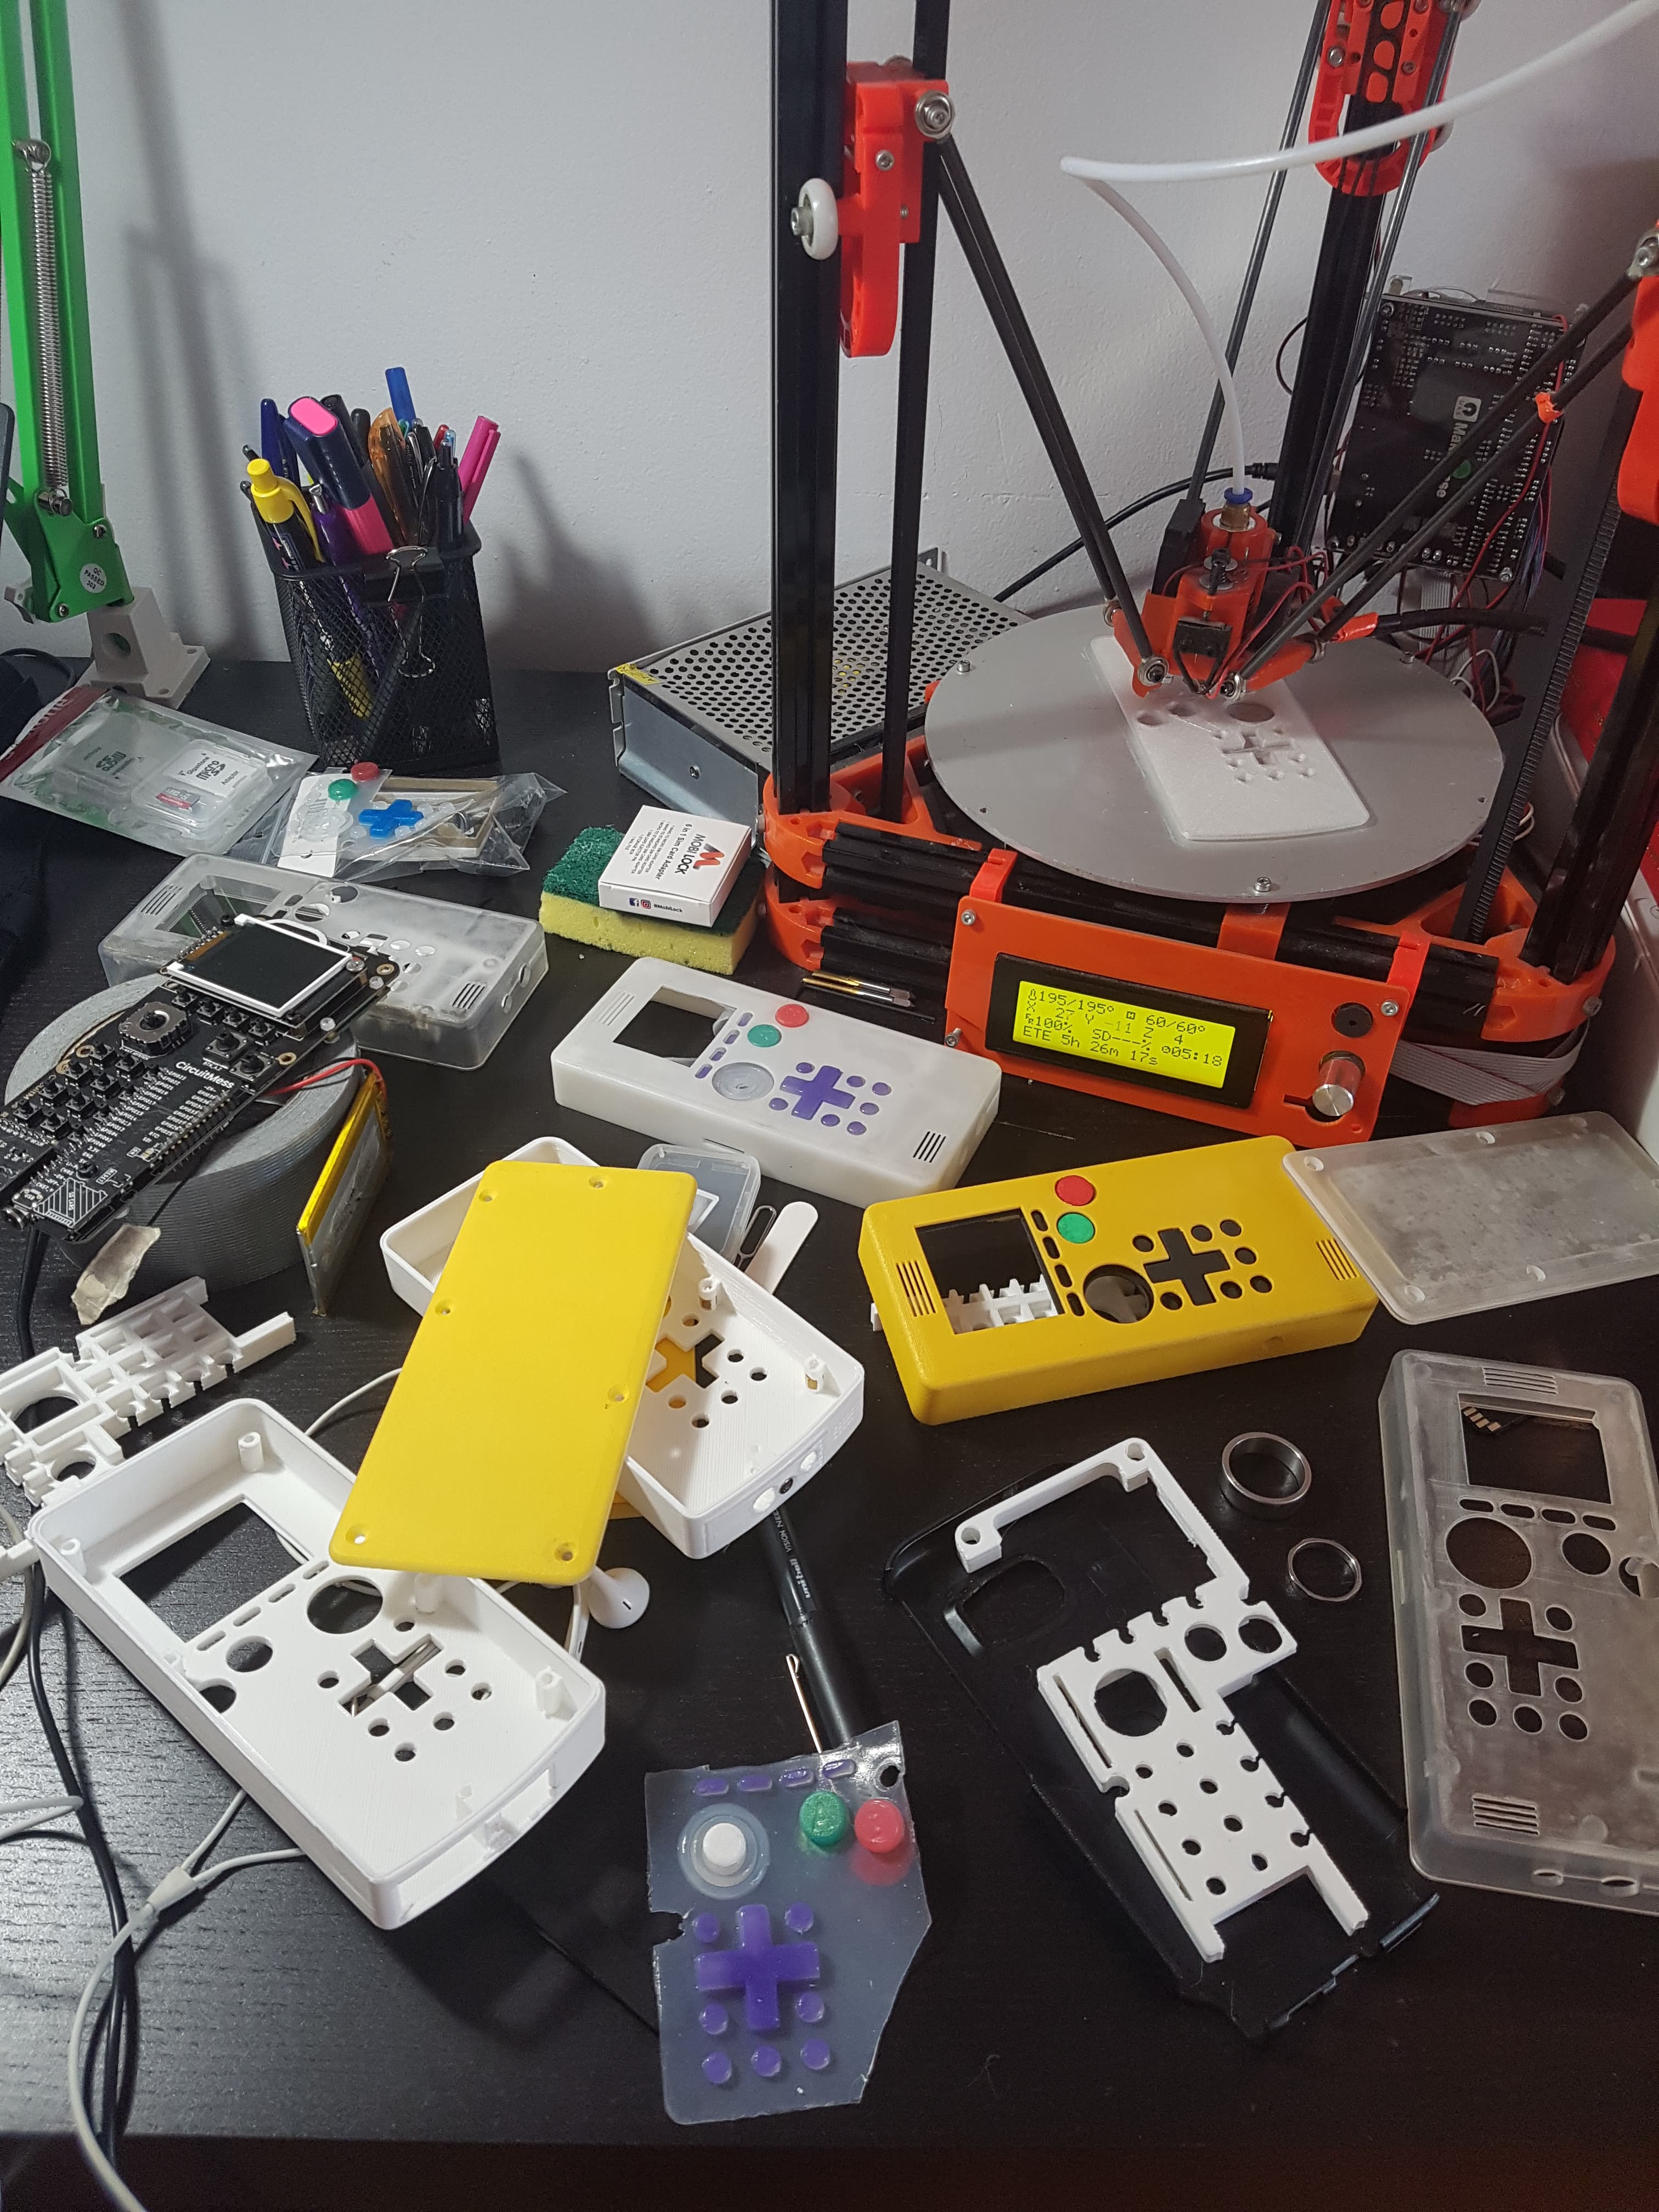
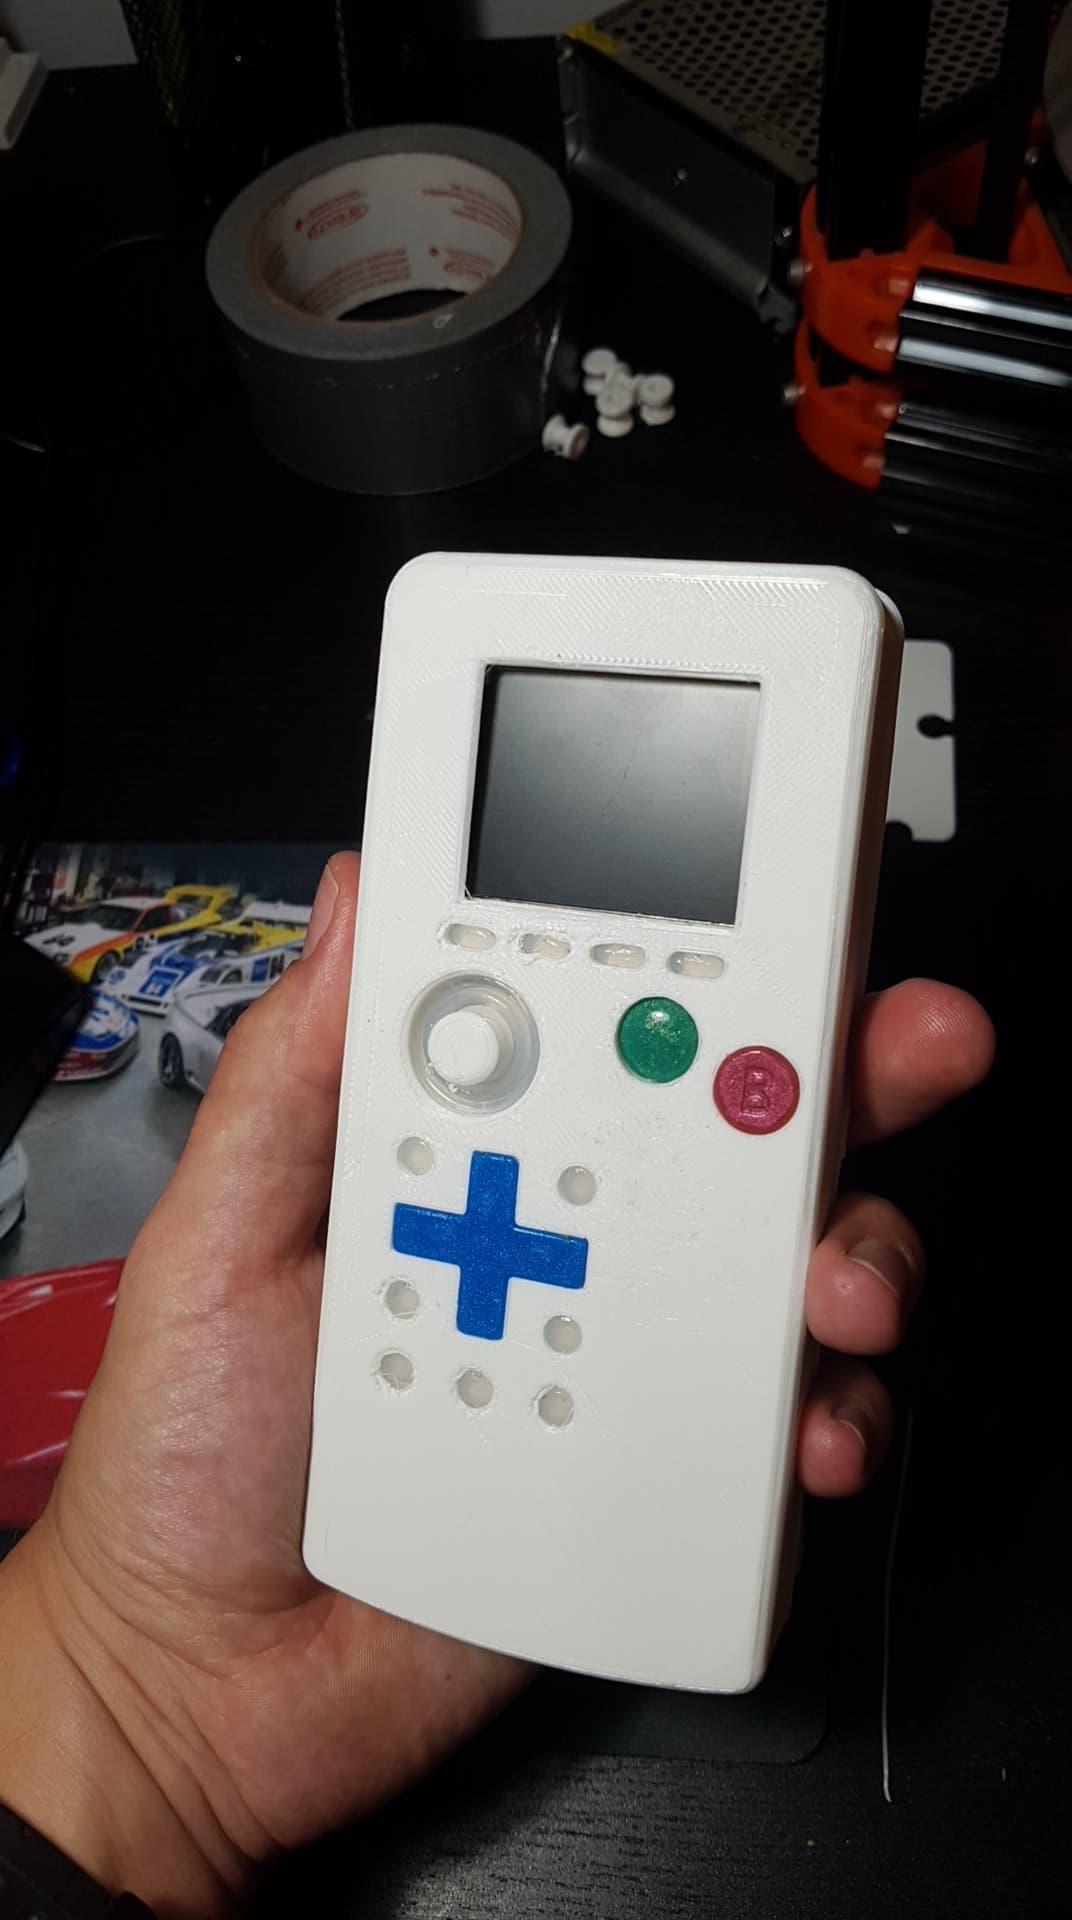
 I went for a blue D-pad, green A button (cure inhibited in picture), and a red B button!