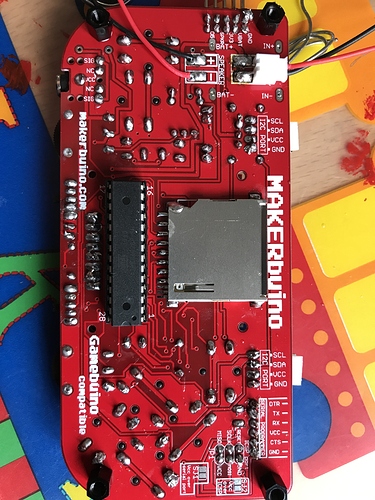
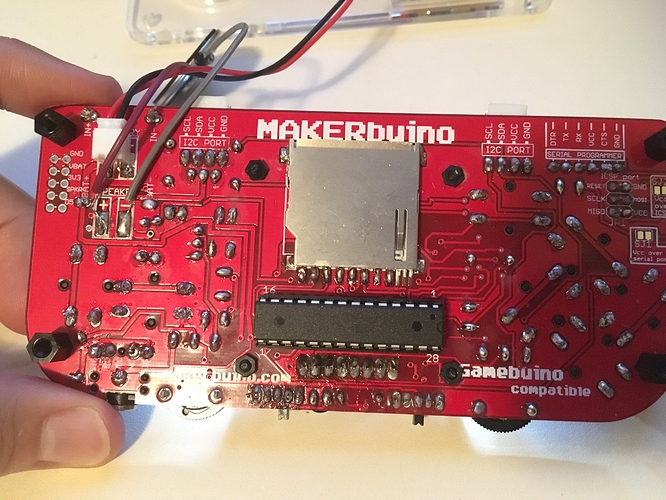
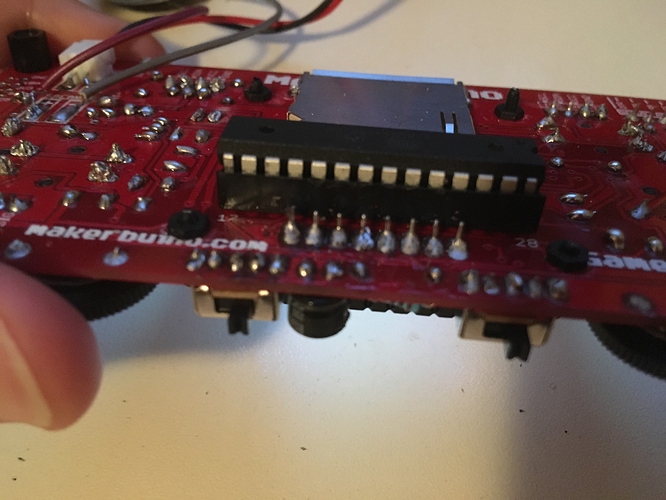
Good idea and take pictures of the card with solder. Maybe its a component mount problem or a bad solder. Someone could see something you missed.
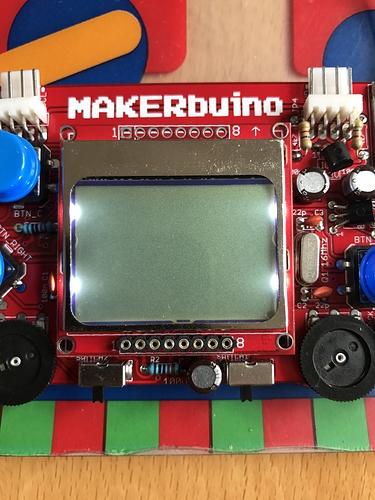
Can anyone please tell me if any soldering issue might have caused my screen not to display anything? (The light is on, on the screen but nothing is displayed)
I see no problem on this picture. Sorry, i hope something else will be able to help you.
Can you see any problems here. I bought two Makerbuinos and I tried to switch the screen and the light came back on
Thank you Jean Charles! I don’t know why the screen isn’t displaying anything… frustrating! I will see if anyone can help me with this! Thank you for your reply 
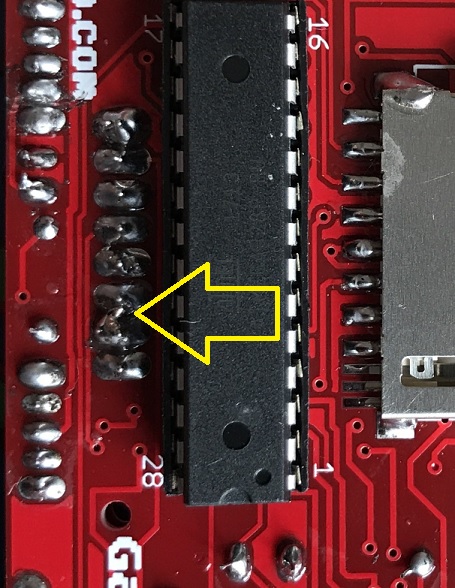
@August_Hilliger You’re soldering doesn’t look good around the screen connections, I would make sure you’re soldering iron is clean and clean off some of that solder on them joints… see the following image…
You’re soldering doesn’t look good my friend… see the following image, you can see the power switch is shorted and you’re screen solder joints look shorted too… try cleaning some of that solder from them joints.
Thank you very much. I will try that right now
It didn’t work  but thanks anyways
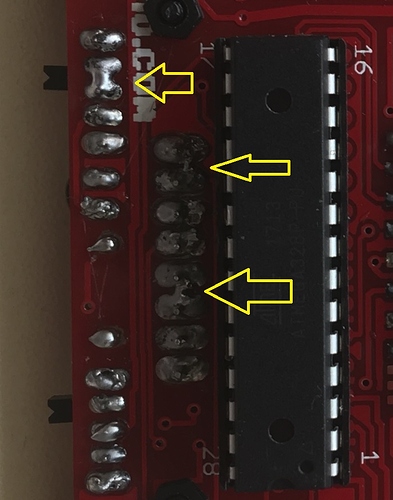
I’m not sure but it’s seems on the picture that you could have cut 2 copper track by scratching the space between 2 solders. It’s maybe a visual effect.
If the tracks are cuted, you will have to remove protective varnish by scratching delicately on each side of the crack and solder a jump
Else you can solder a wire between the start of the track and the end (it’s can be more easy maybe because tracks are easy to follow)
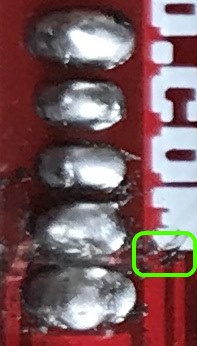
Okay, Thank you. I will try that later
Hey @bitfogav. I tried fixing the soldering. Here are two pictures but the screen is still not displaying things!
It turns on and now a black line appears for a second then nothing. Could you please help me figure out the problem? I’ve had this issue for a week and I need to fix it to be able to enjoy my makerbuino. Thank you!
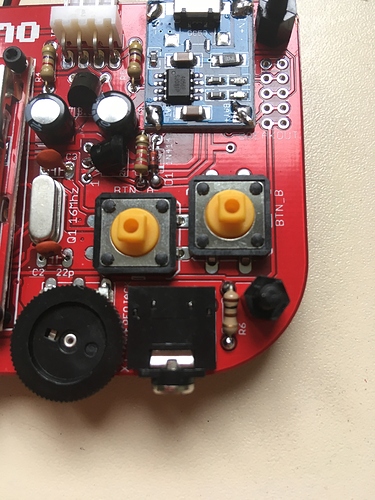
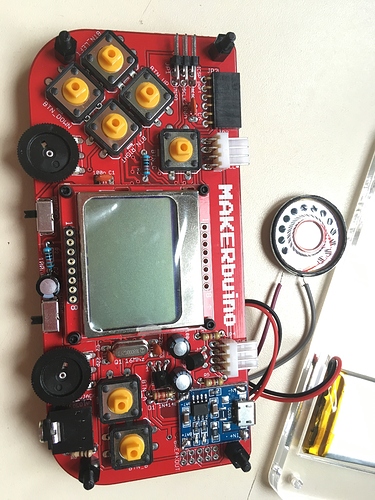
@sak41 Can you check that the voltage regulator and the transistor are in the right spots? They both look identical except for the markings on the flat side(they’re the black things with 3 wires that are bent over to the right of the screen), the one closest to the buttons should be the transistor and will say “2n2222” on its flat side. Also, do the ceramic capacitors(orange flat things that stick up on either side of the long silver thing right of the screen) say 22 or 104? They should say 22.
Also, check that the electrolytic capacitors(round tower things to the right and at the bottom) are facing the correct way, they are polarized which means they won’t work if they’re put in backwards. The bottom one should have the thick white line pointing to the right and the top 2 should be pointing to the left.
Edit: Also, check that your resistors are in the correct locations, they’re not polarized so they can face either way but they need to be in the correct spots.
Here’s an image to help identify what I’m talking about:
@August_Hilliger Check your transistor/ voltage regulator and ceramic capacitors as well, your electrolytic capacitors and resistors are correct.
@Dalemaunder hello! Thank you for your help!
I checked all components and they seem okay!
However, in your picture, R6 (down to the far right) seems to be a resistor of colors brown, red, black, black! However I put it as a brown black black golden resistor (as mentioned in the tutorial)
Which one is the correct one?
Any other help provided to solve this problem? :((((
Thank you
Full picture of front:
Thank you very much. They all looked fine, but I think I will try to resolder everything to find the problem
Whoops, I’ve put the wrong resistor there, it should have been brown/black/black/black/brown, good catch. Either way, that resistor is for the headphone jack and won’t affect the rest of the system.
Unfortunately, the only thing I can think of is either a faulty screen or an improperly flashed micro controller, do you have any breadboard equipment and another Arduino to test with? If not, you’ll probably have to contact @albertgajsak and ask that he send another one your way, unless anyone else has any ideas.
In @August_Hilliger’s case, I think it’s just a dud screen, an improperly flashed micro controller wouldn’t stop the screen from lighting up at all.
Thanks for your help!
No I don’t have any 
I don’t know how to fix this… it’s frustrating
I have used these Nokia Displays in other projects and found out that some of them are not working out of the box. The good thing is, that most of them can be fixed without any bigger problems.
First, make sure, that you followed all the suggestions above. (correct and clean soldering, choosing the right parts for assembling…)
If you still cant see anything on the display, you have to open the display to clean the rubbery bar which connects the small pcb inside the display with the display itself. Clean the contacts on the pcb (inside the display, on both sides of the rubber bar and on the lcd) with some rubbing alcohol. When done, carefully reassemble the display unit again and try if it works now. I had displays I had to do it twice… but most likely your display will be fine after the ceaning.
Hope this helps, Eskimo
@Jean-Charles_Lebeau, @bitfogav, @Dalemaunder, @eskimo, thank you for helping @sak41 and @August_Hilliger out.
@sak41, I think we’re still solving your issue and waiting for your reply in this thread here:
@August_Hilliger spoke with me via PM. I’ve told him to send me the photo of his MAKERbuino’s front side but without the screen attached (I want to see the soldering joints on the microcontroller’s socket).
@August_Hilliger, it might be better if you just post that photo here instead of PM-ing it to me.
Please don’t worry, if this doesn’t work, you will test your microcontroller and we will send you a new one if this one was mistakenly sent blank or was damaged in the soldering process.
In case the micro is working fine, I’ll send you a new screen.
